
Appsmith Practical Guide: Build Your Admin Panel in 10 Minutes
What is This
In simple terms, Appsmith is an open-source low-code platform specifically designed for quickly building admin dashboards, internal tools, and data dashboards.
Imagine the old way of creating a backend management system: you had to write frontend code, backend code, and tweak the styles, which took a lot of effort. Now, with Appsmith, you can basically get it done by dragging and dropping components and connecting to your database.
As of October 2025, it has already garnered 38.1K Stars on GitHub, indicating a substantial user base. Furthermore, it's being used by over 5,000 companies across more than 100 countries, so its reliability is quite good.
https://appstore.lazycat.cloud/#/shop/detail/cloud.lazycat.app.liu.appsmith
Hands-on: Quickly Build a User Management Page
Let's walk through building a simple user management system, including search, add, edit, and delete functionalities.
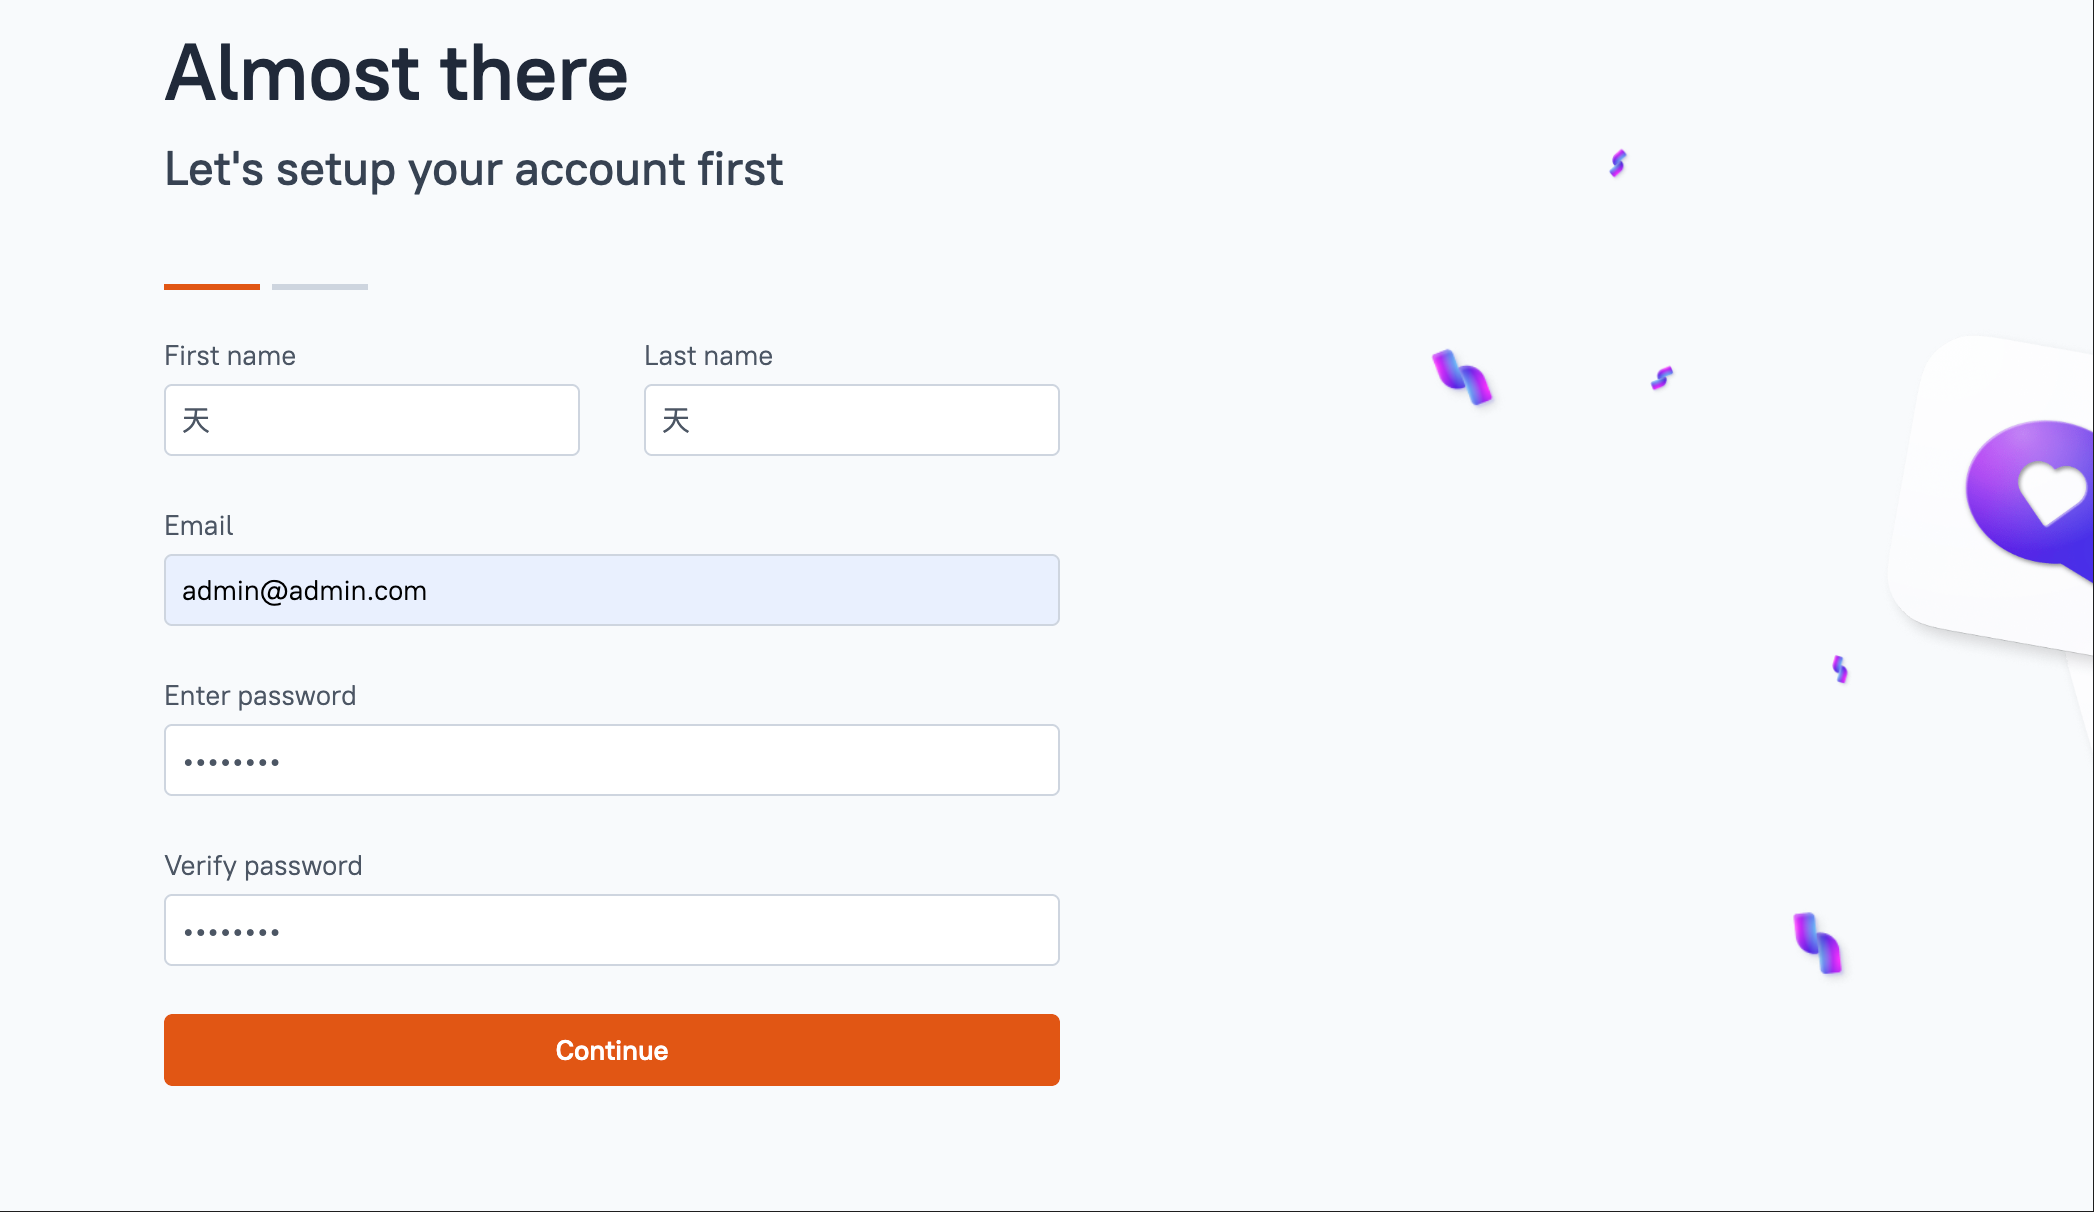
Step 1: Register a User
After installing the application, you need to register an account first.
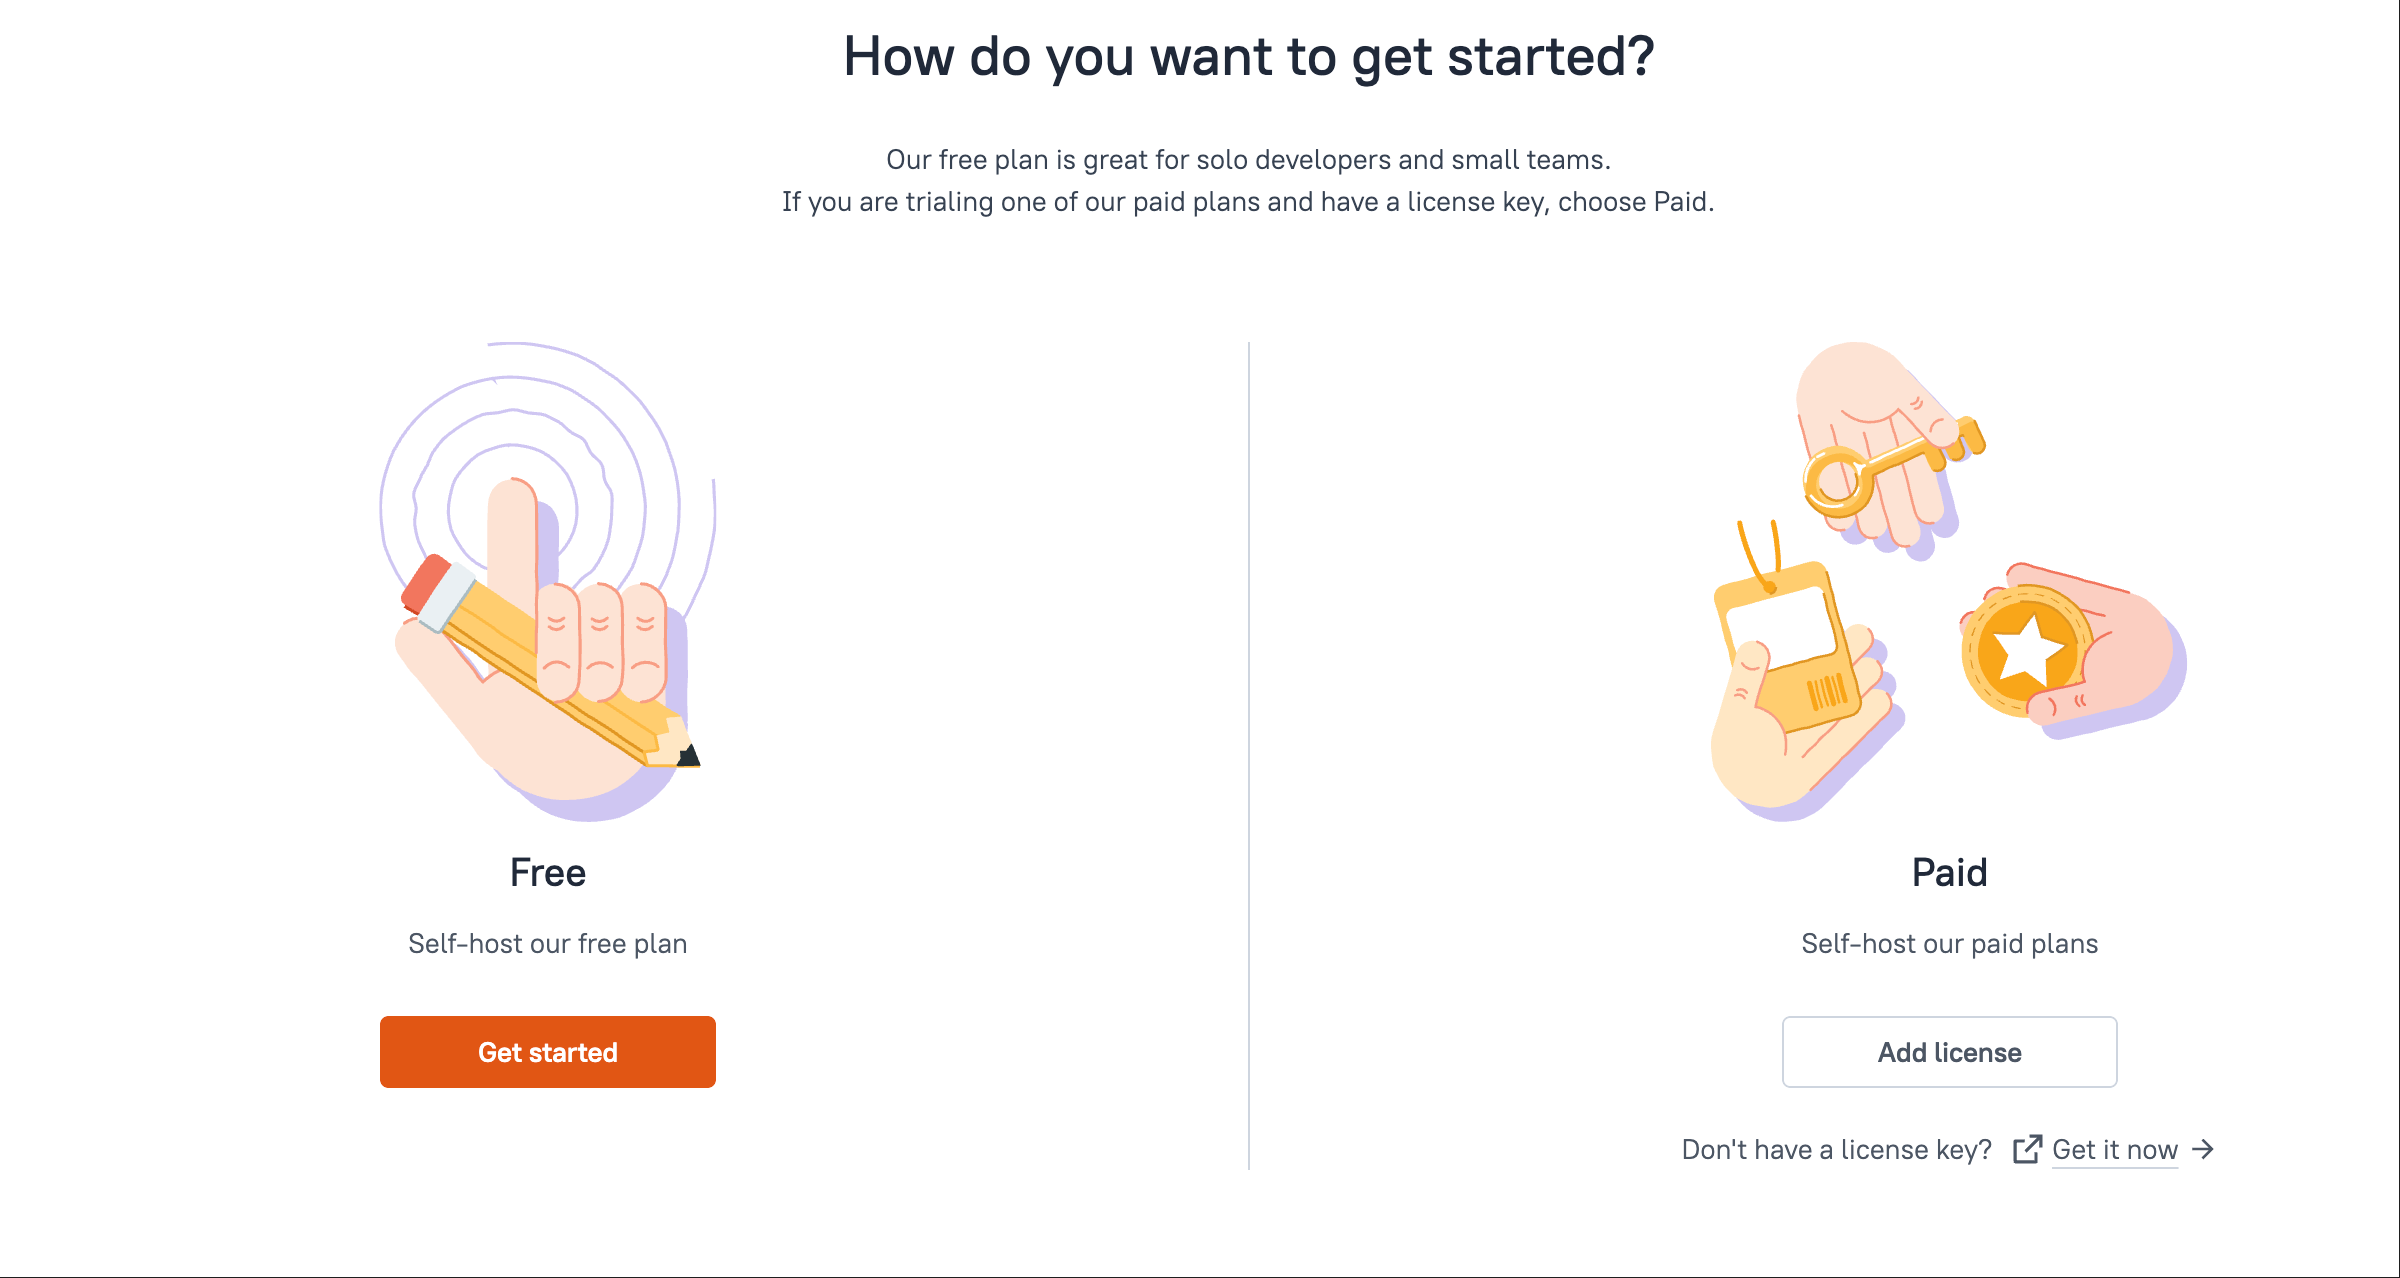
Select the free mode on the left here.
Step 2: Connect to a Database
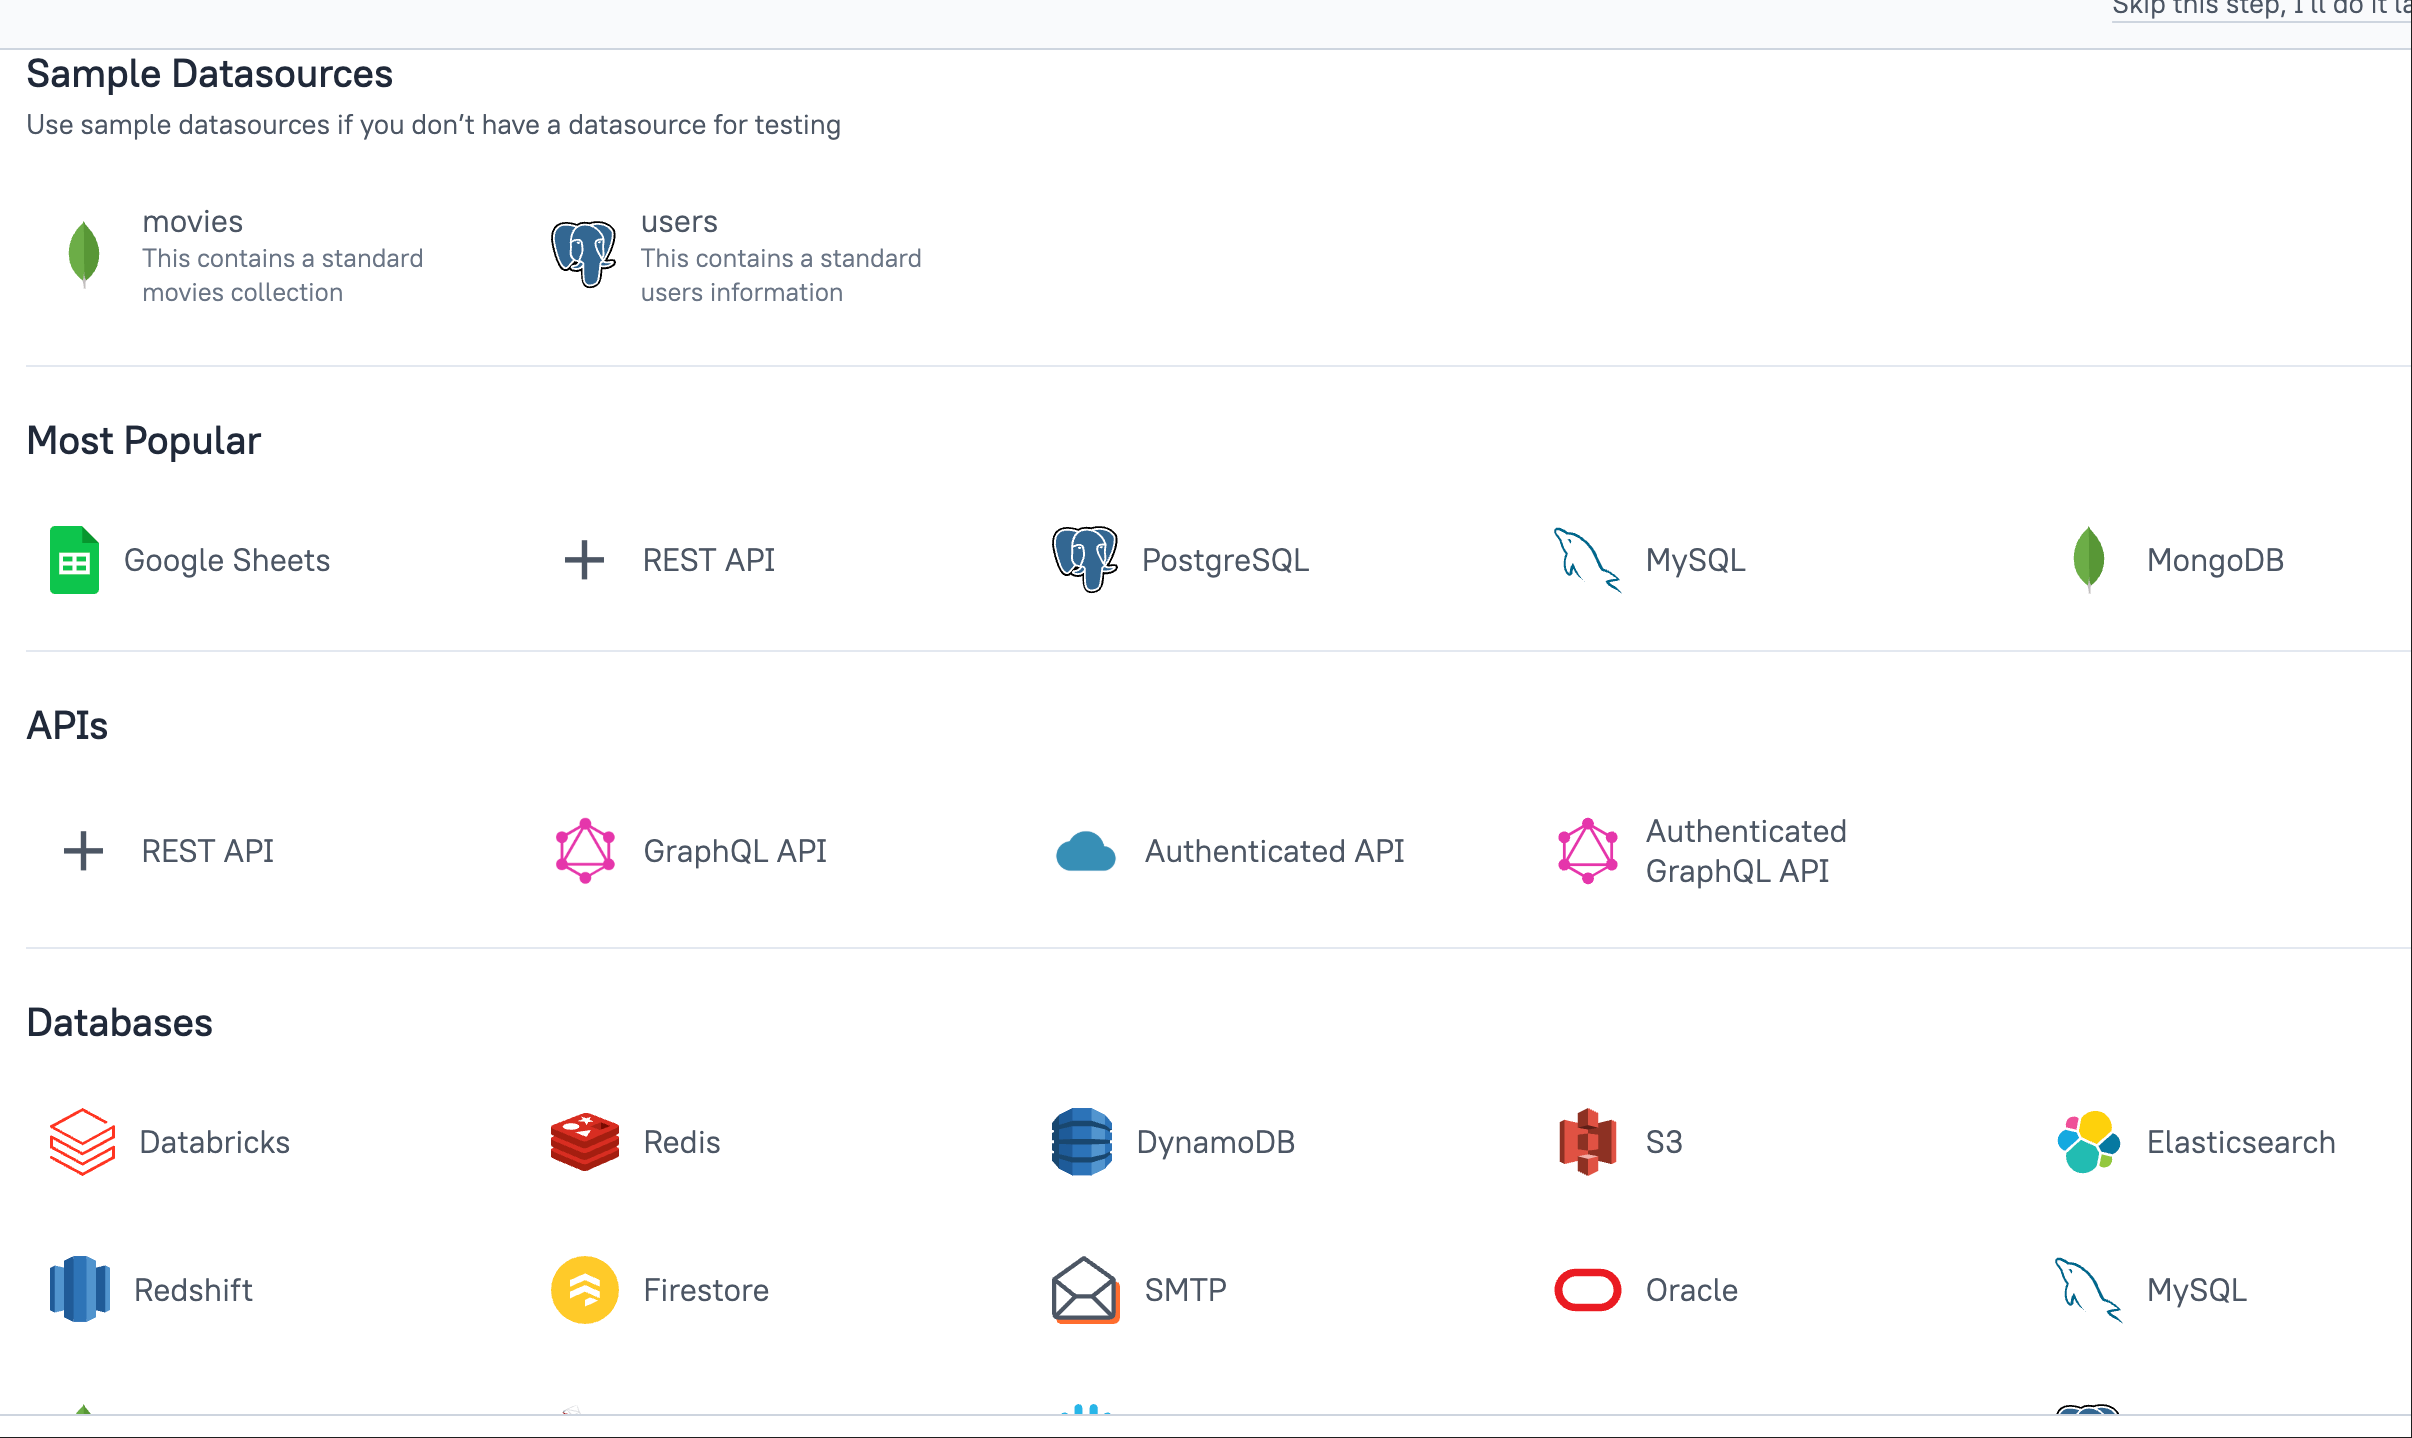 Click + New Datasource, select your database type (e.g., MySQL)
Fill in the database address, port, username, and password
Click + New Datasource, select your database type (e.g., MySQL)
Fill in the database address, port, username, and password
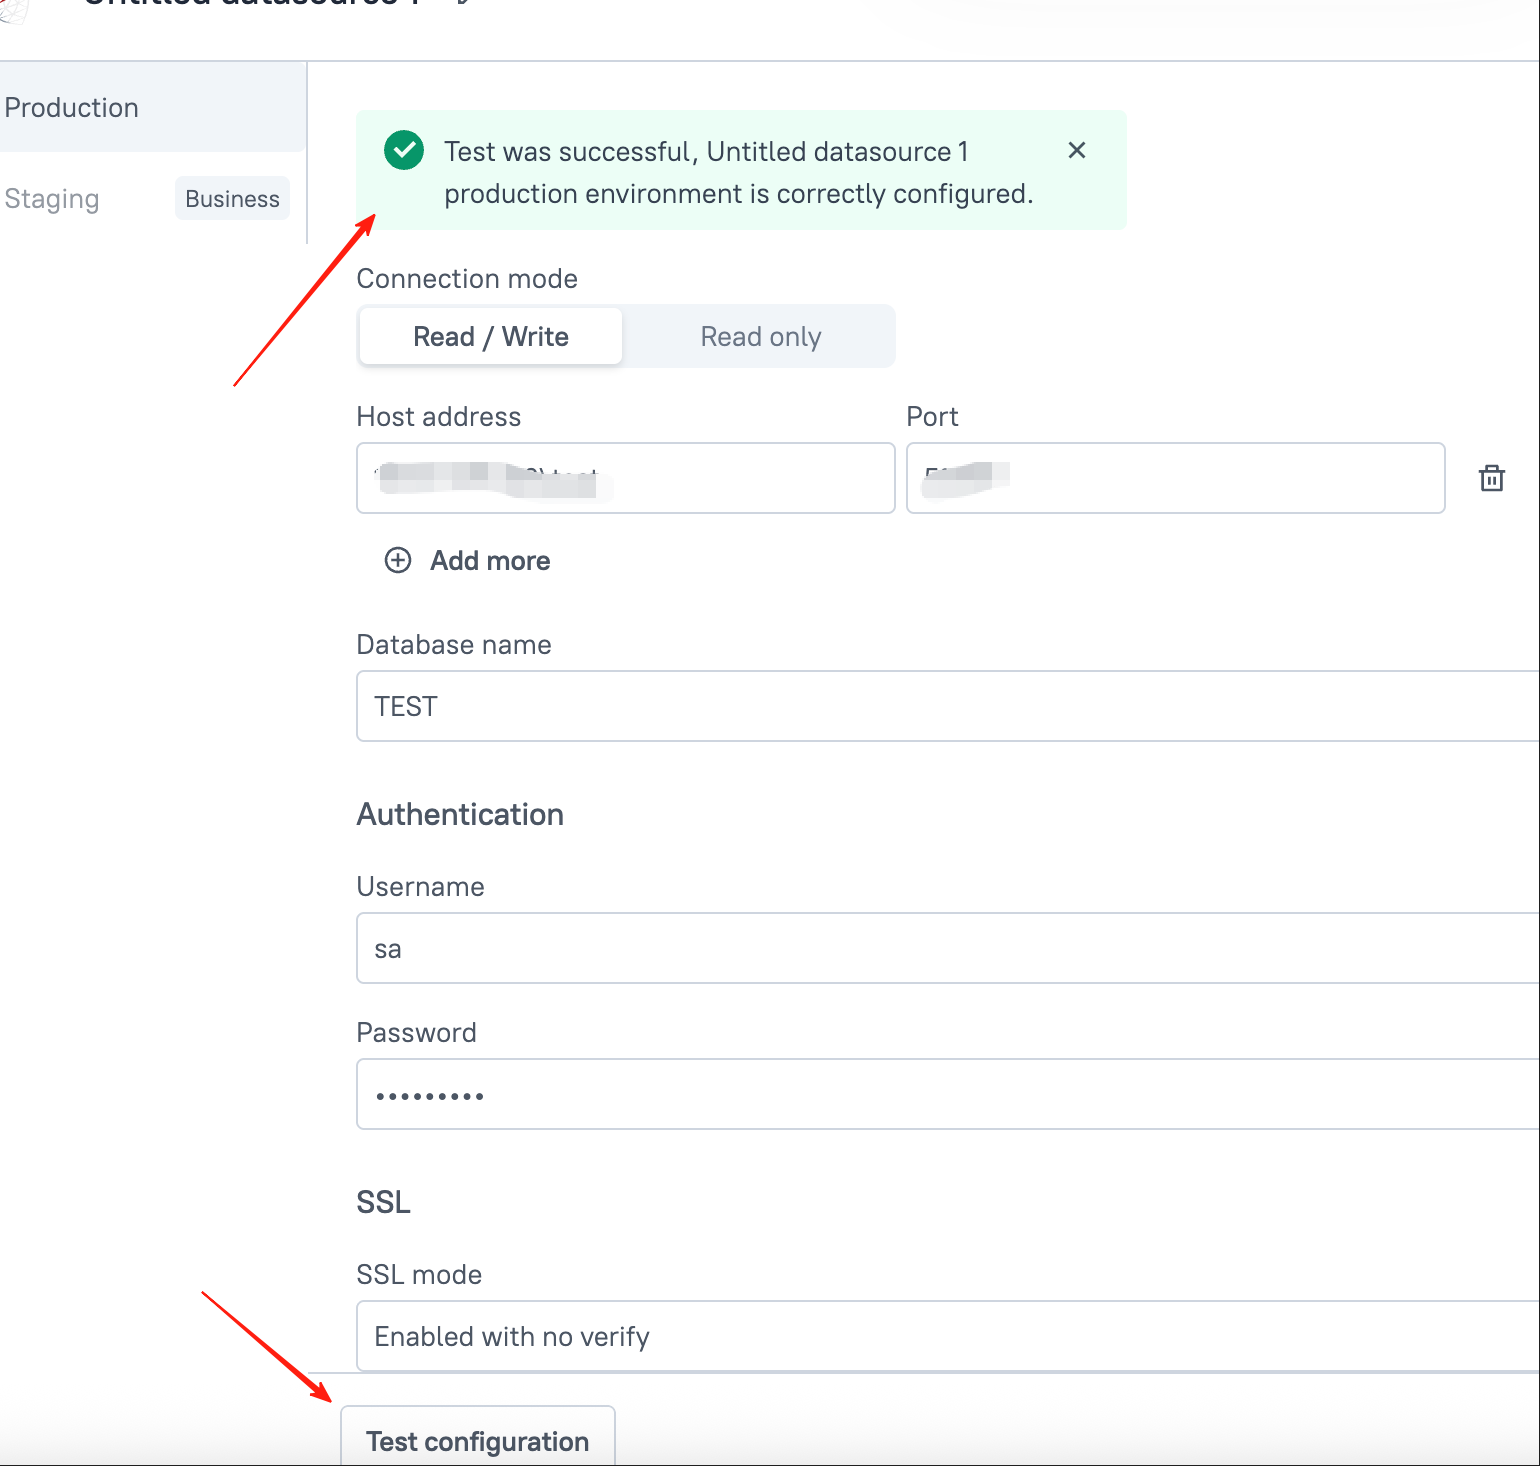 Click Test to verify the connection, then click Save if successful.
Step 3: Create a Query
- Click Queries/JS, then select + New Query
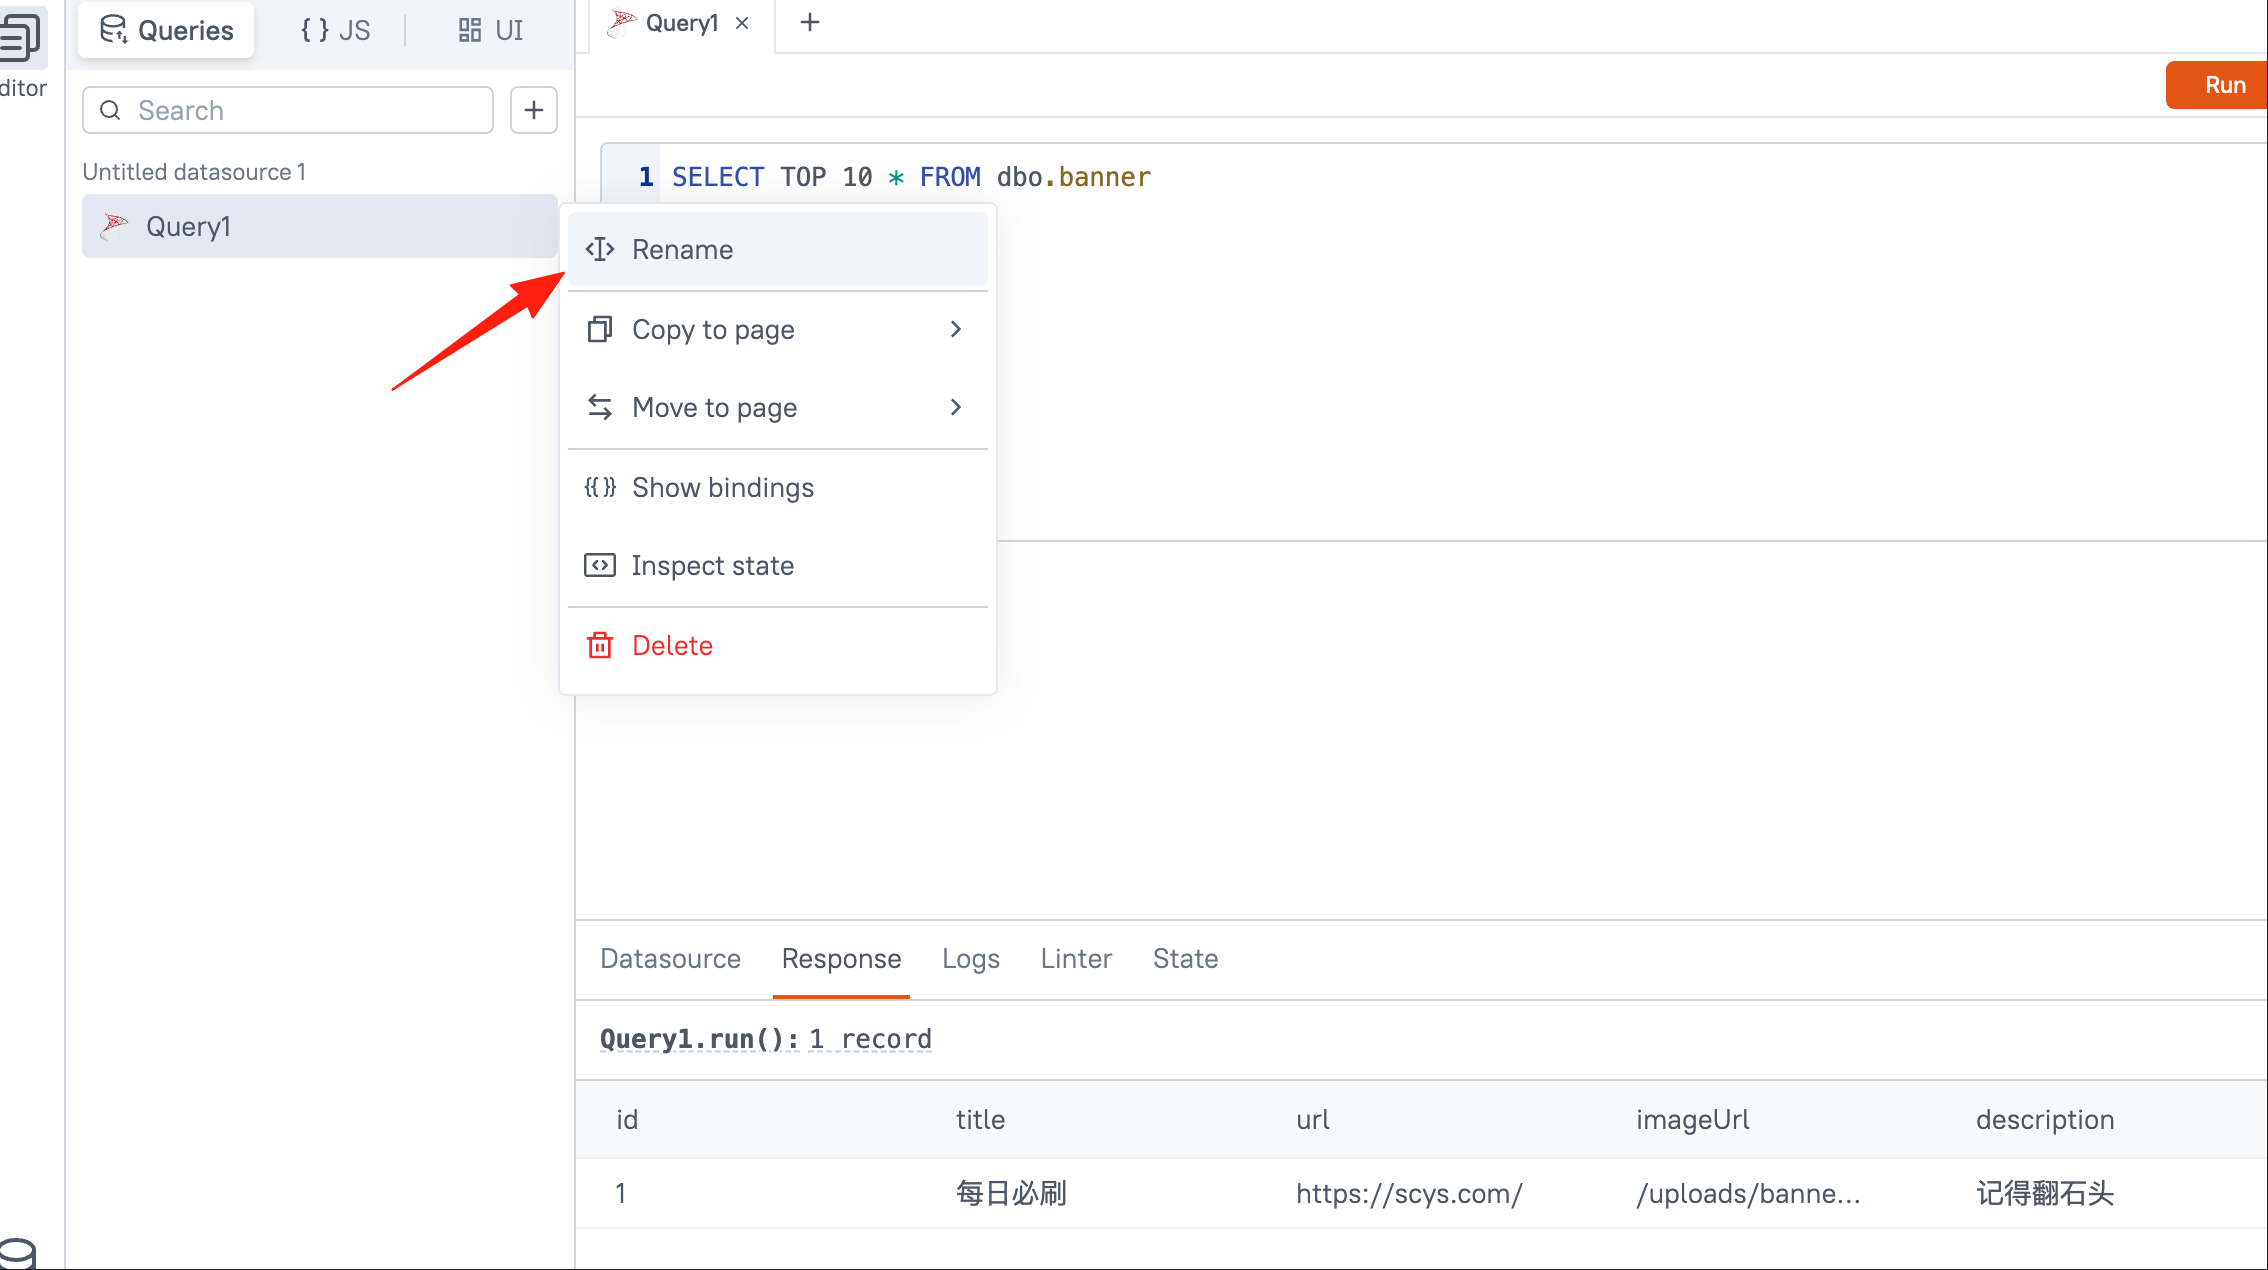
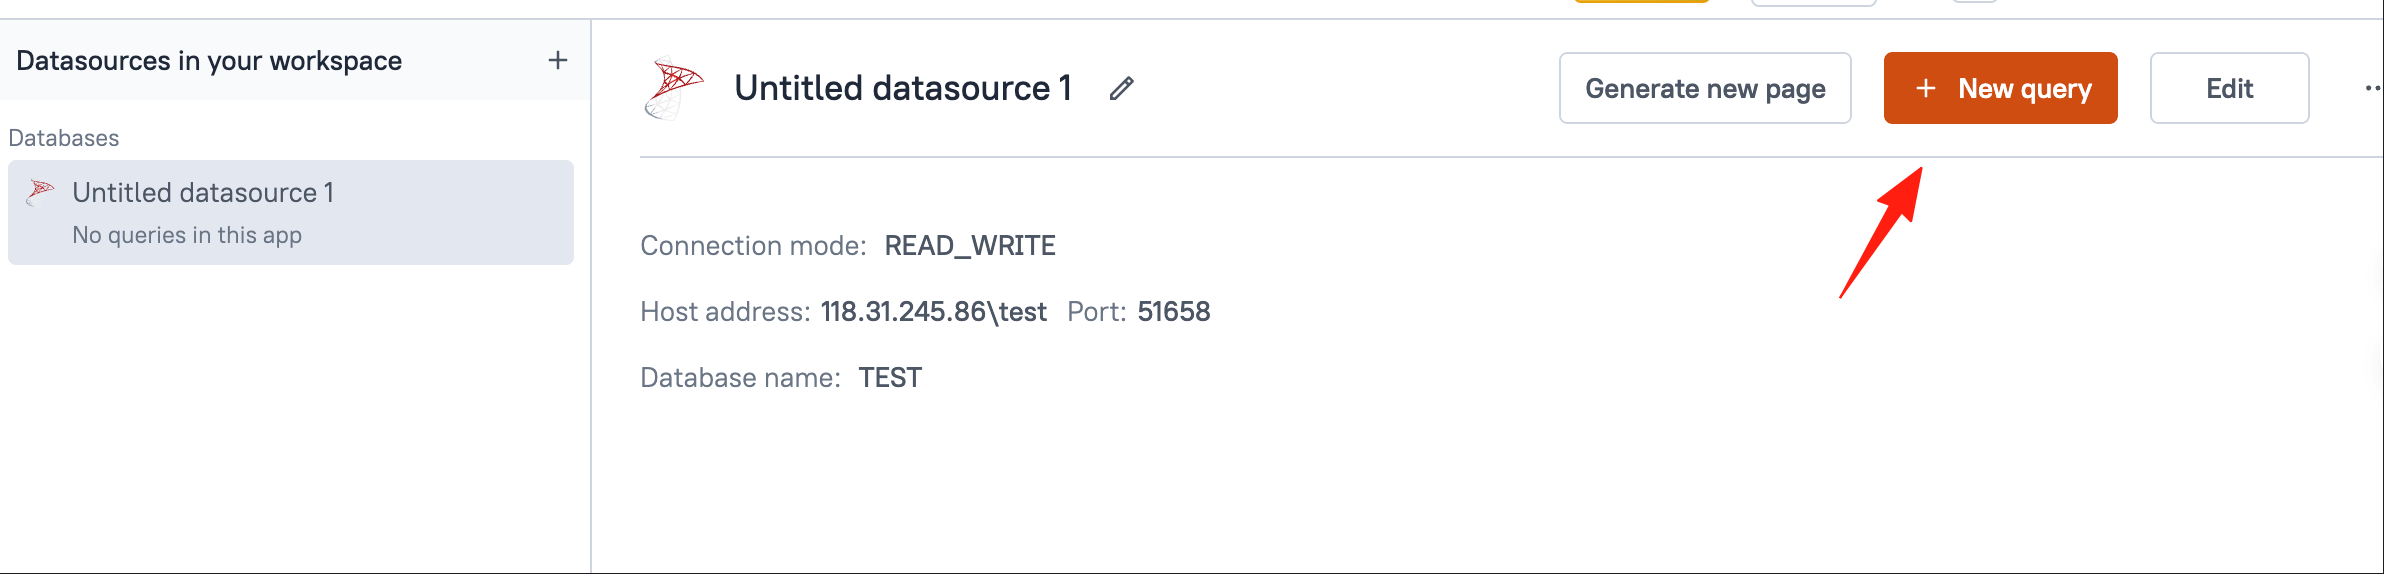 Write a query, for example:
SELECT * FROM users WHERE name LIKE '%{{Input1.text}}%' LIMIT 10;
Here, {{Input1.text}} is a dynamic parameter that we'll use later.
Give this query a name, e.g., getUsers
Click Run to test it; you should see the data if it's correct.
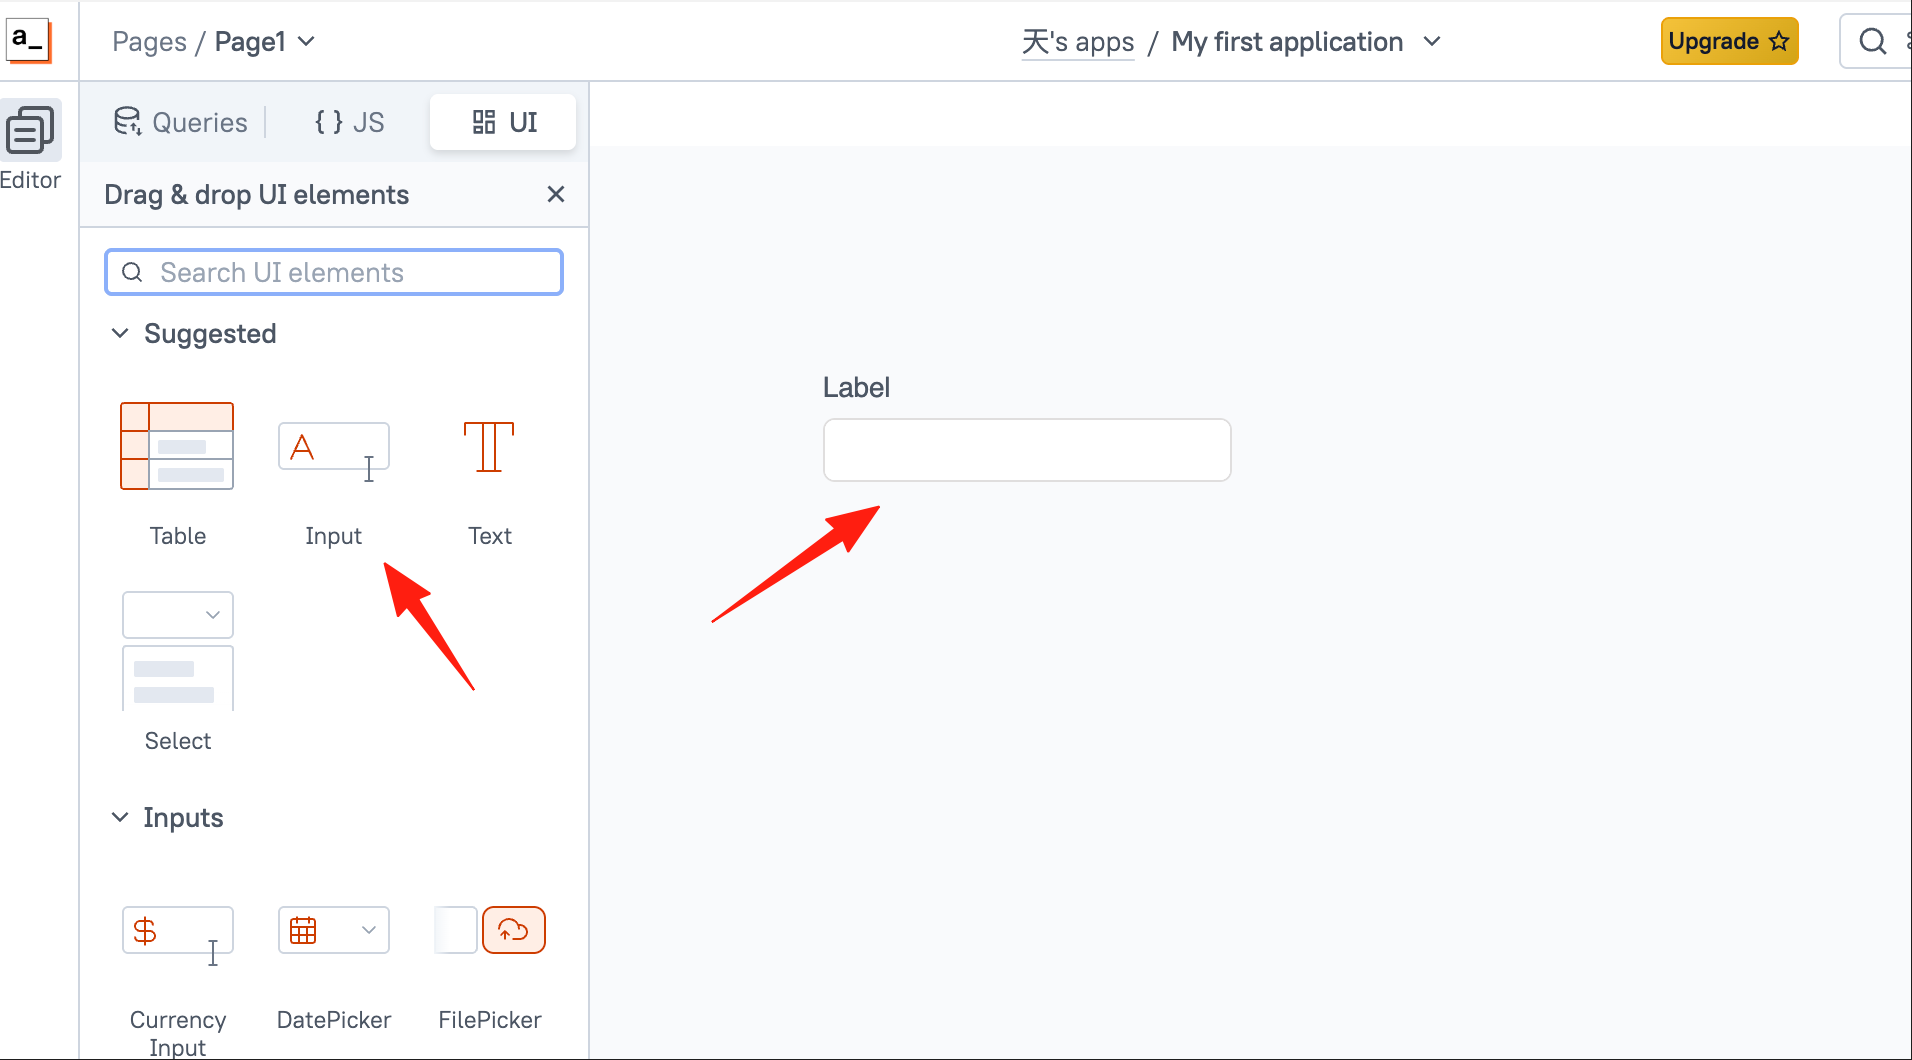
Step 4: Drag Components to Build the UI
Add a Search Box:
- Drag an Input component onto the page.
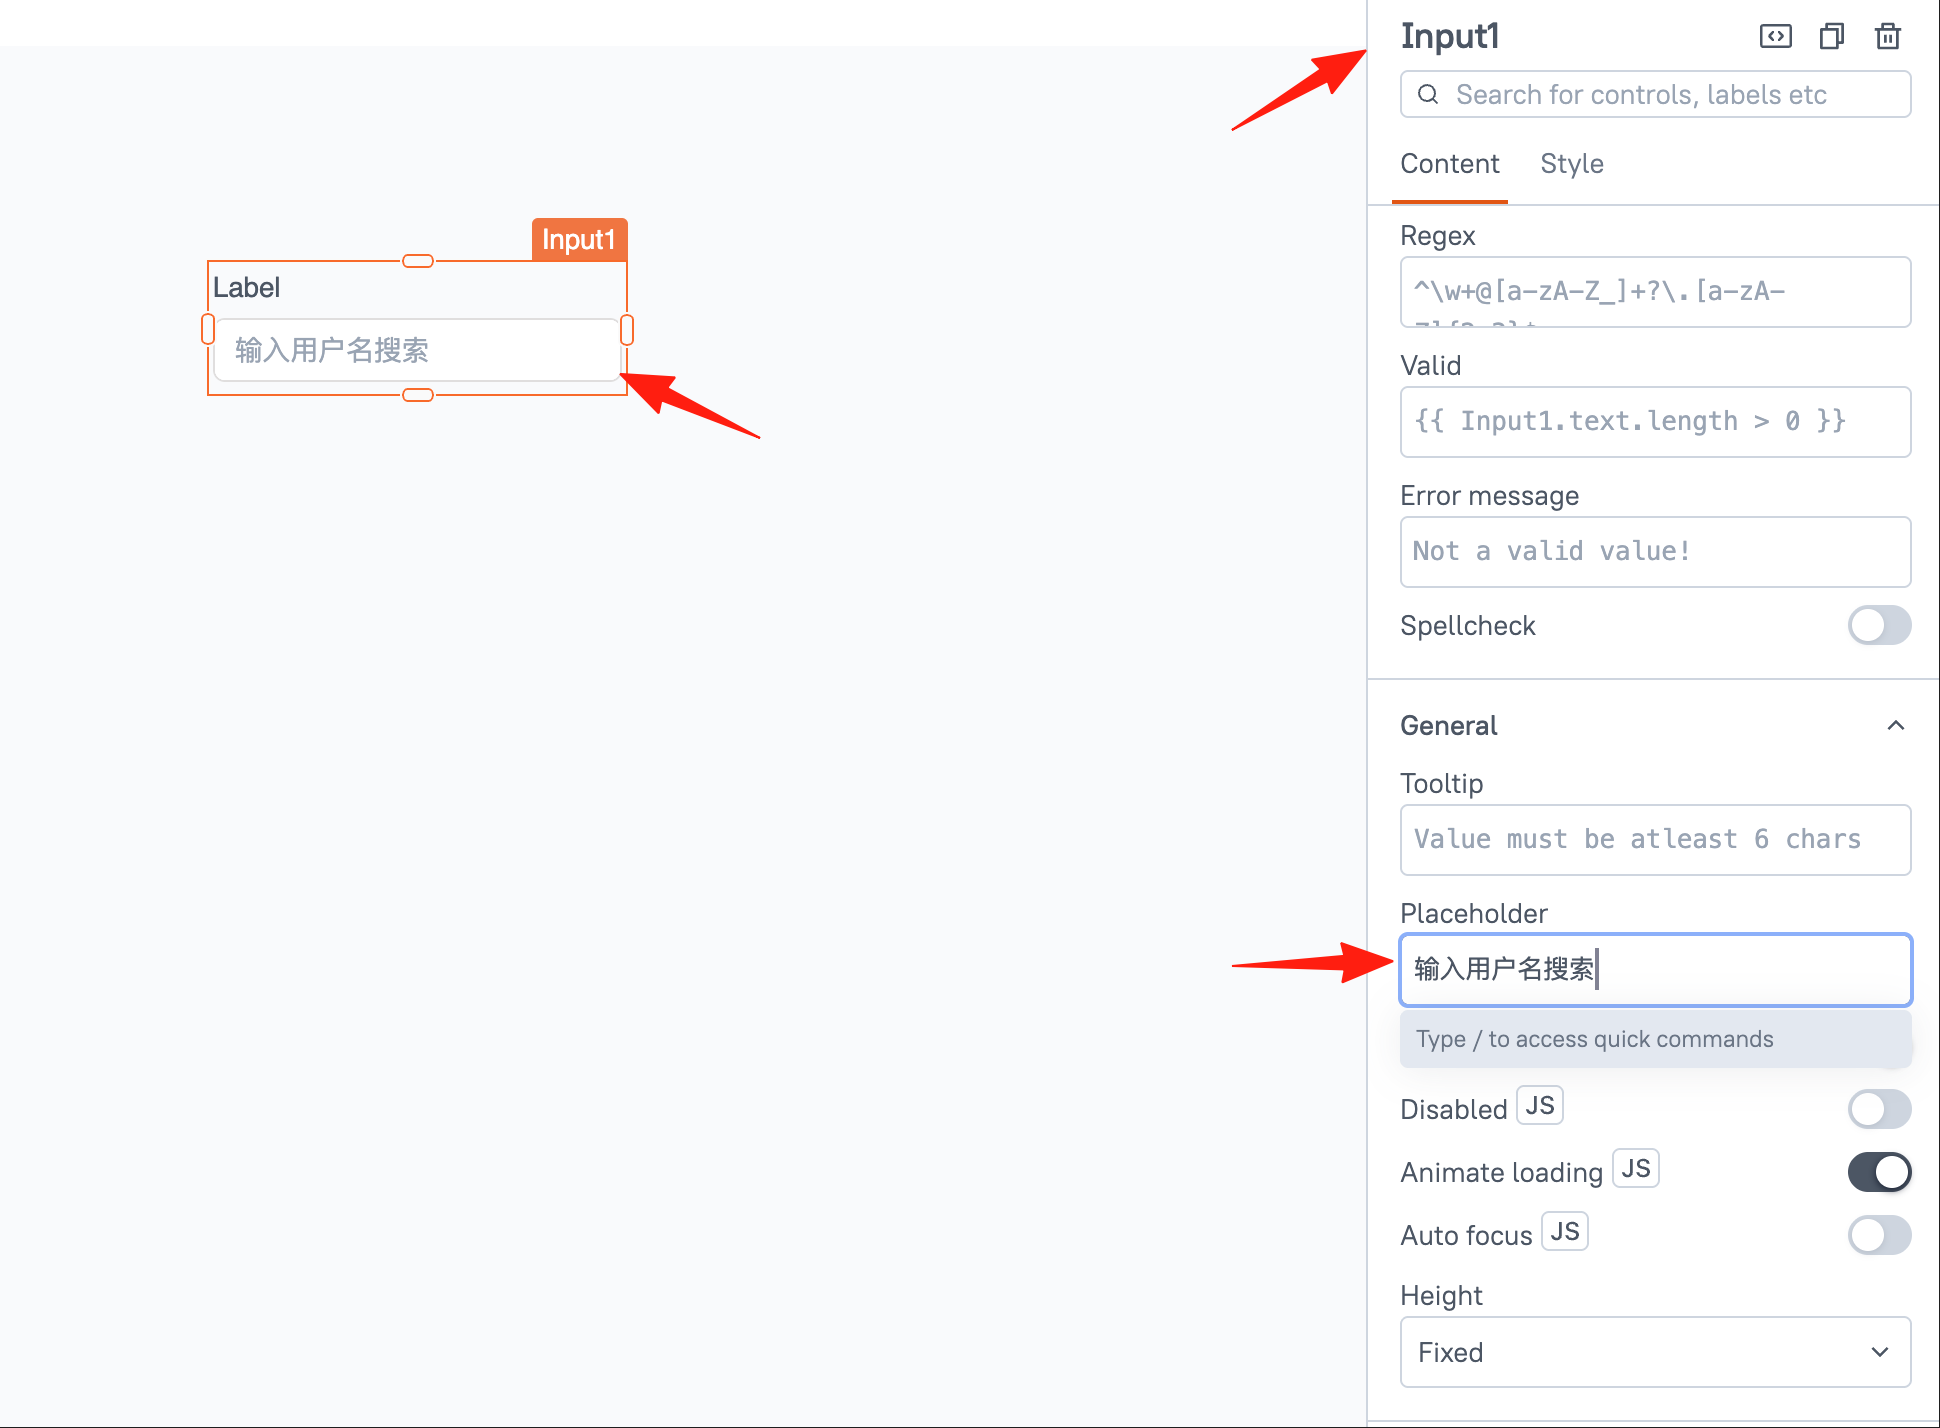
- In the property panel on the right, change the Property Name to
Input1. - Set the Placeholder to "Enter username to search".
 Add a Search Button:
- Drag a Button component.
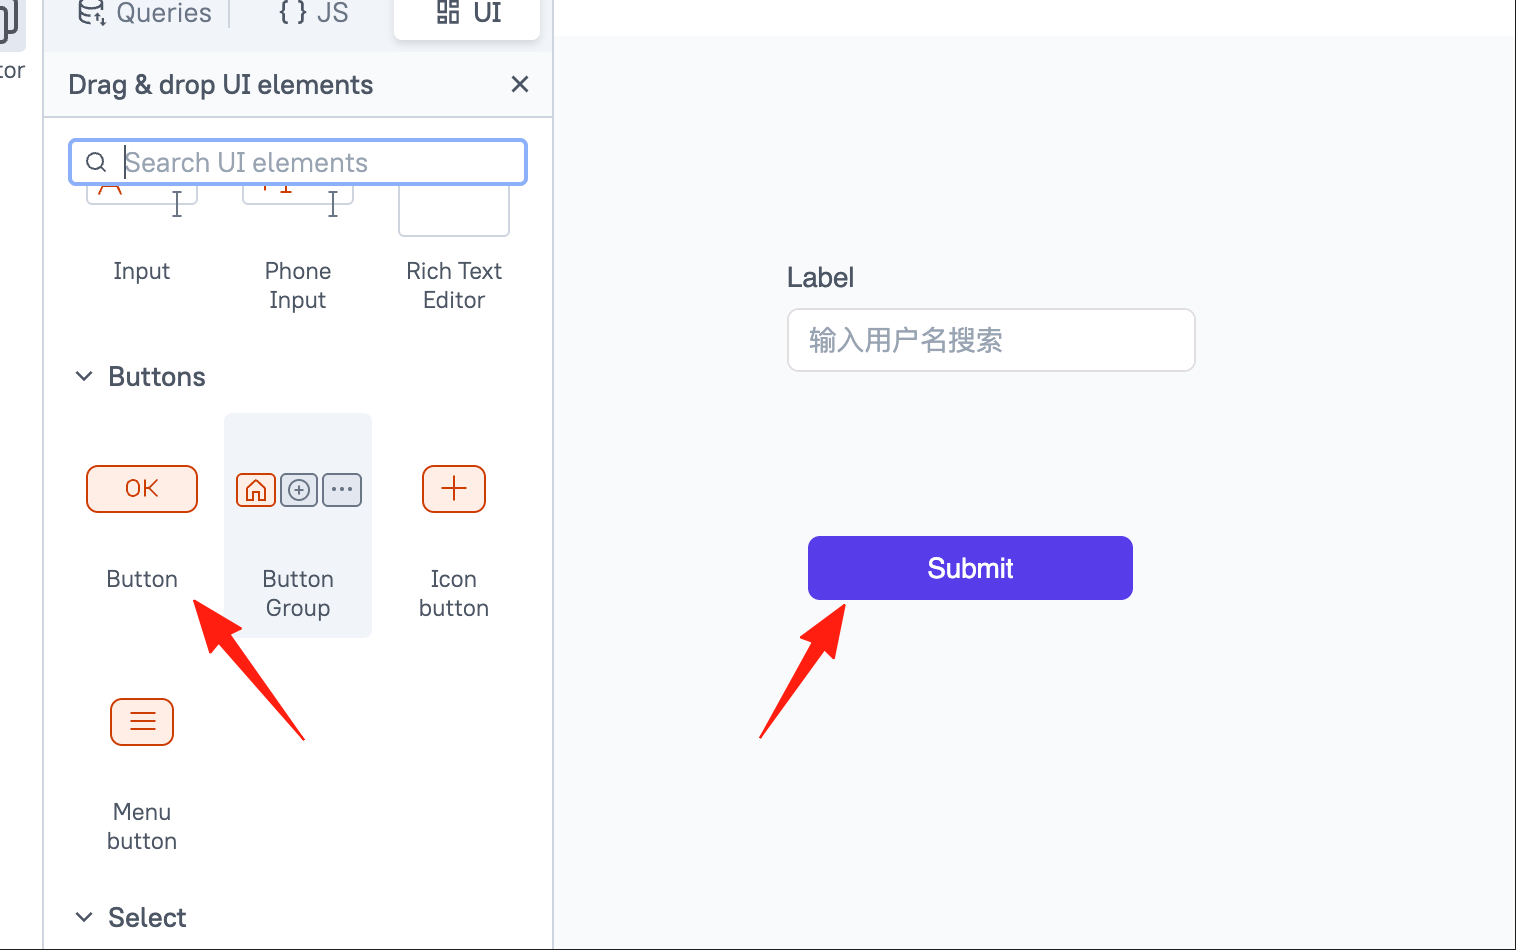
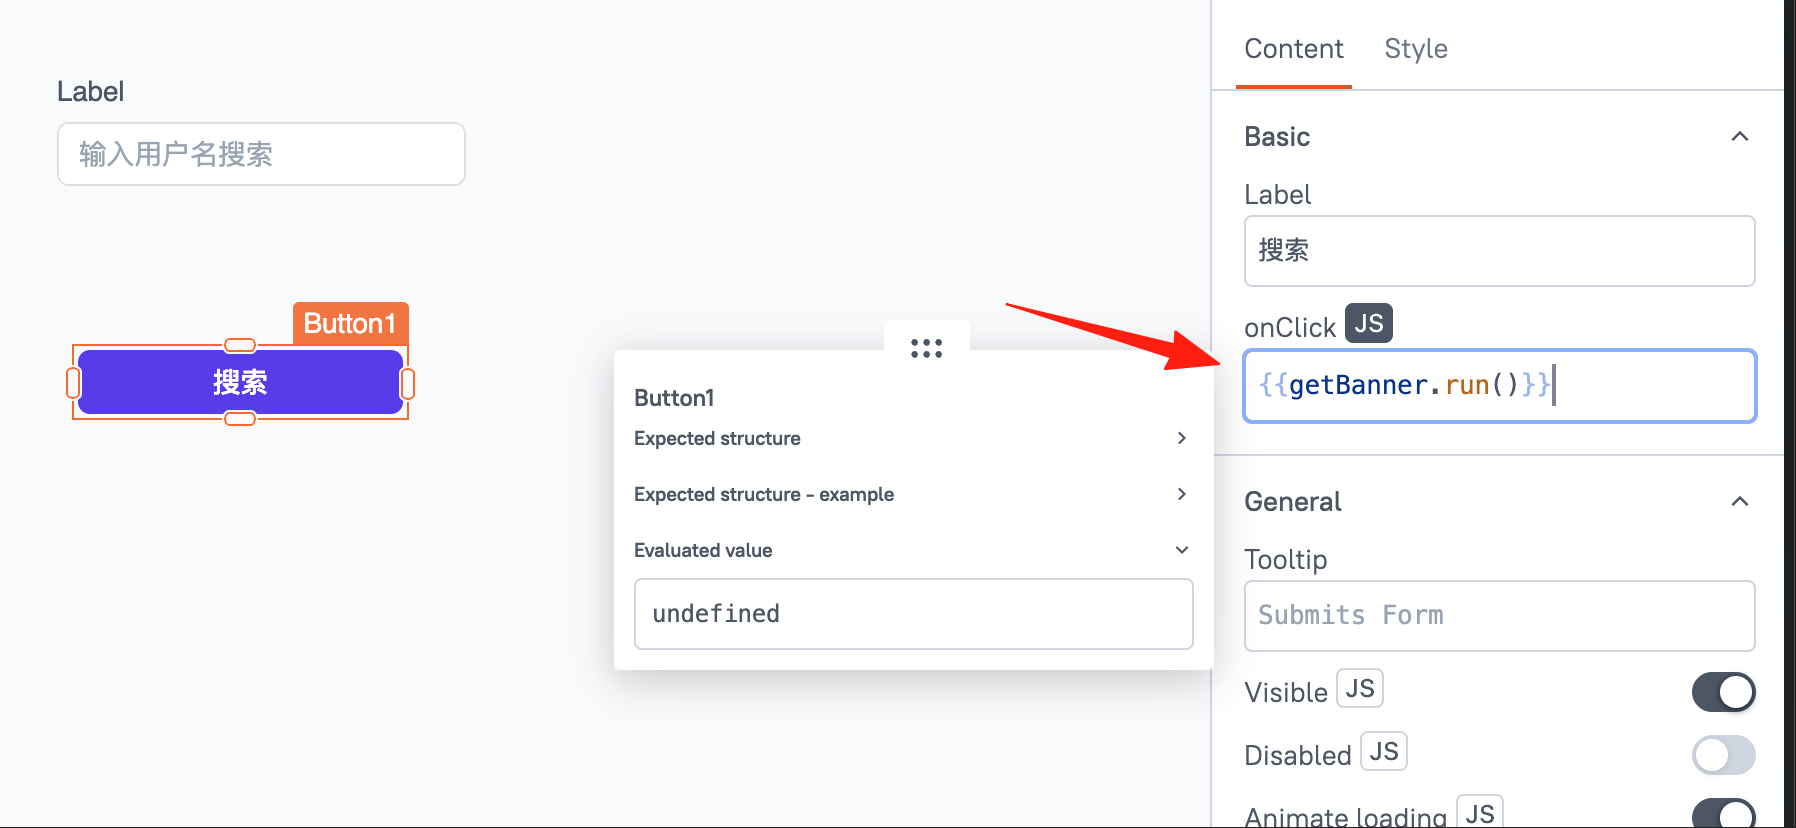
- Change the Label to "Search".
- For the onClick event, select
getUsers.run().
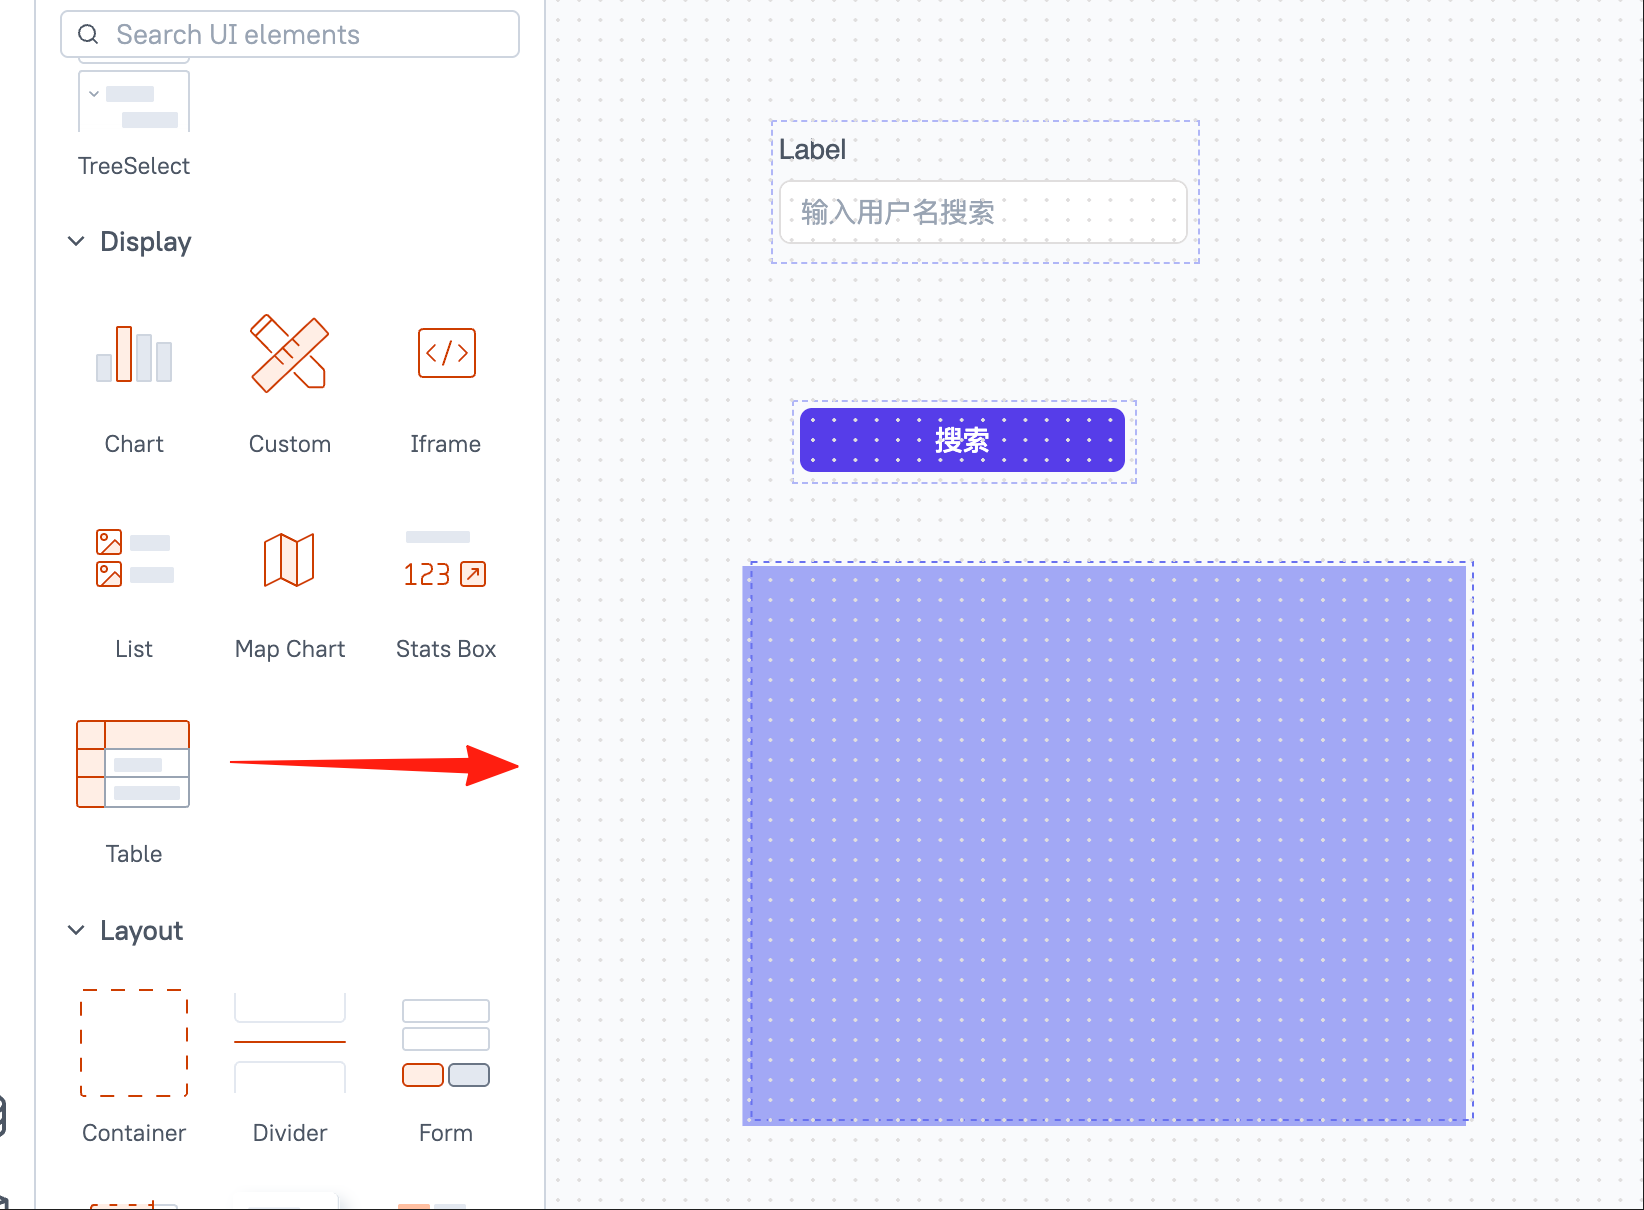
Add a Table to Display Data:
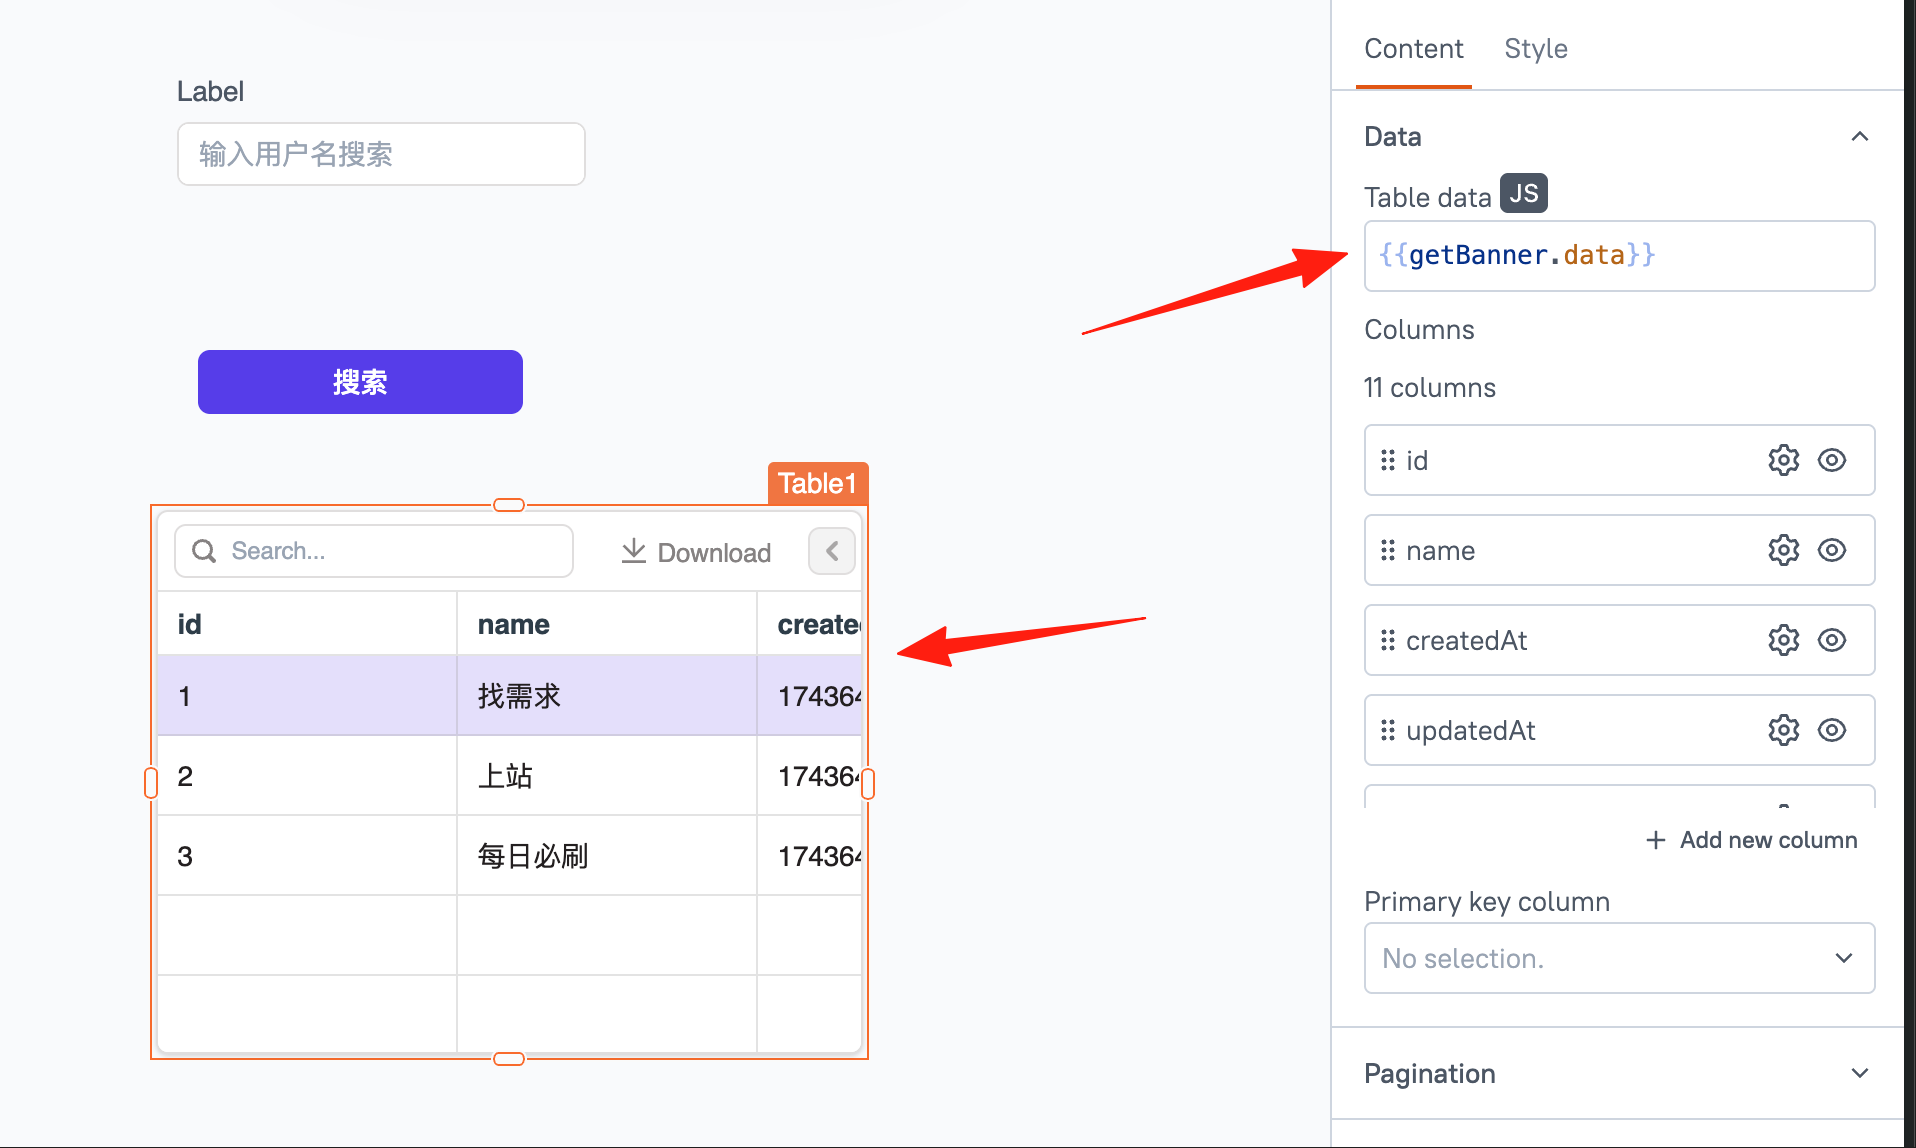
- Drag a Table component.
- Set the Table Data to
{{getUsers.data}}. - The table should now display the query results.
Create an Add Button:
- Drag another Button, change the Label to "Add User".
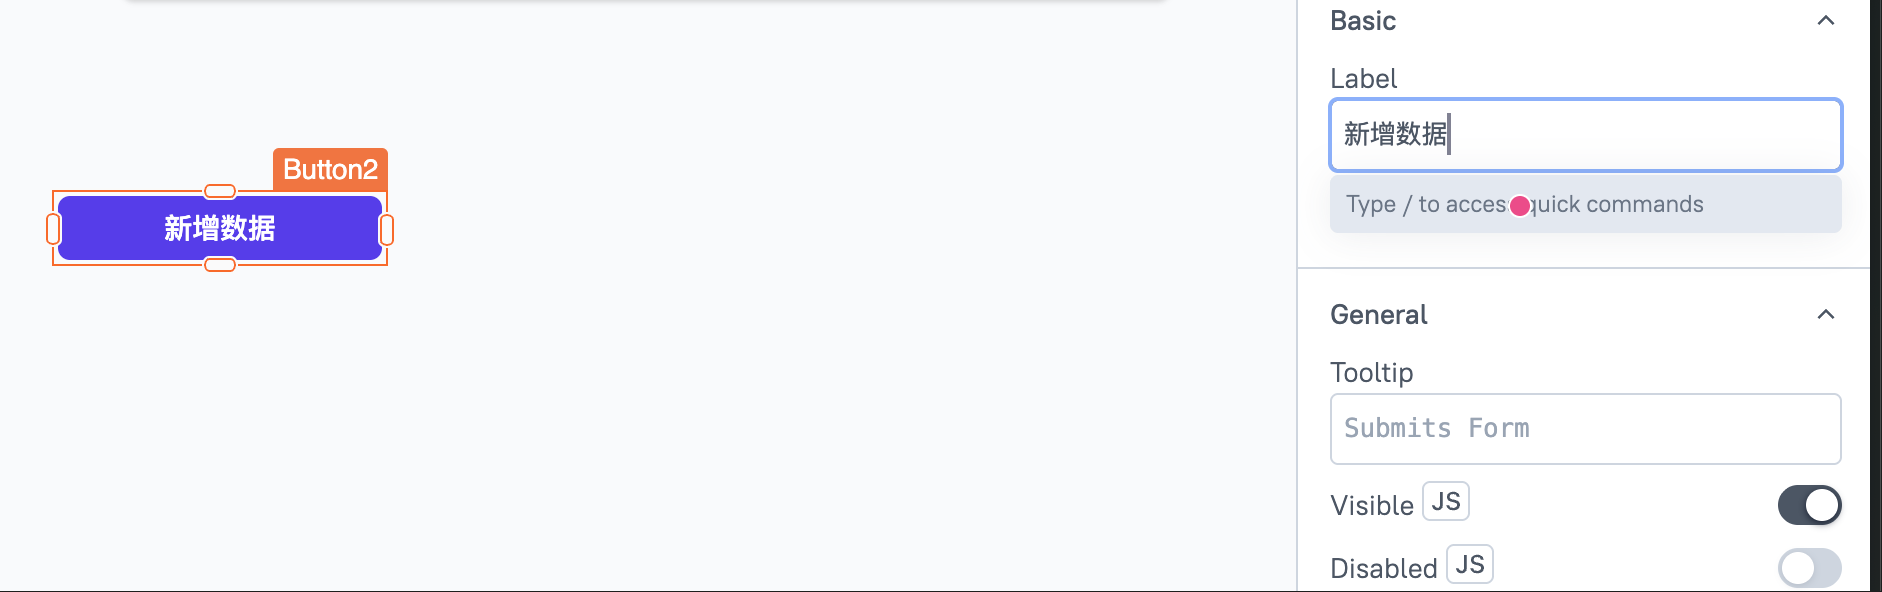
- For onClick, select
showModal('Modal1').
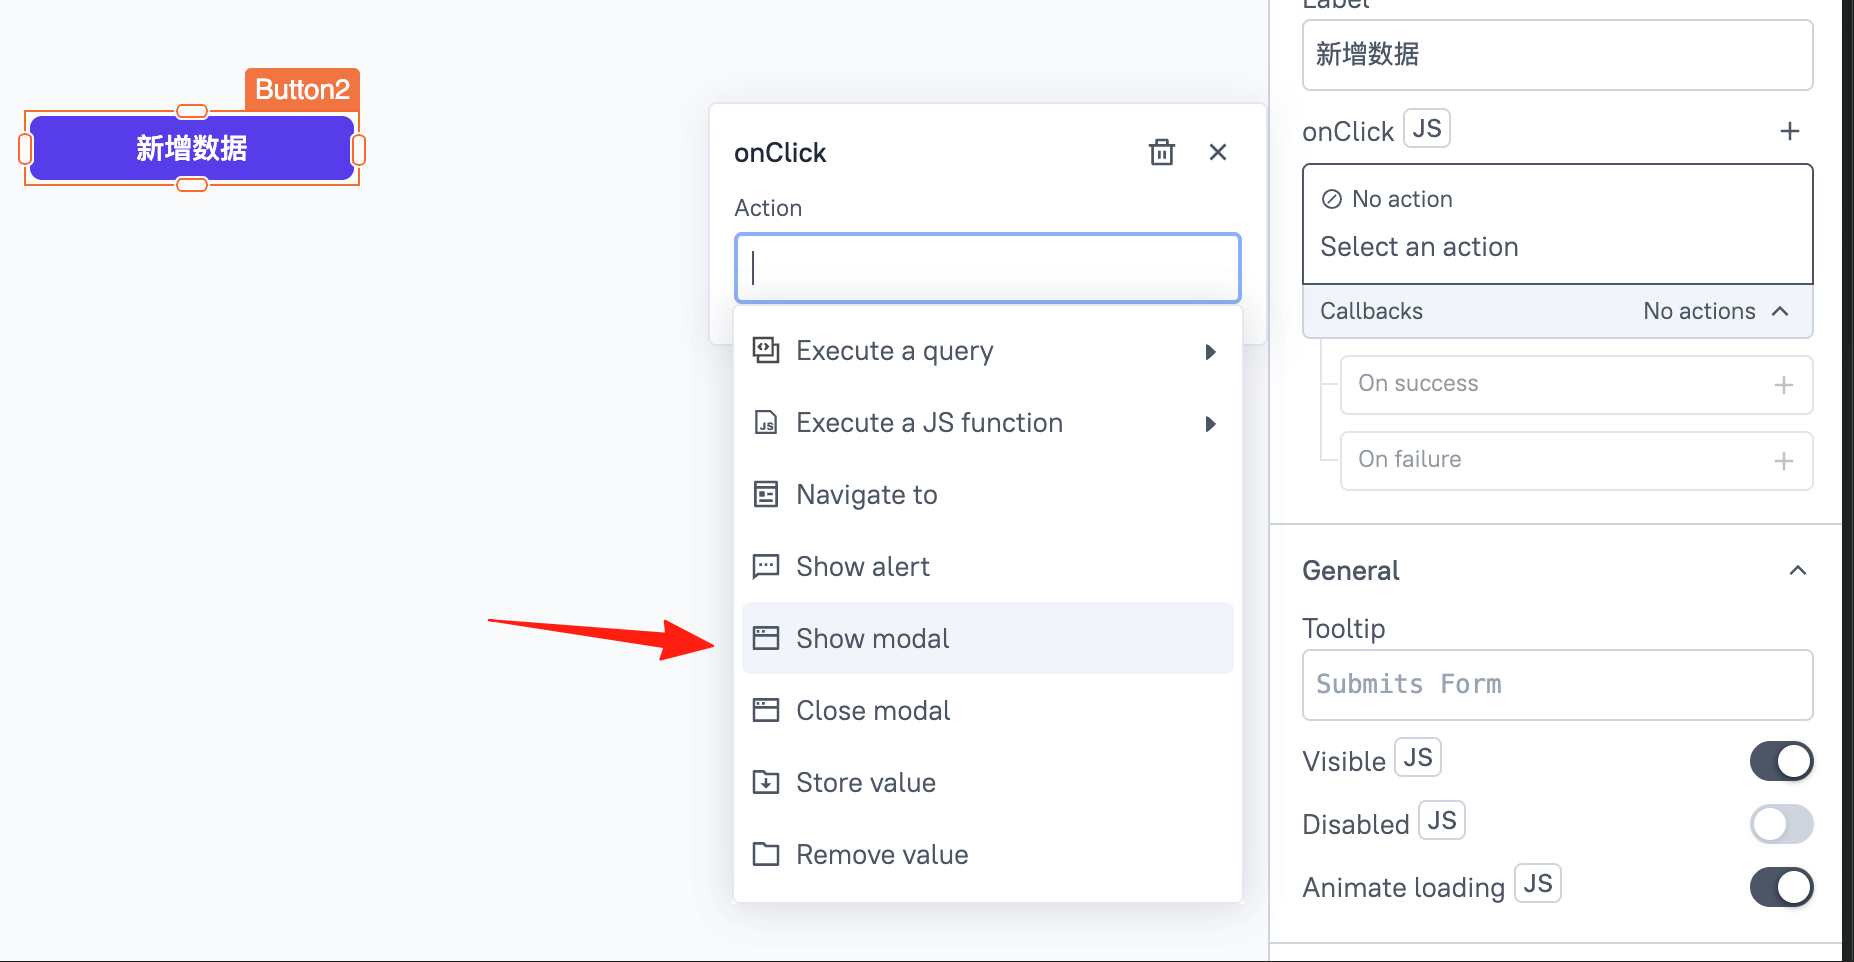
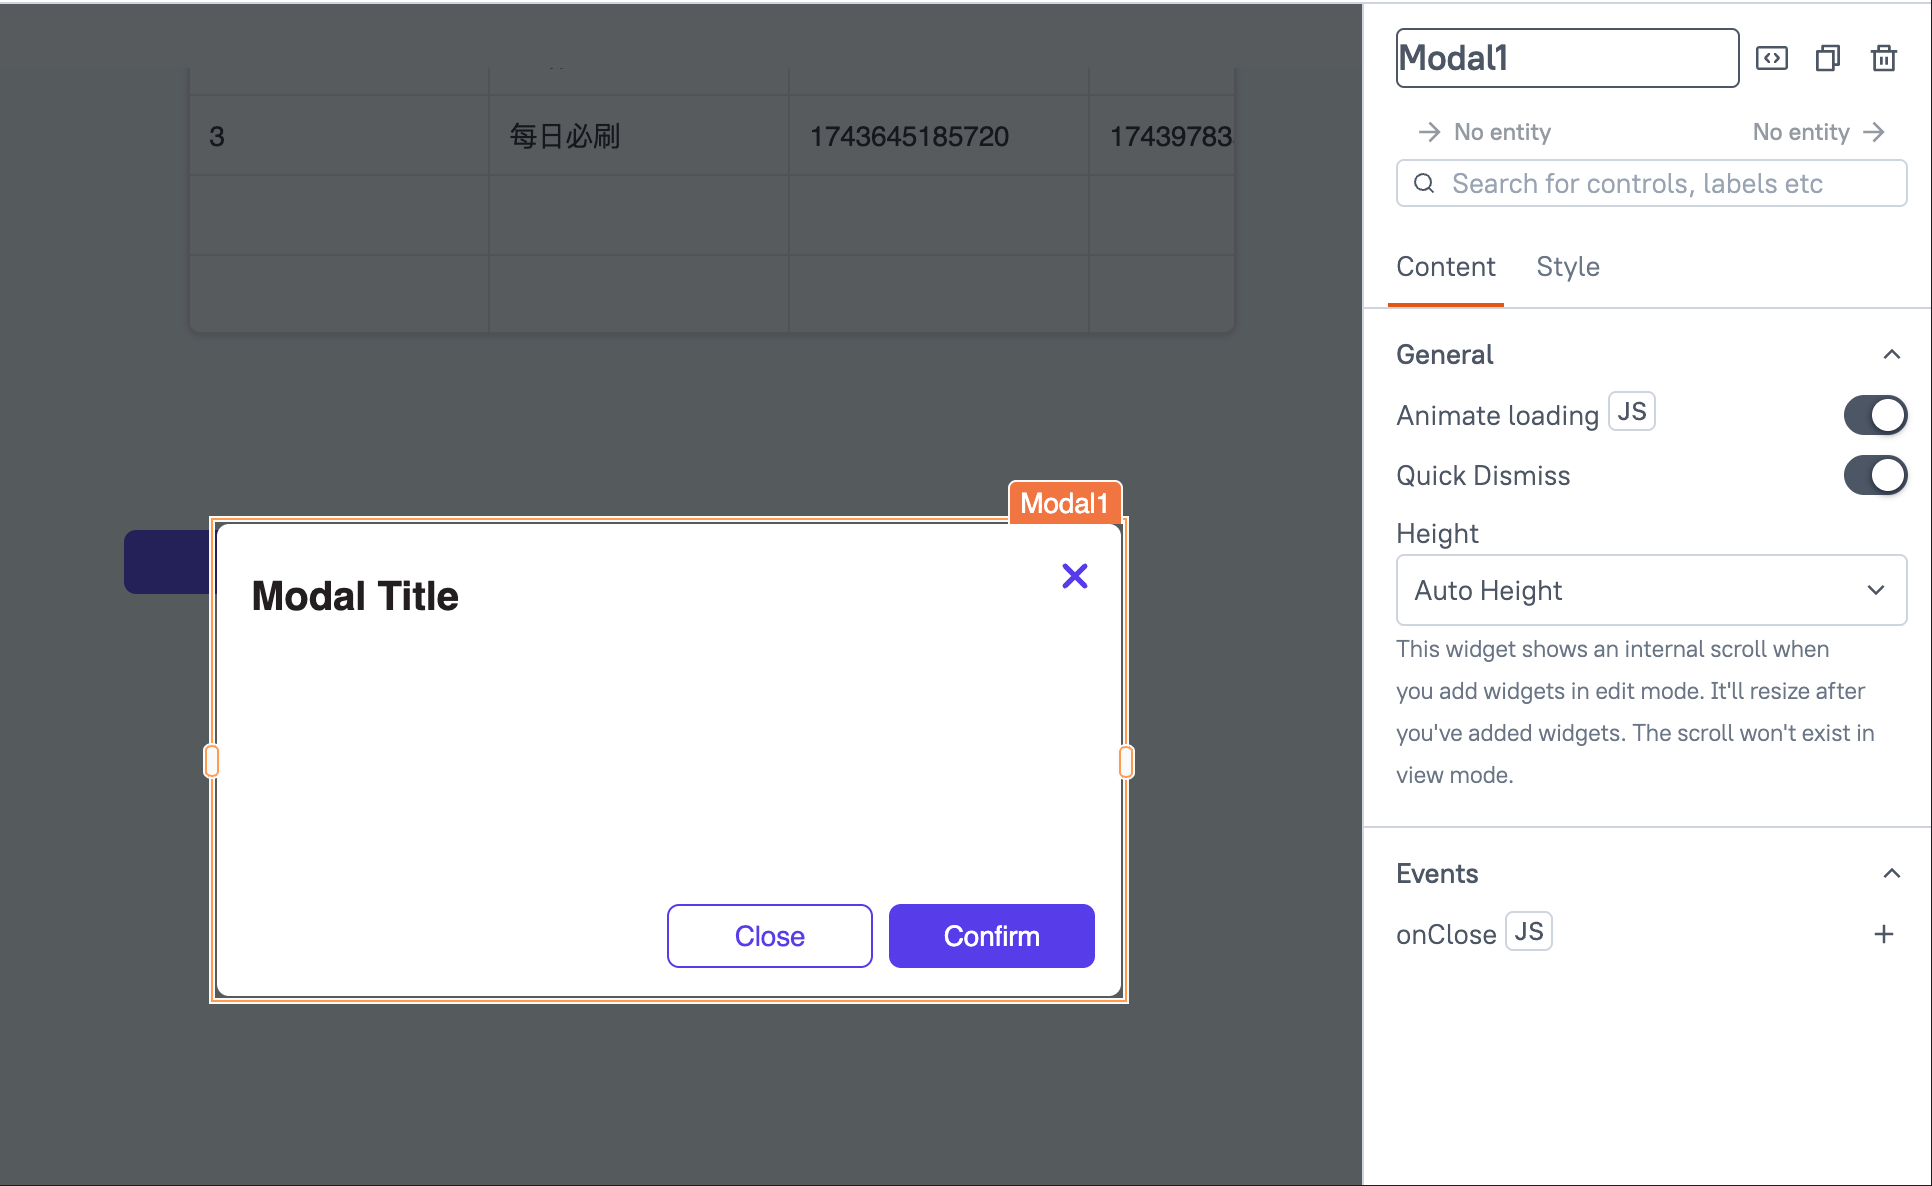
- Drag a Modal component onto the page (it's named Modal1 by default).
- Place several Input components inside the Modal (e.g., for name, email, phone).
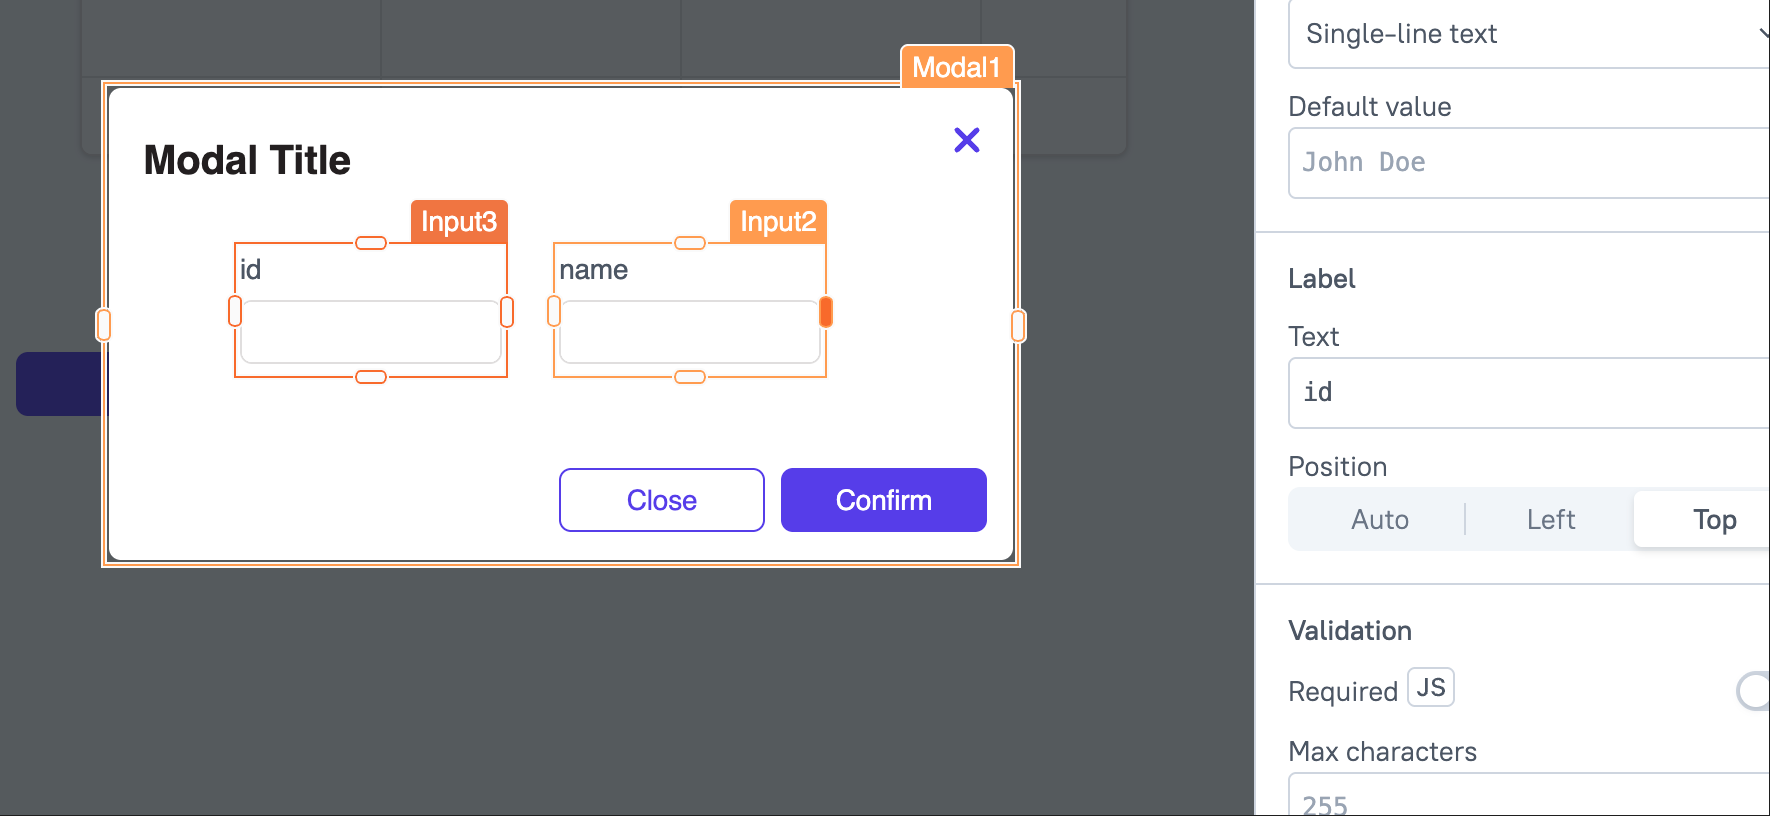
- Also add a submit button inside the modal.
Step 5: Implement the Add Logic
- Create a new query named
addUser:INSERT INTO users (name, email, phone) VALUES ('{{Input_Name.text}}', '{{Input_Email.text}}', '{{Input_Phone.text}}');
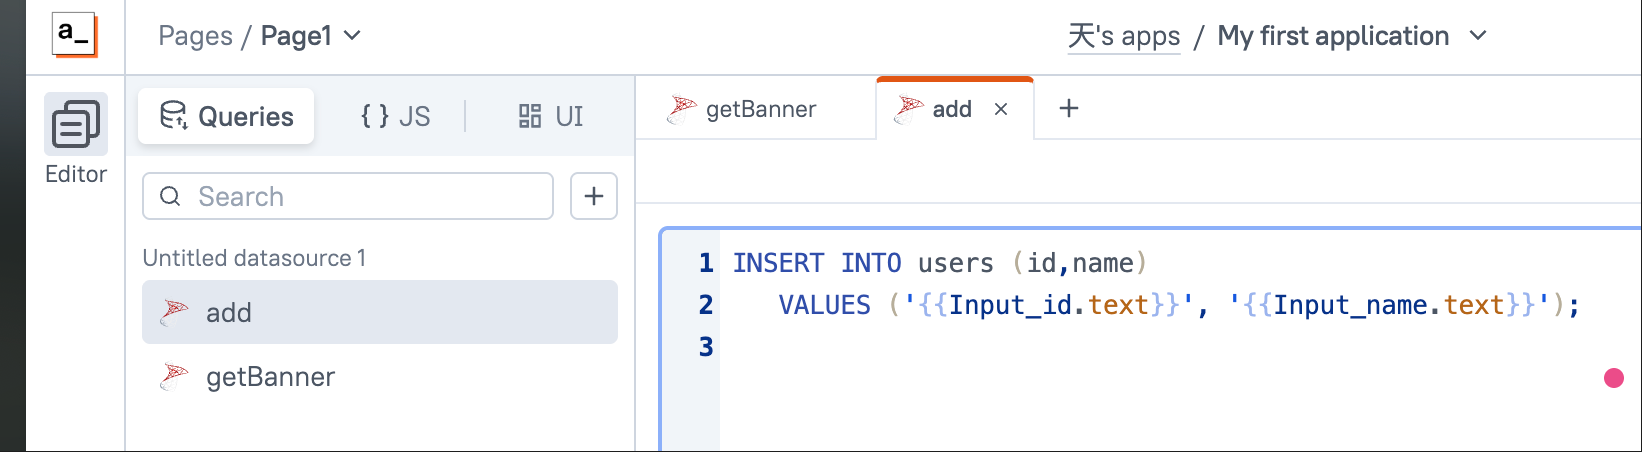 2. For the submit button's onClick, write:
addUser.run()
  .then(() => {
    showAlert('Added successfully', 'success');
    closeModal('Modal1');
    getUsers.run(); // Refresh the list
  })
  .catch(() => {
    showAlert('Failed to add', 'error');
  });
Step 6: Implement Edit and Delete
Edit Functionality:
- Add a custom column to the table.
- Set its type to Icon Button.
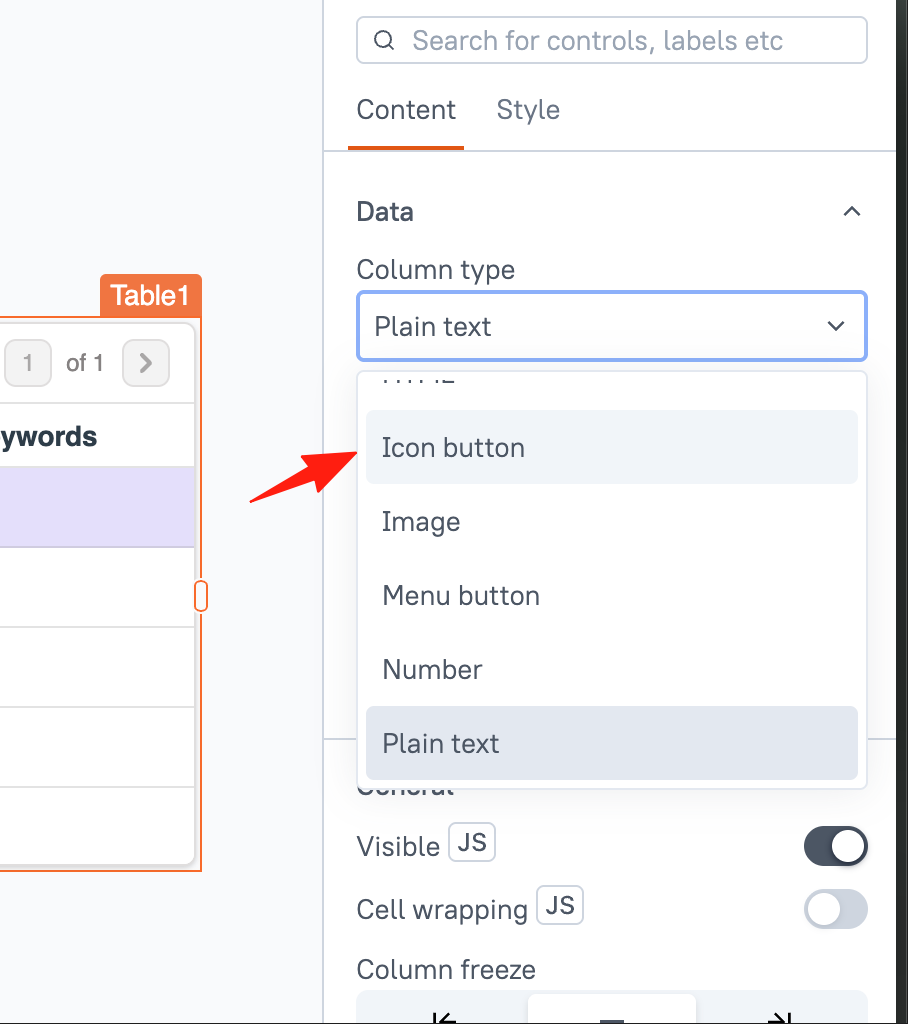
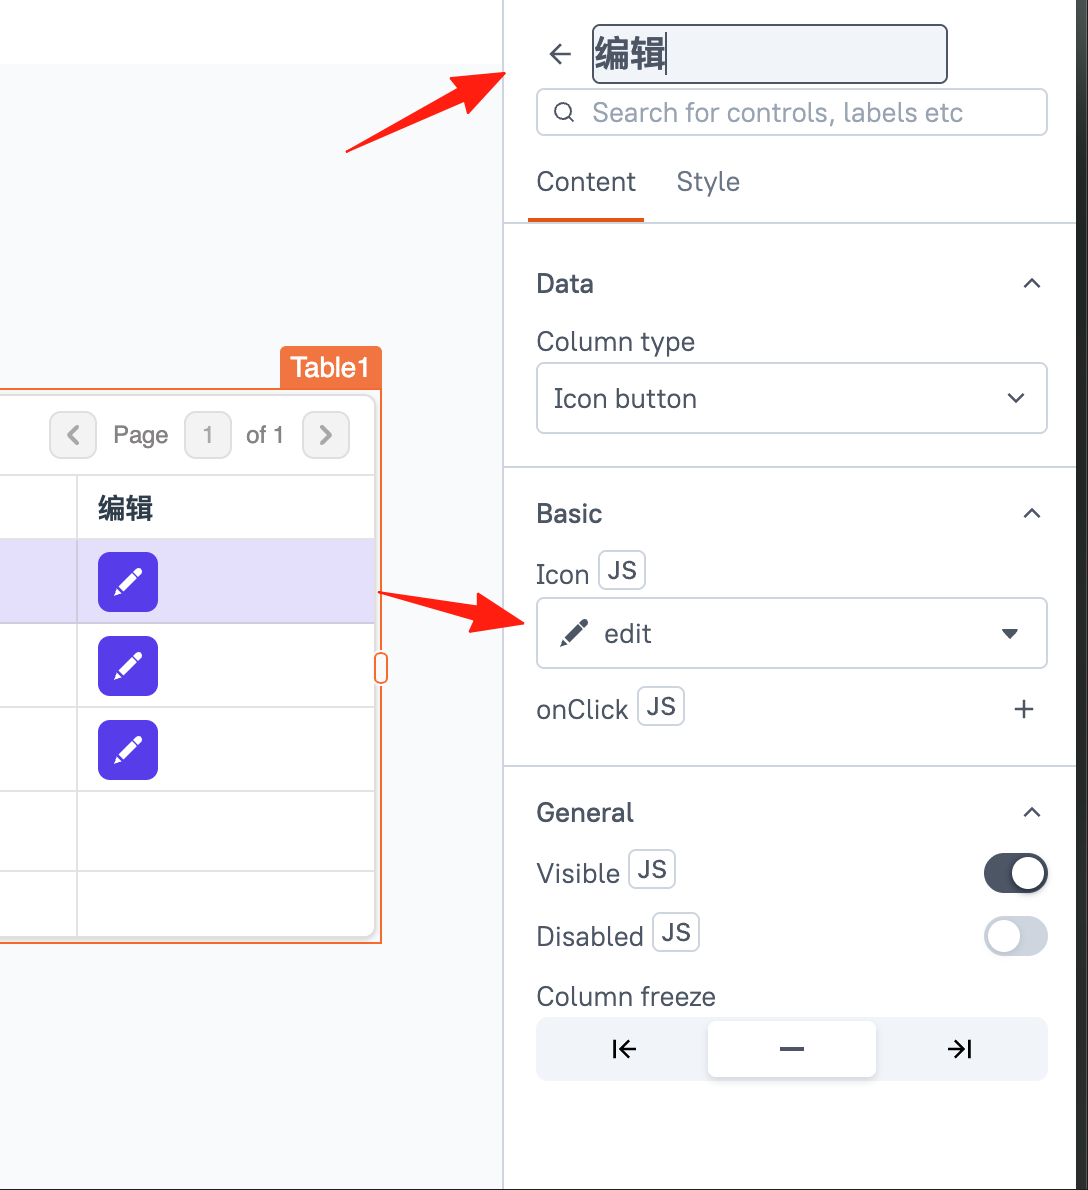
- For its onClick, write:
storeValue('editingUser', Table1.selectedRow); showModal('EditModal'); - Create an edit Modal (named 'EditModal'), its logic is similar to the add modal, just use an UPDATE SQL statement.
Delete Functionality:
- Add another column for the delete button. You can search for a delete icon.
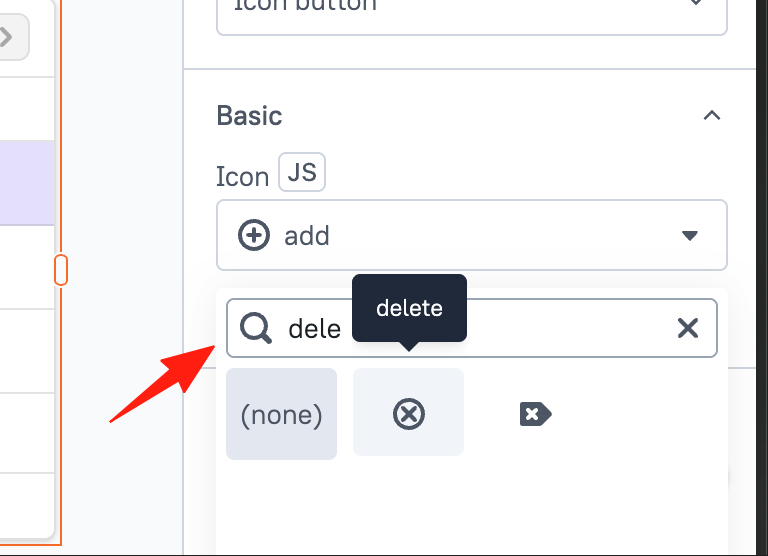
- For its onClick, write:
showModal('ConfirmModal'); // Show a confirmation dialog first - In the confirmation dialog's confirm button, execute a delete query:
DELETE FROM users WHERE id = {{Table1.selectedRow.id}};
Useful Tips
1. Data Refresh
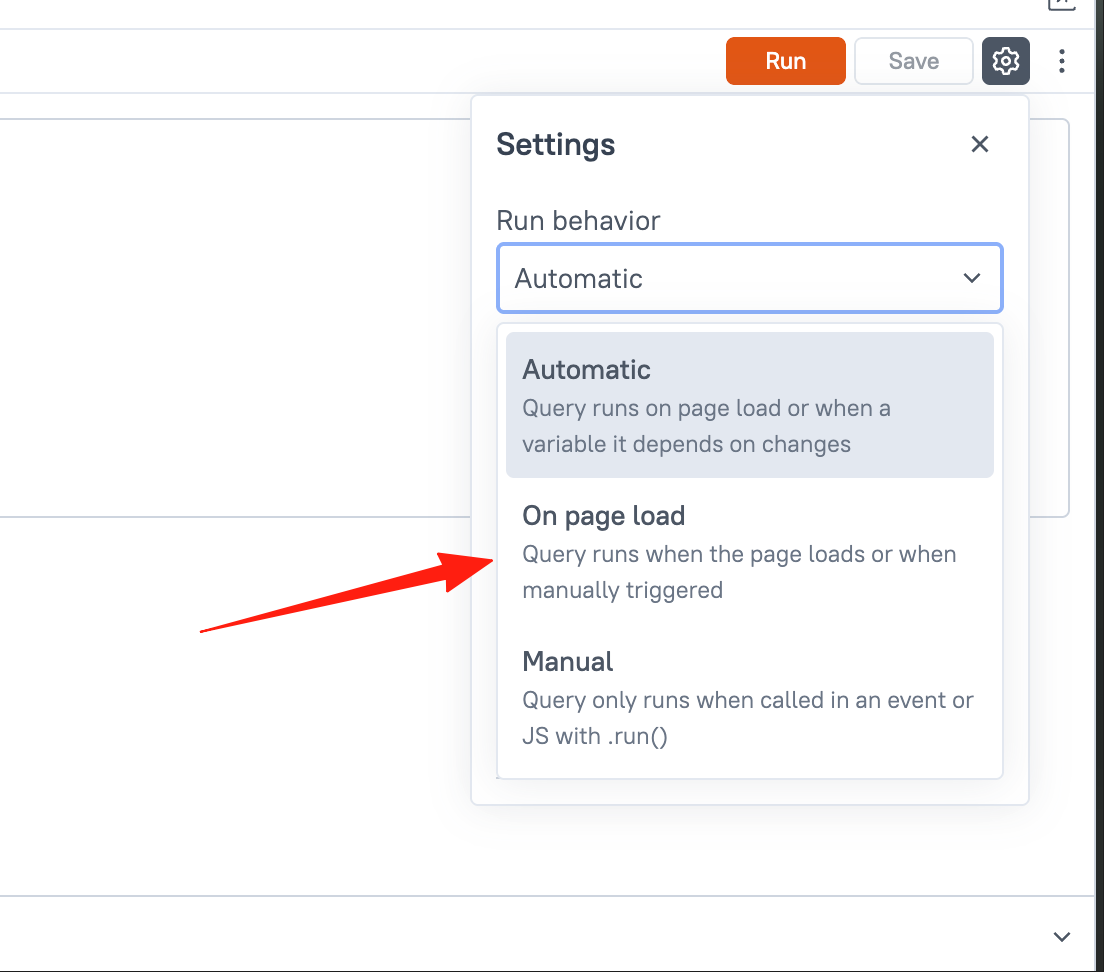
Often you need to refresh data after an operation. You can enable Run query on page load in the query's Settings, or manually call yourQuery.run() in your code.
2. Data Validation
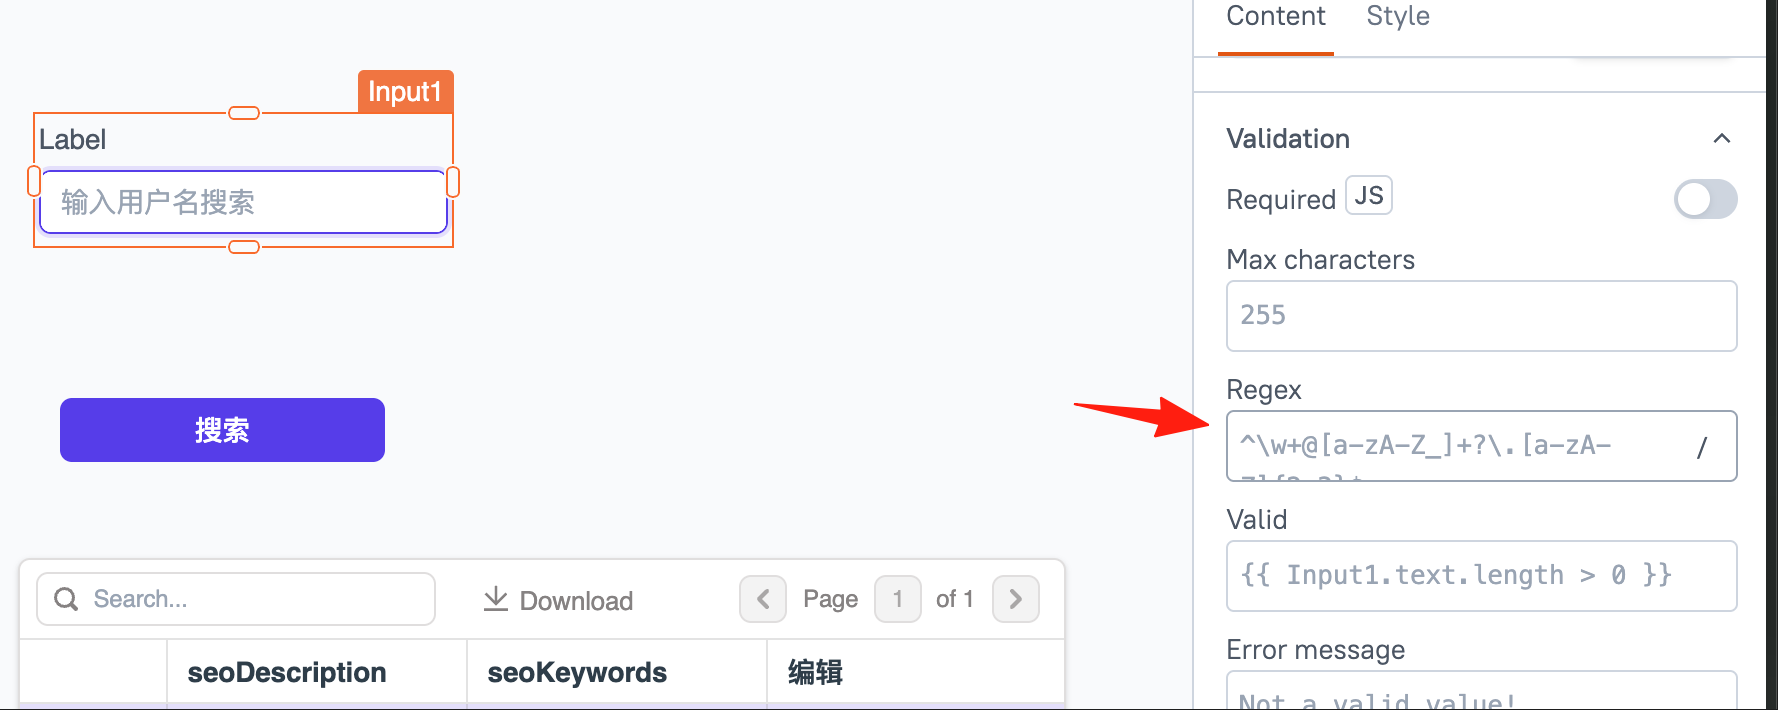
Input components have a Regex property where you can write regular expressions for validation. For example, for email validation:
^[^\s@]+@[^\s@]+\.[^\s@]+$
3. Permission Control
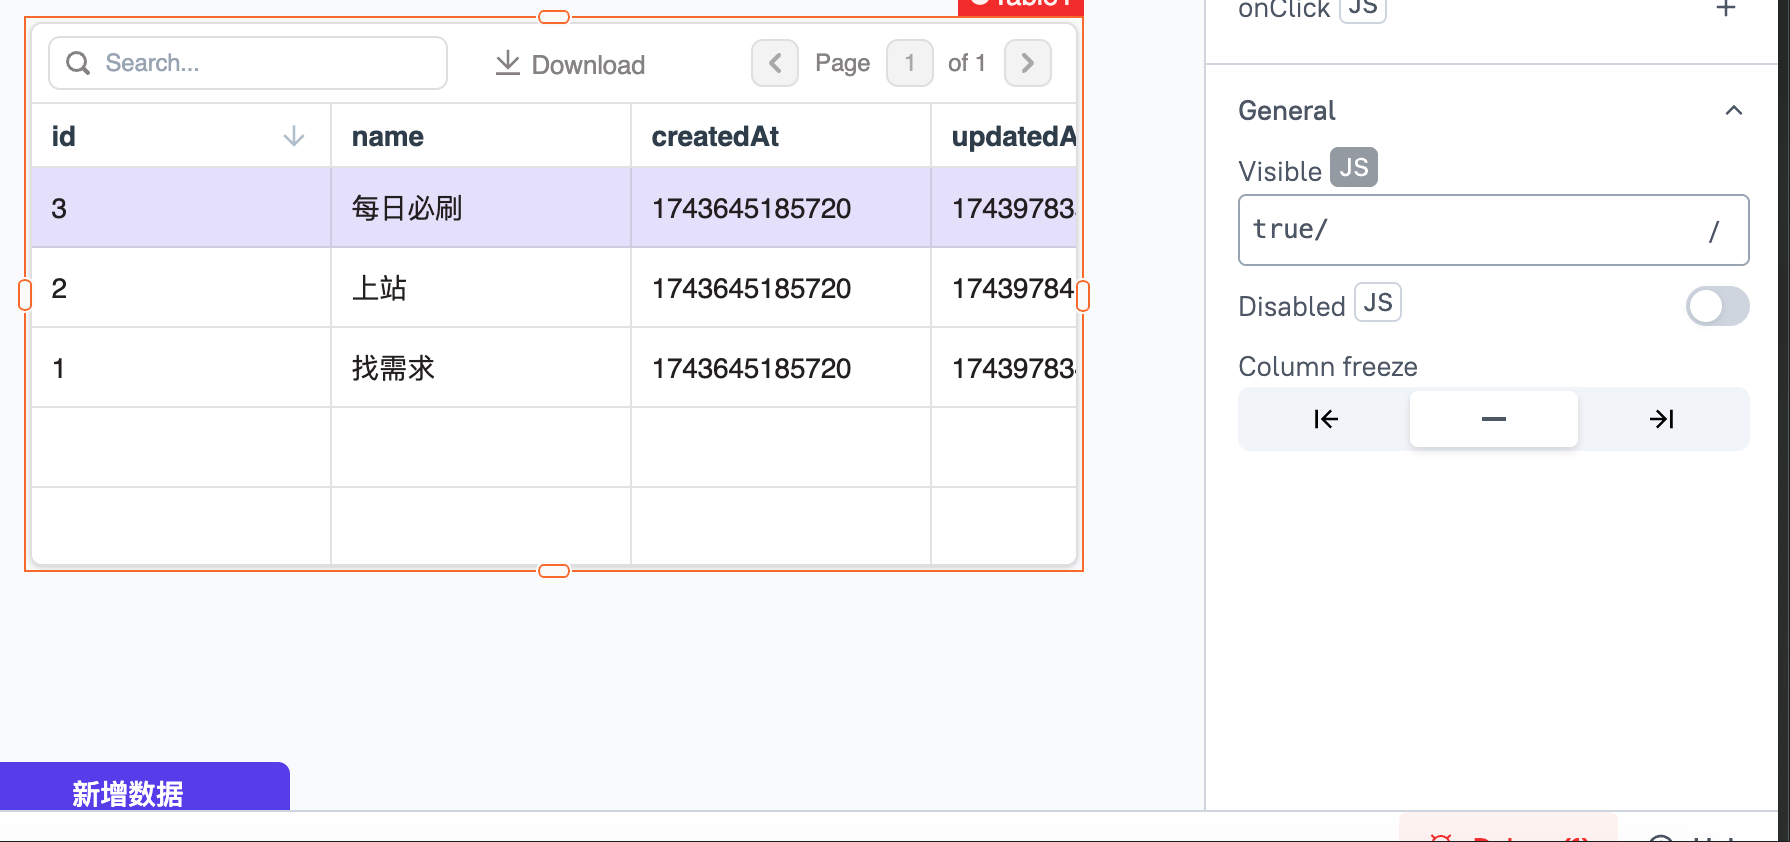
Table columns have a Visible property that can be controlled with JS expressions:
{{appsmith.user.email === 'admin@example.com'}}
This way, you can control which buttons are visible only to administrators.
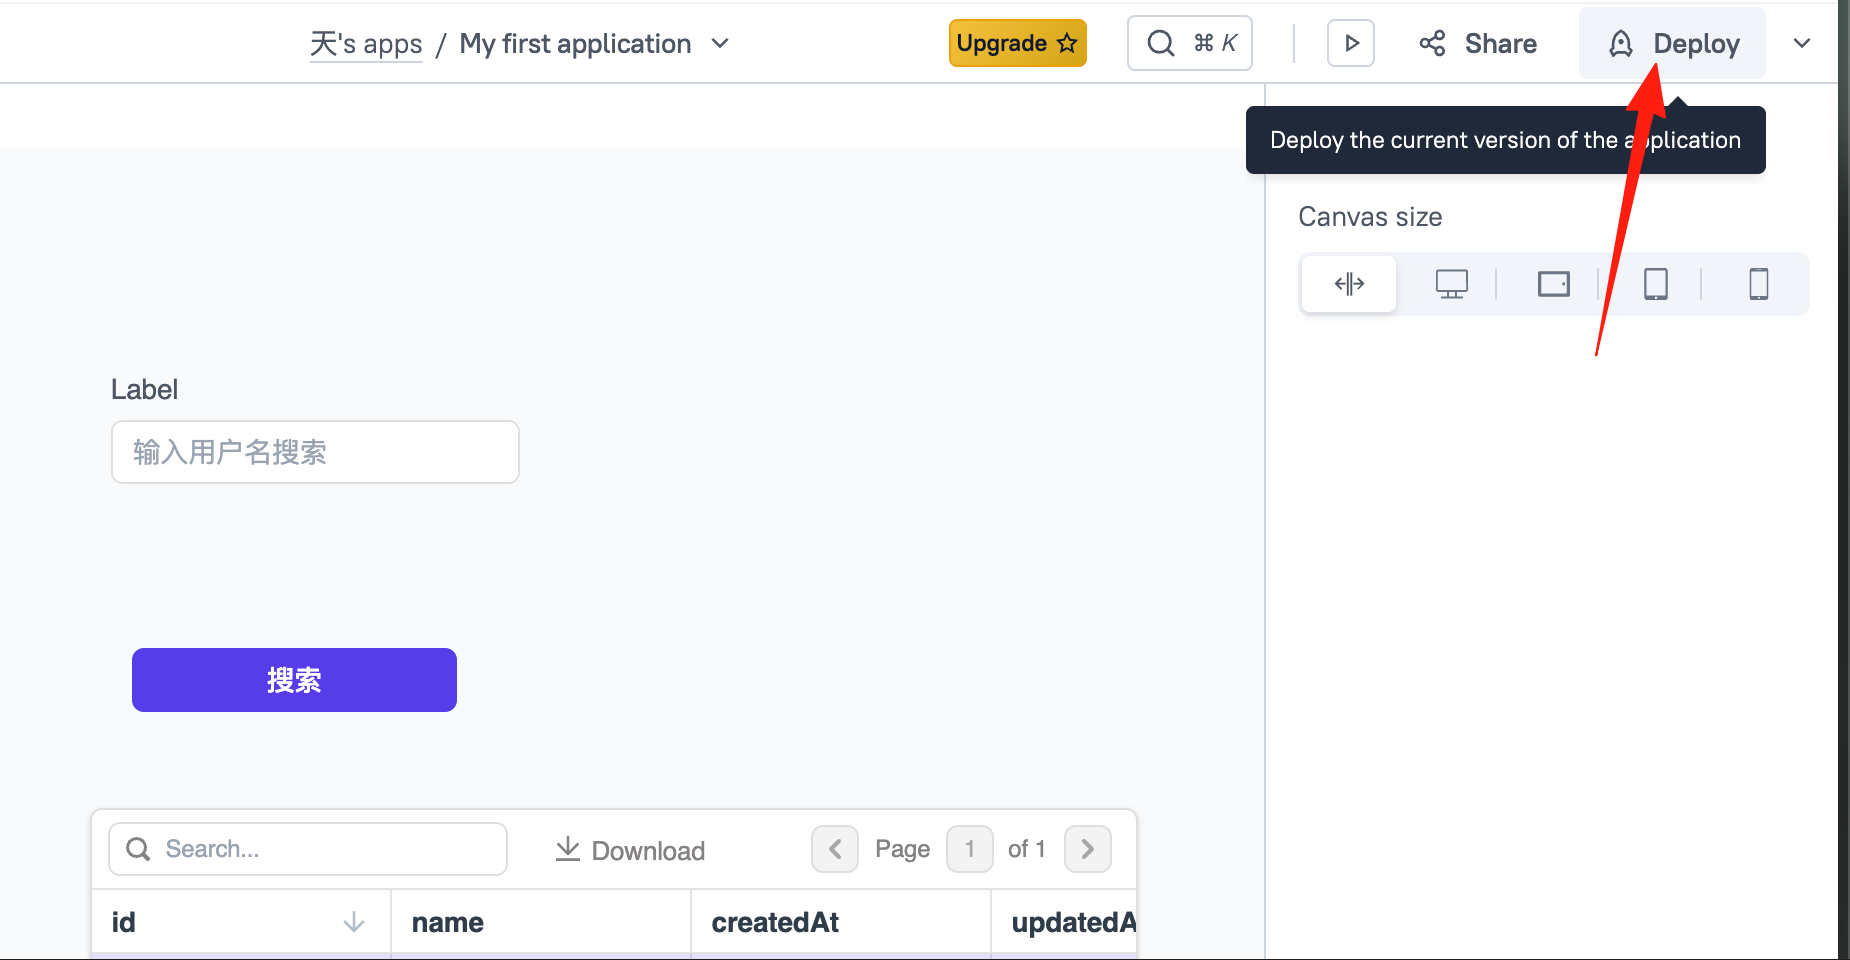
Finally, click the Deploy button in the top right corner to publish and view your new page.
Final Words
Appsmith isn't a silver bullet, but it can save you a lot of effort. It's particularly useful for scenarios requiring rapid development of internal tools. You don't have to start from scratch setting up frameworks, component libraries, or writing boilerplate code; you can focus on the business logic.
Getting started suggestion: Begin by creating a simple query page to familiarize yourself with the operations. Then gradually add features and experiment with interactions between components. The official documentation is fairly well-written; if you run into problems, check it out—you'll likely find answers there.
GitHub Repository: https://github.com/appsmithorg/appsmith