
Getting Started with Motia: Making Backend Development Painless
Have you ever encountered this situation: you write a backend service, use Express for APIs, node-cron for scheduled tasks, BullMQ for queues, and then you also need a Python script to run AI models. In the end, the project has seven or eight different frameworks, and you feel like smashing your computer when debugging.
Motia is here to solve this problem. Simply put, it unifies all your backend needs—APIs, background jobs, scheduled tasks, AI workflows—all handled with a single framework.
https://appstore.lazycat.cloud/#/shop/detail/com.tiantian.motia
How to Use
After installing the application, open the home page. There will be an initial guide page explaining the usage. If you closed it, you can reopen it from the top-right corner.
The main features of Motia's built-in Workbench are:
1. Flows
You can see how all the Steps are connected, which one triggers which, all at a glance.
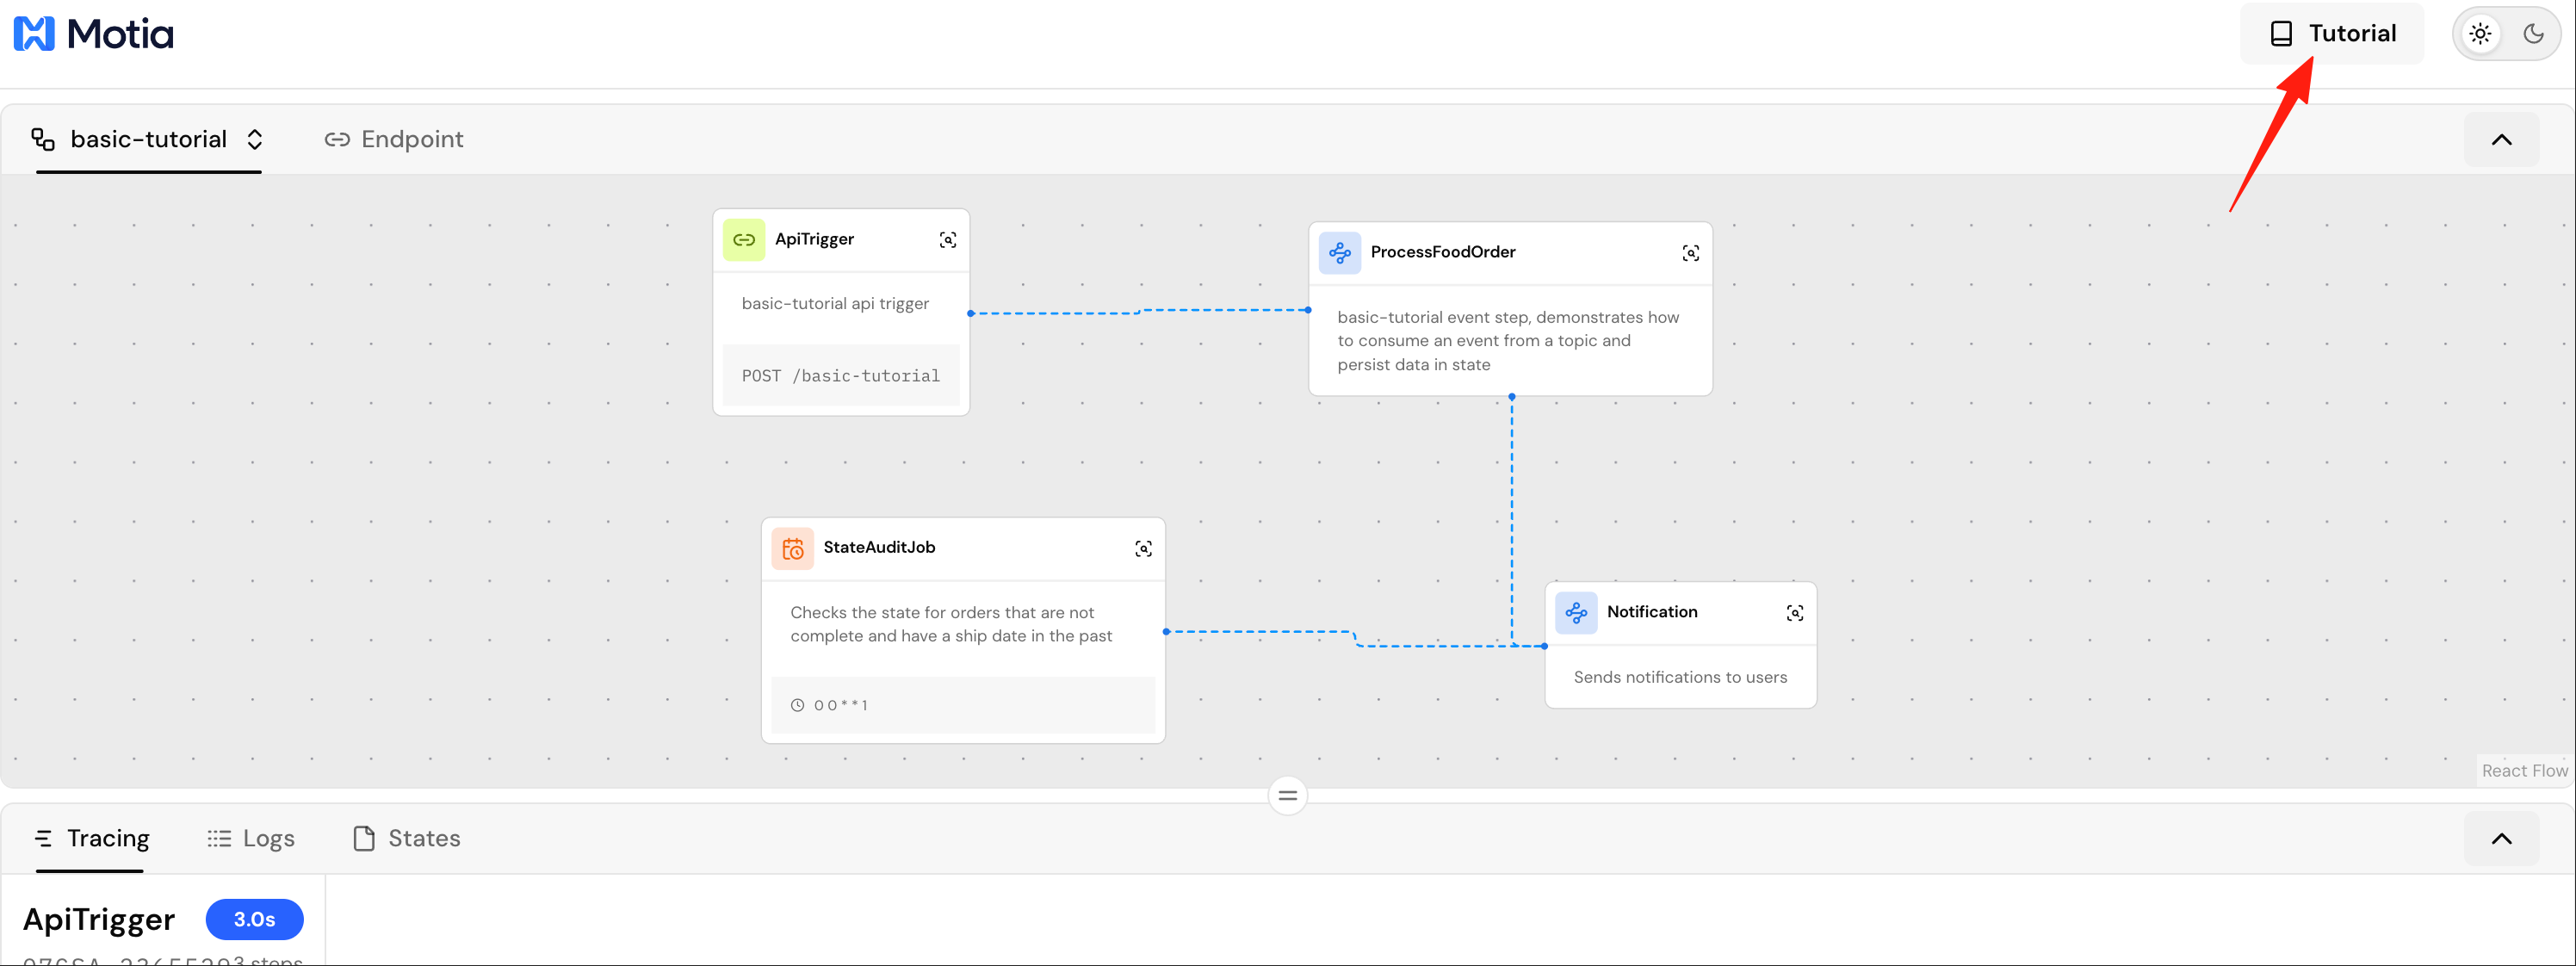
It provides us with a usage example by default. Click the magnifying glass in the top right corner to see the details.
The flow diagram shows an end-to-end chain for a "Basic Tutorial": • ApiTrigger: Exposes an HTTP interface POST /basic-tutorial • StateAuthJob: Checks status/date based on the order data you provide (example logic) • ProcessFoodOrder: Consumes the event and persists data to State • Notification: Sends a notification to the user (example logic)
Quickly Debug the Workflow:
- Trigger Test: Click ApiTrigger → Test the API in the pop-up panel
- View Flow: Observe the data flow between nodes (with animation effects)
- Check Logs: Switch to the Logs tab to view detailed execution logs
- Verify Results: Check in States whether the data was stored correctly
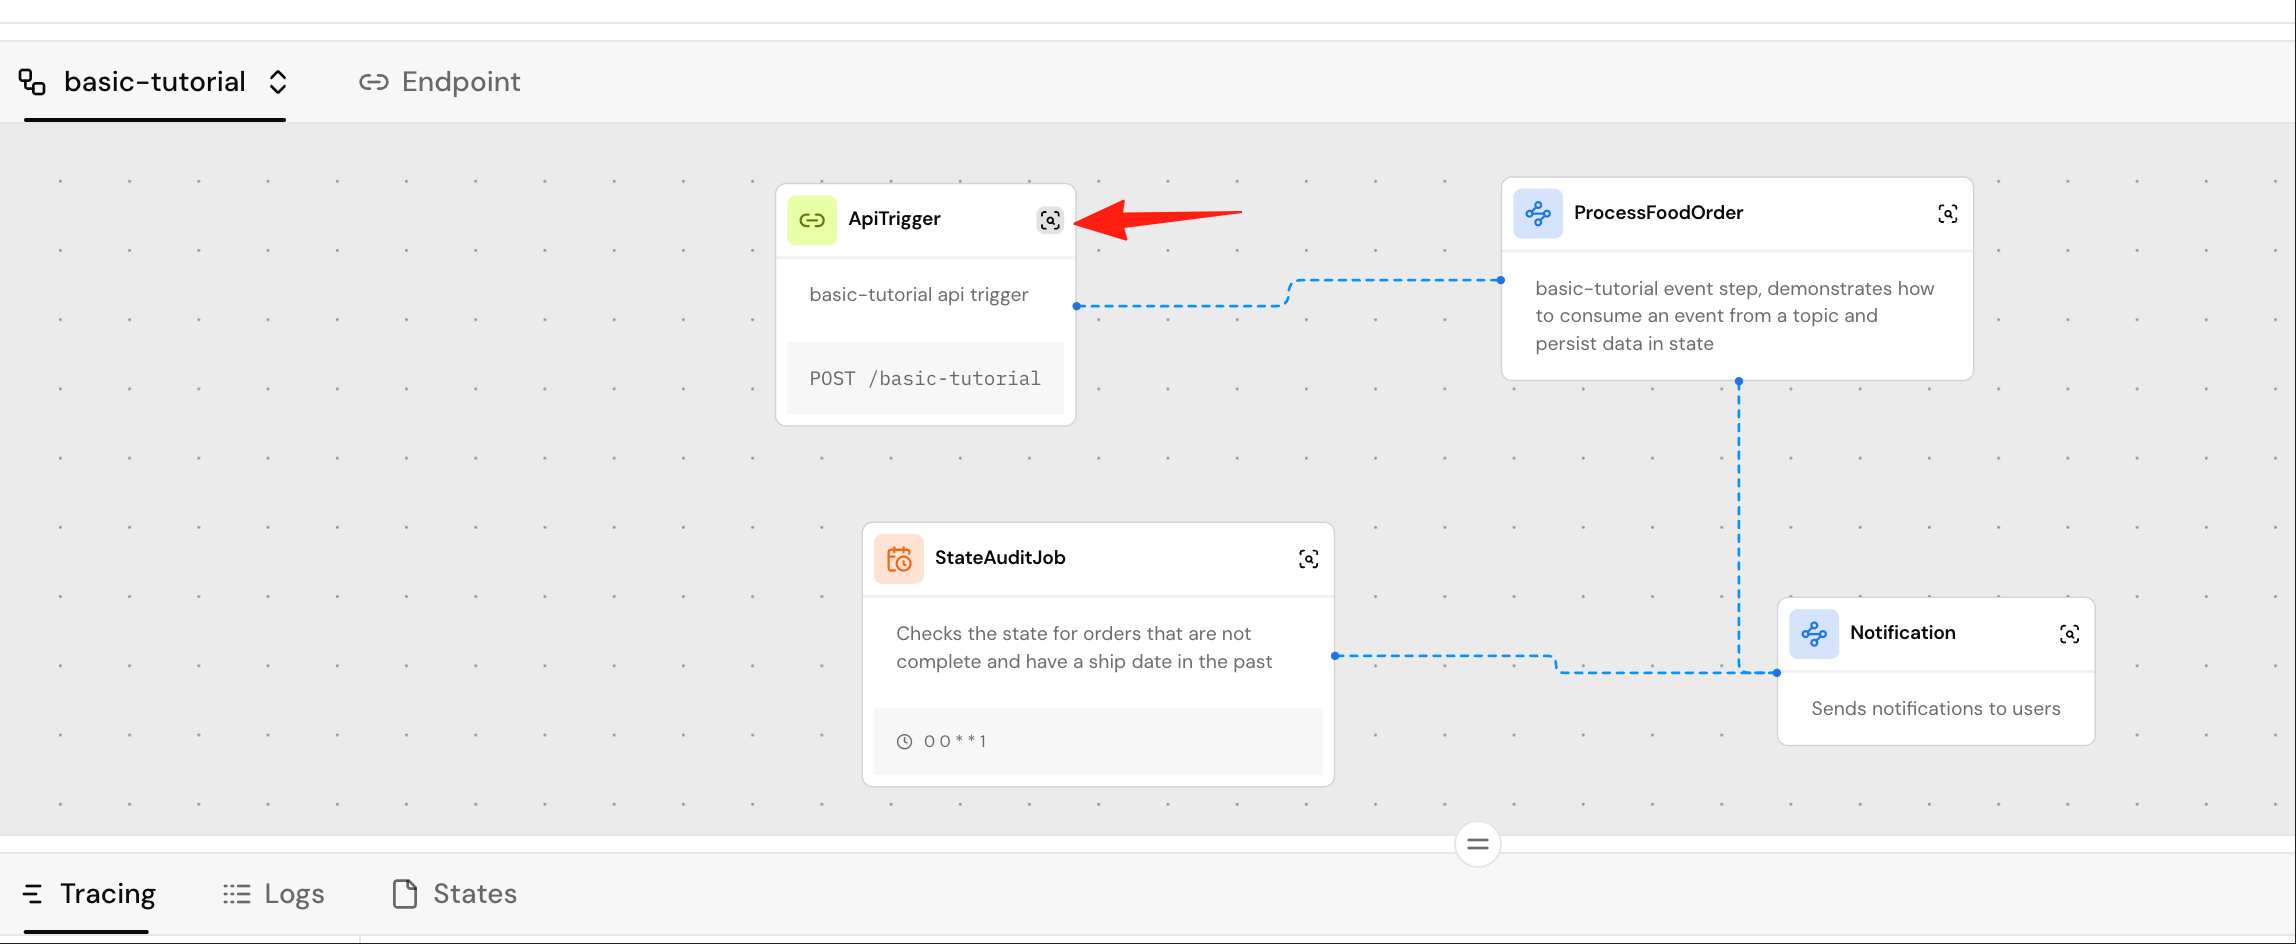
The core concept of Motia is just one: Step. Think of it as a functional unit containing your business logic.
Each Step has three elements:
- Trigger: How to start this Step
- Processing Logic: What the Step does
- Output: Can be a return value, emitting an event, updating state, etc.
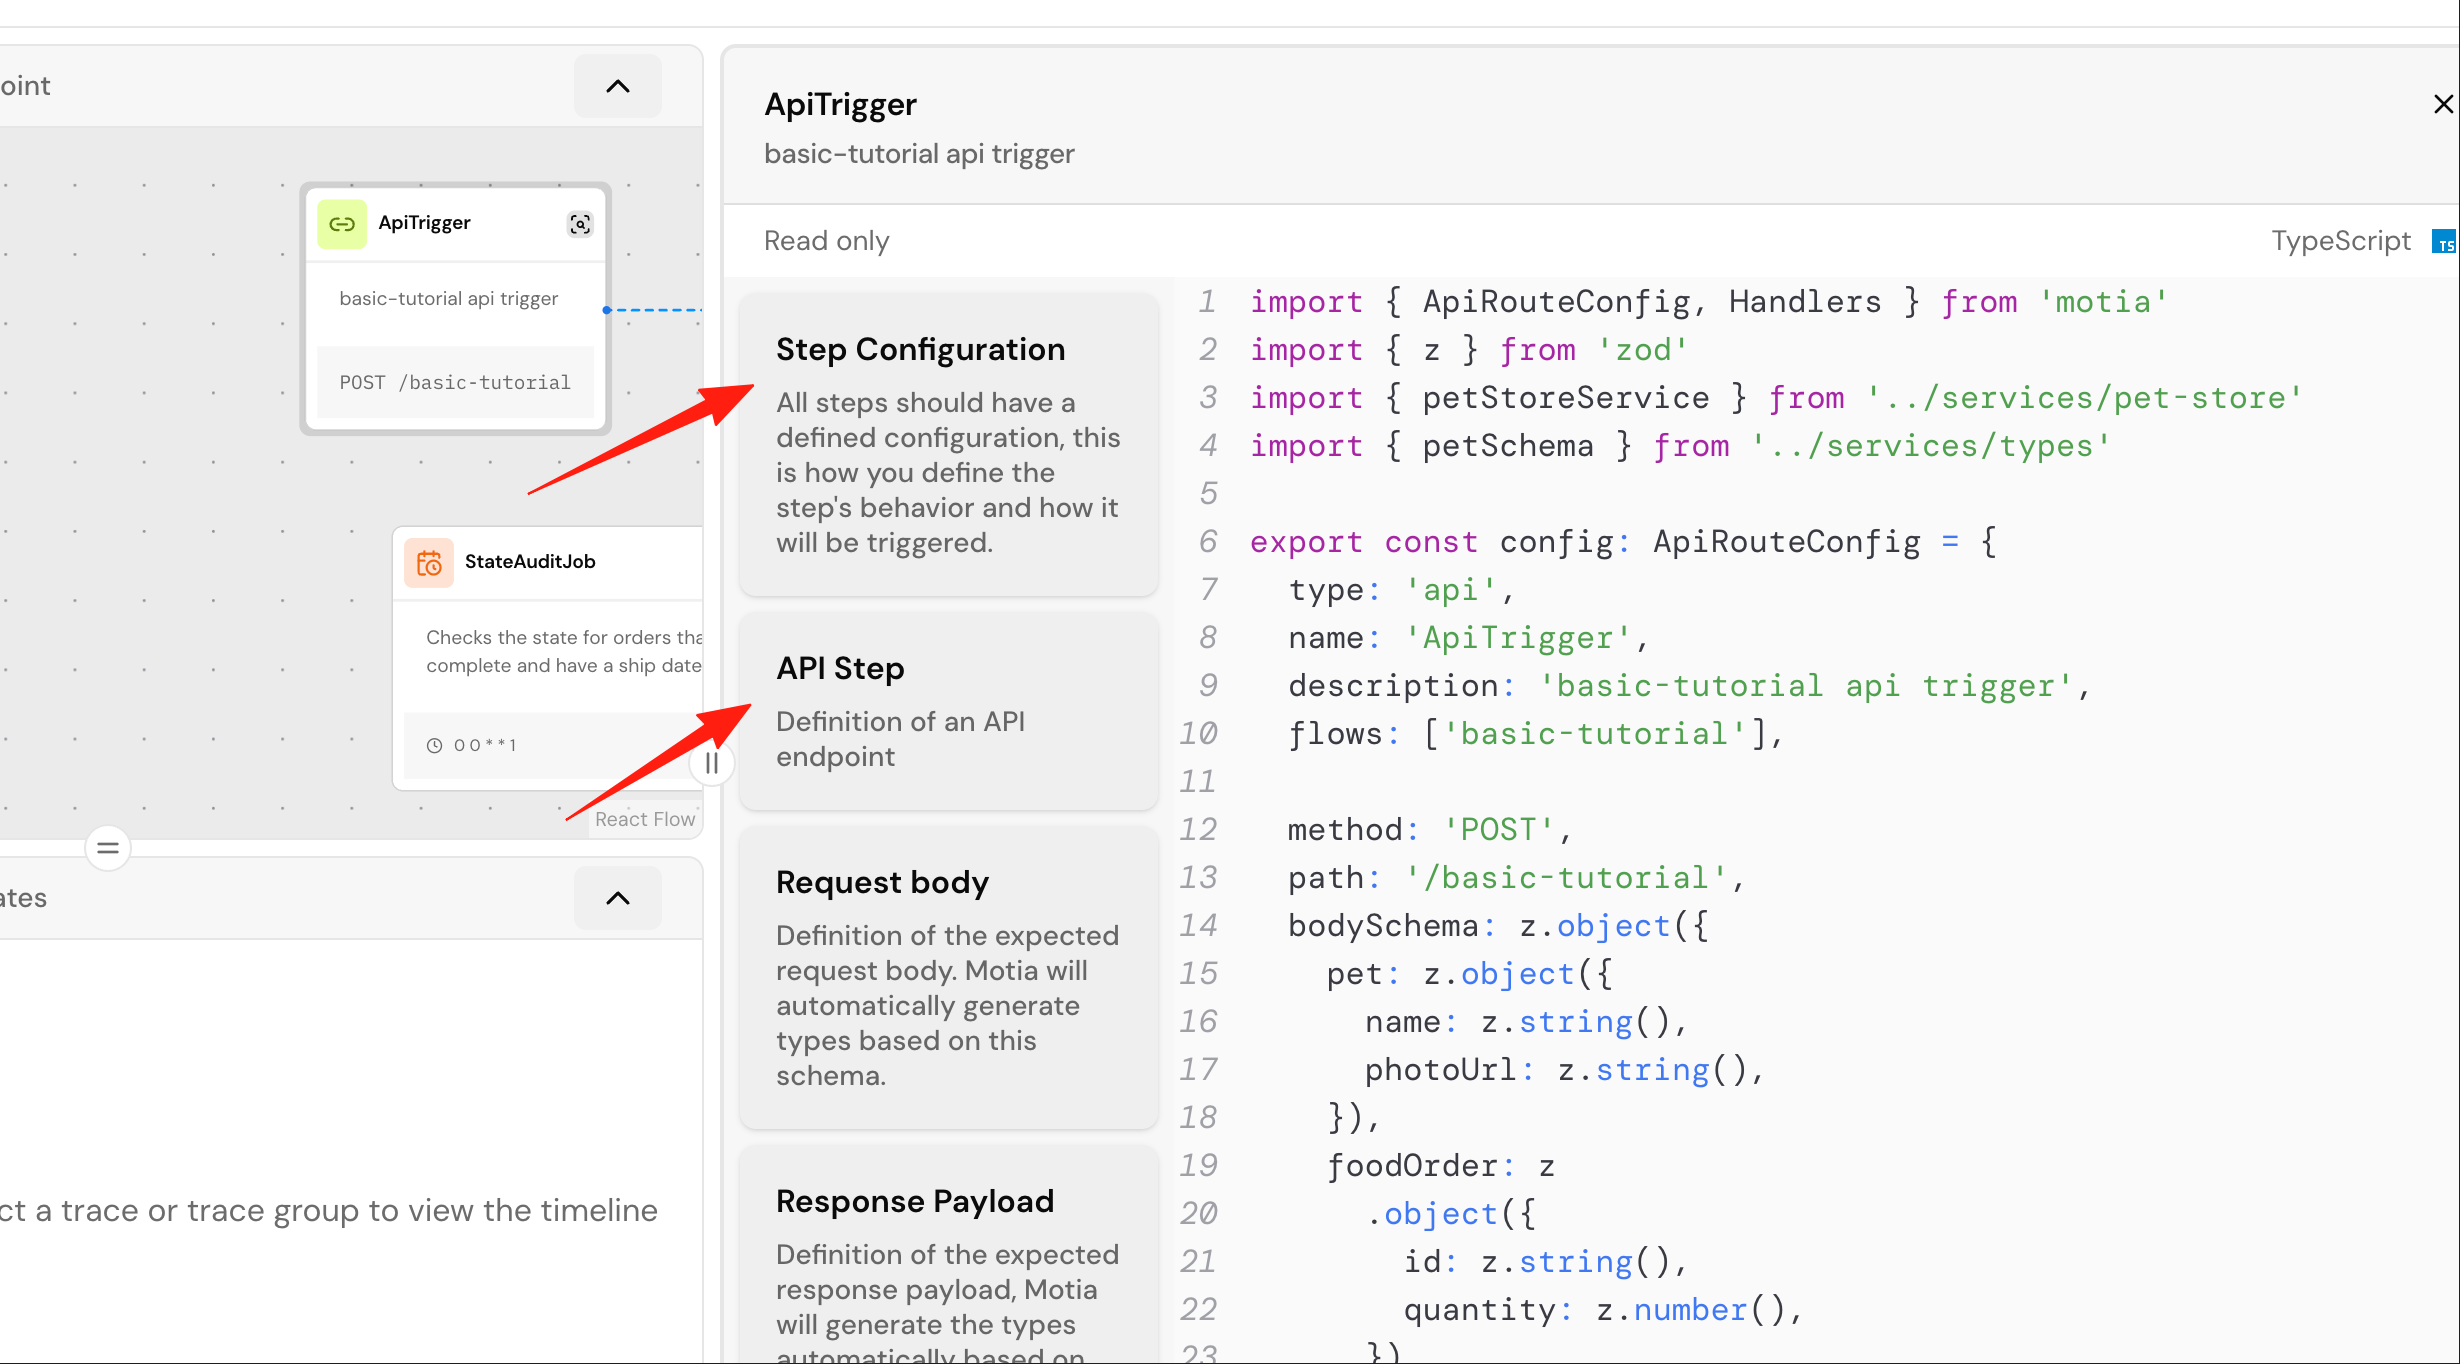
2. Endpoints
Test APIs directly on the interface, no need to open Postman. You can also see the return results in real-time.
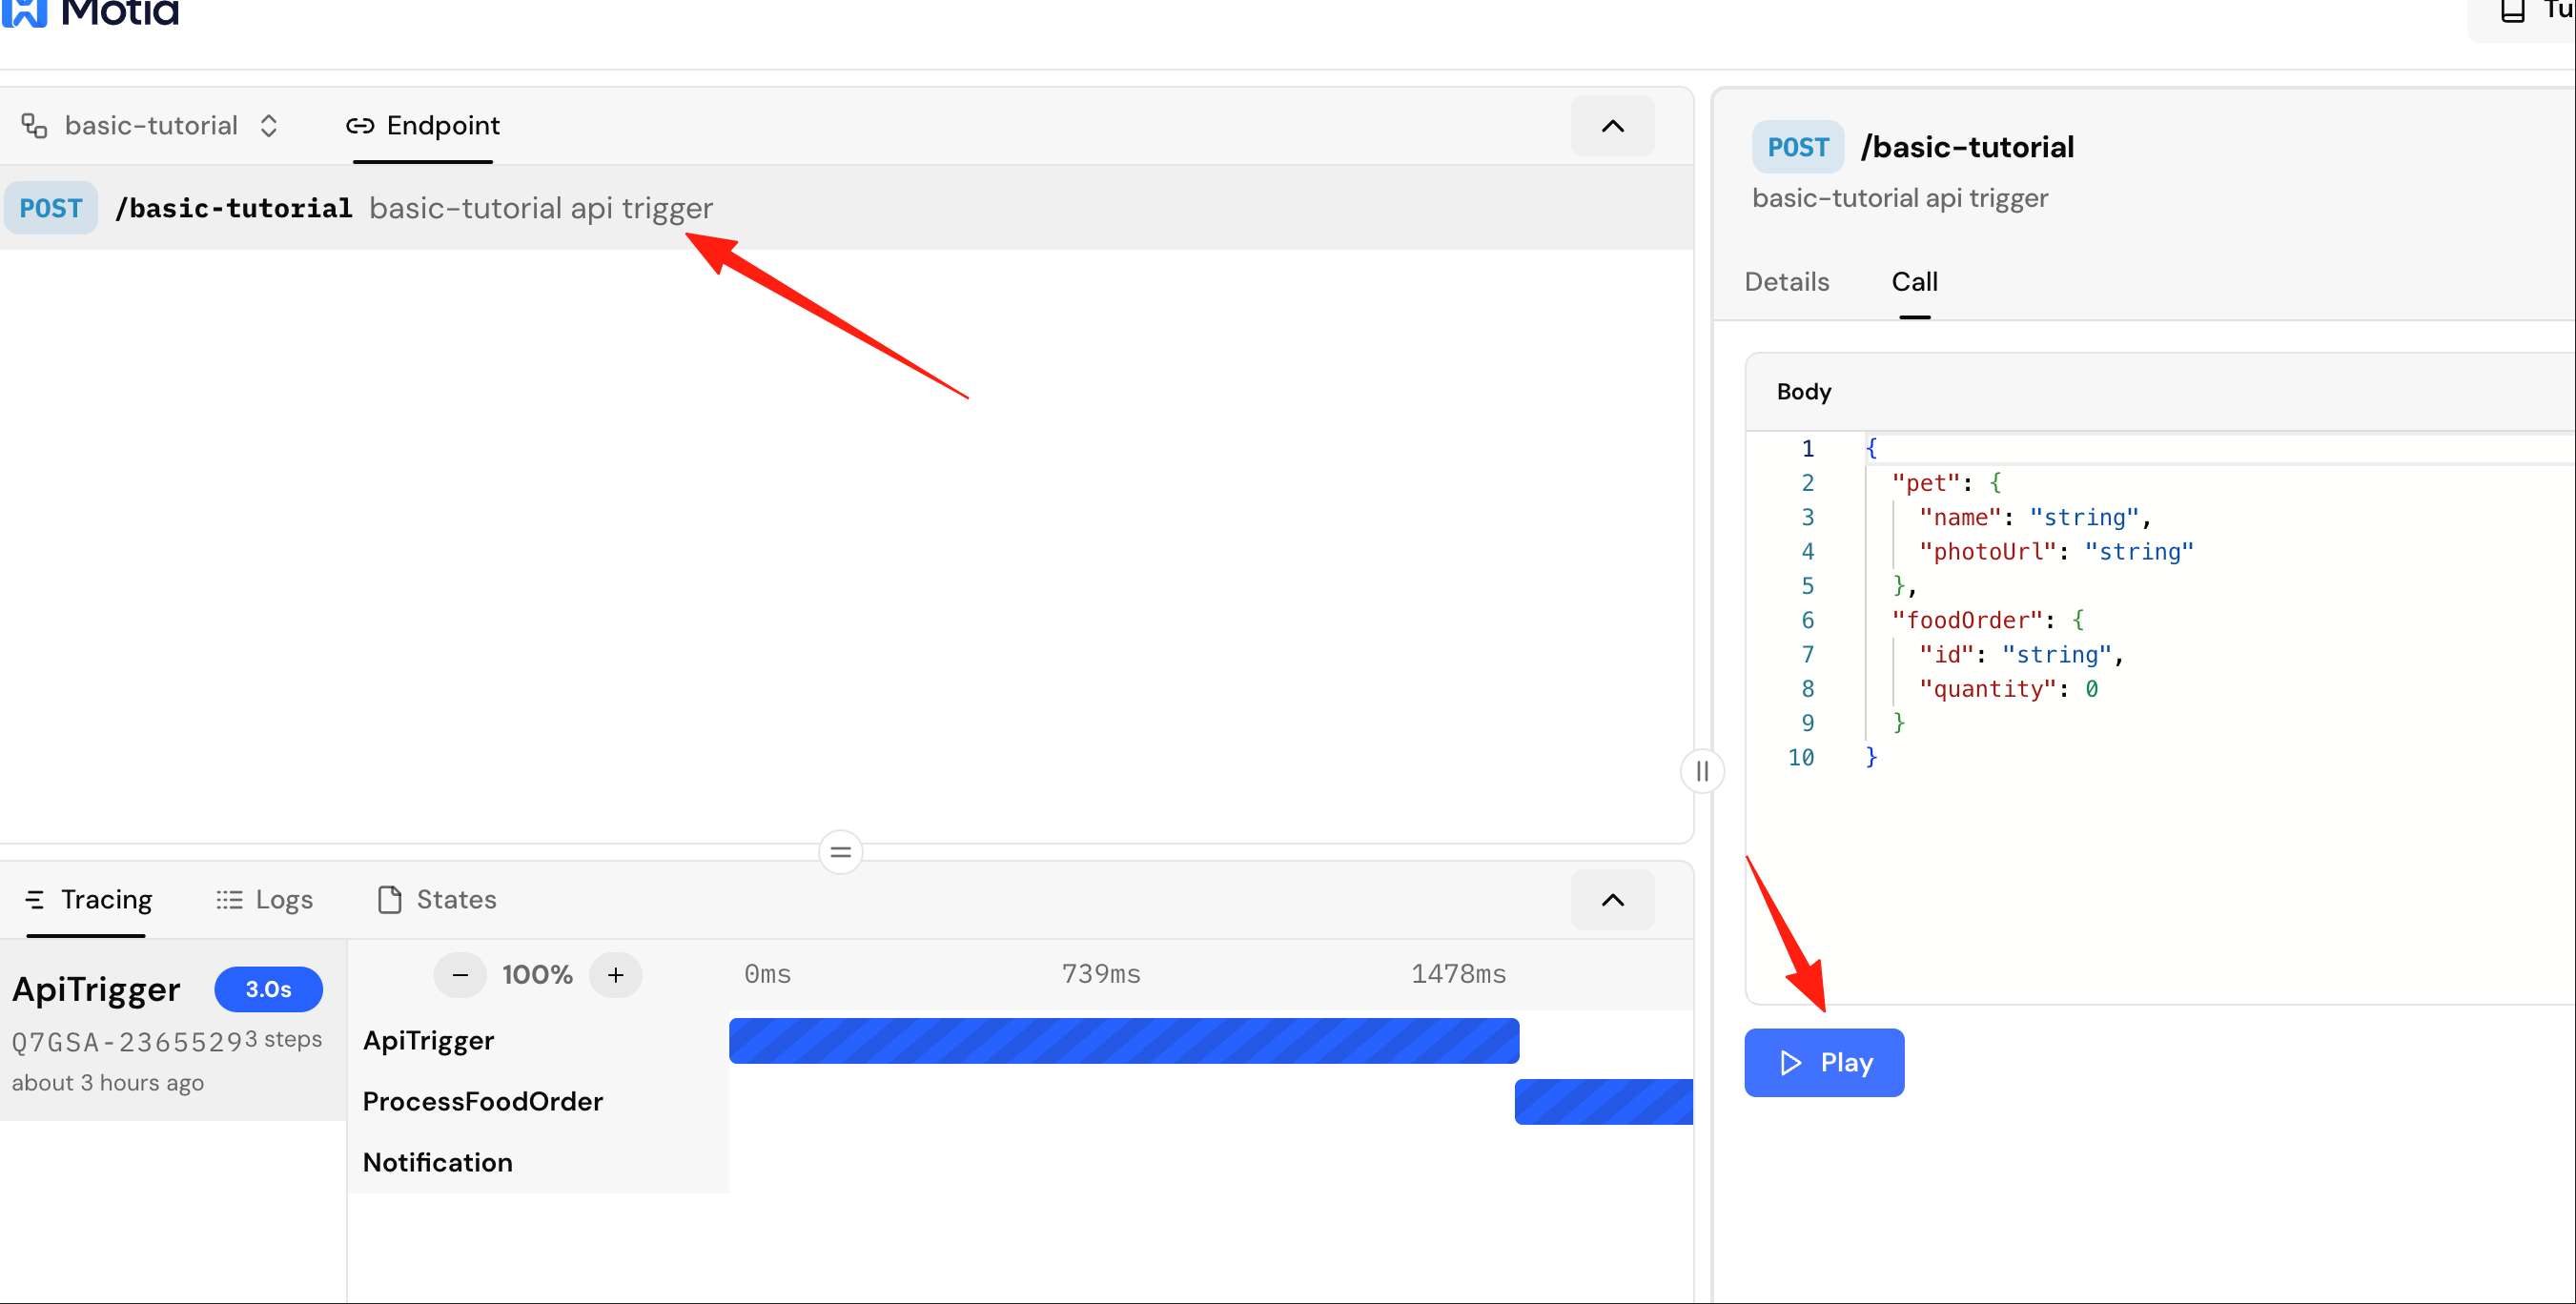
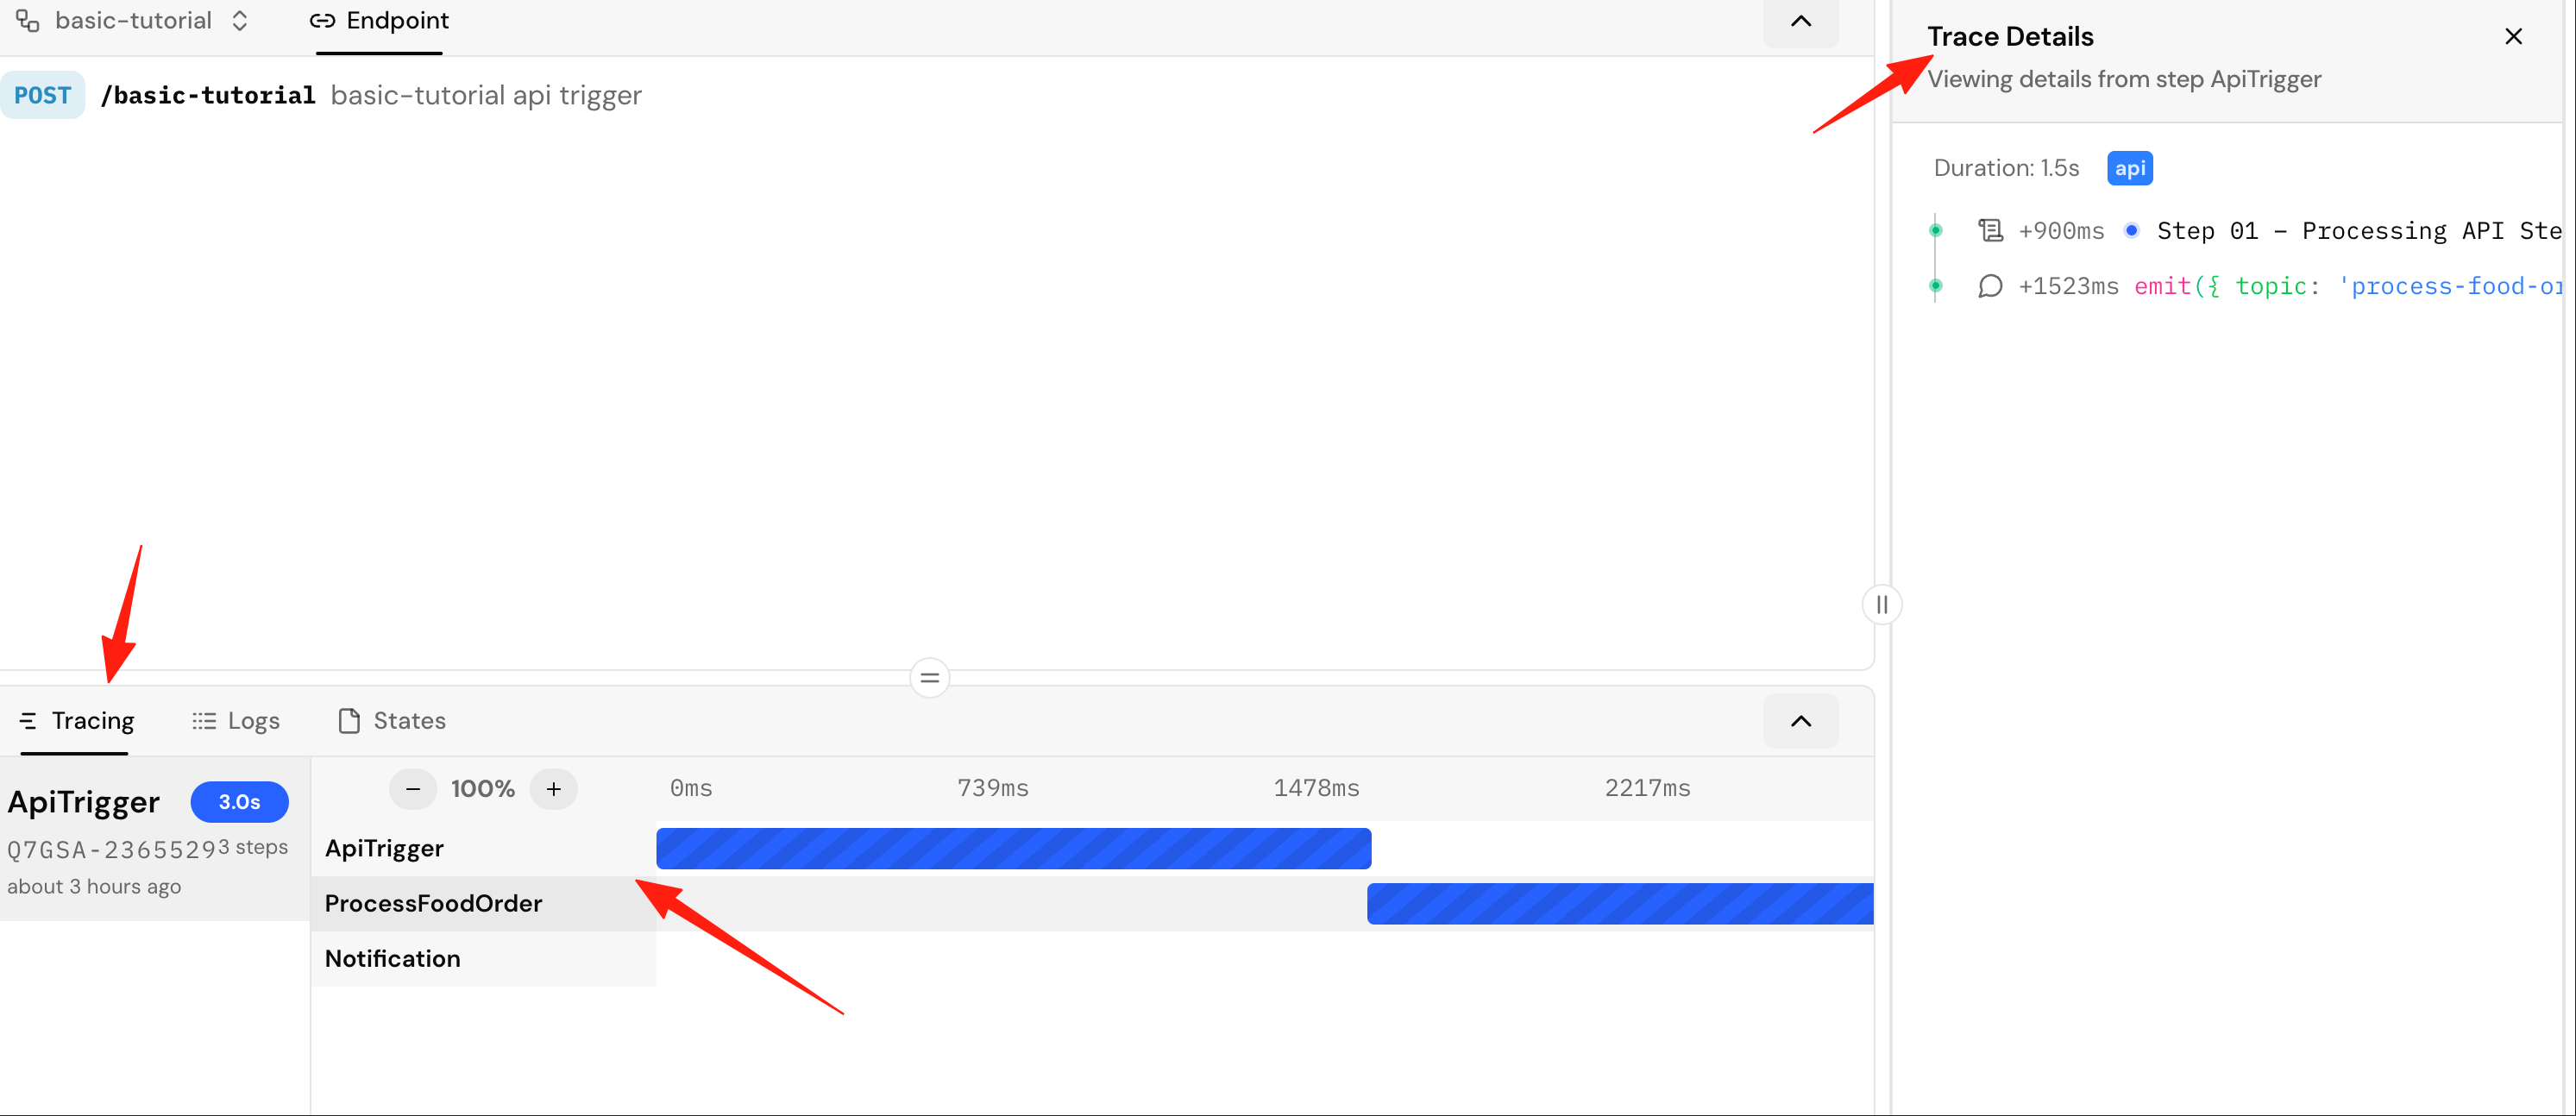
3. Traces
- After sending a request, check the bottom Tracing panel
- Click on a specific Trace ID to view the timeline
- See the execution order and time consumption for each step Every execution has a complete trace record, allowing you to see:
- Which Steps were executed
- How much time each Step took
- Intermediate state changes
- All log outputs
4. State
You can directly view and modify the contents of the key-value store, which is especially convenient for debugging.
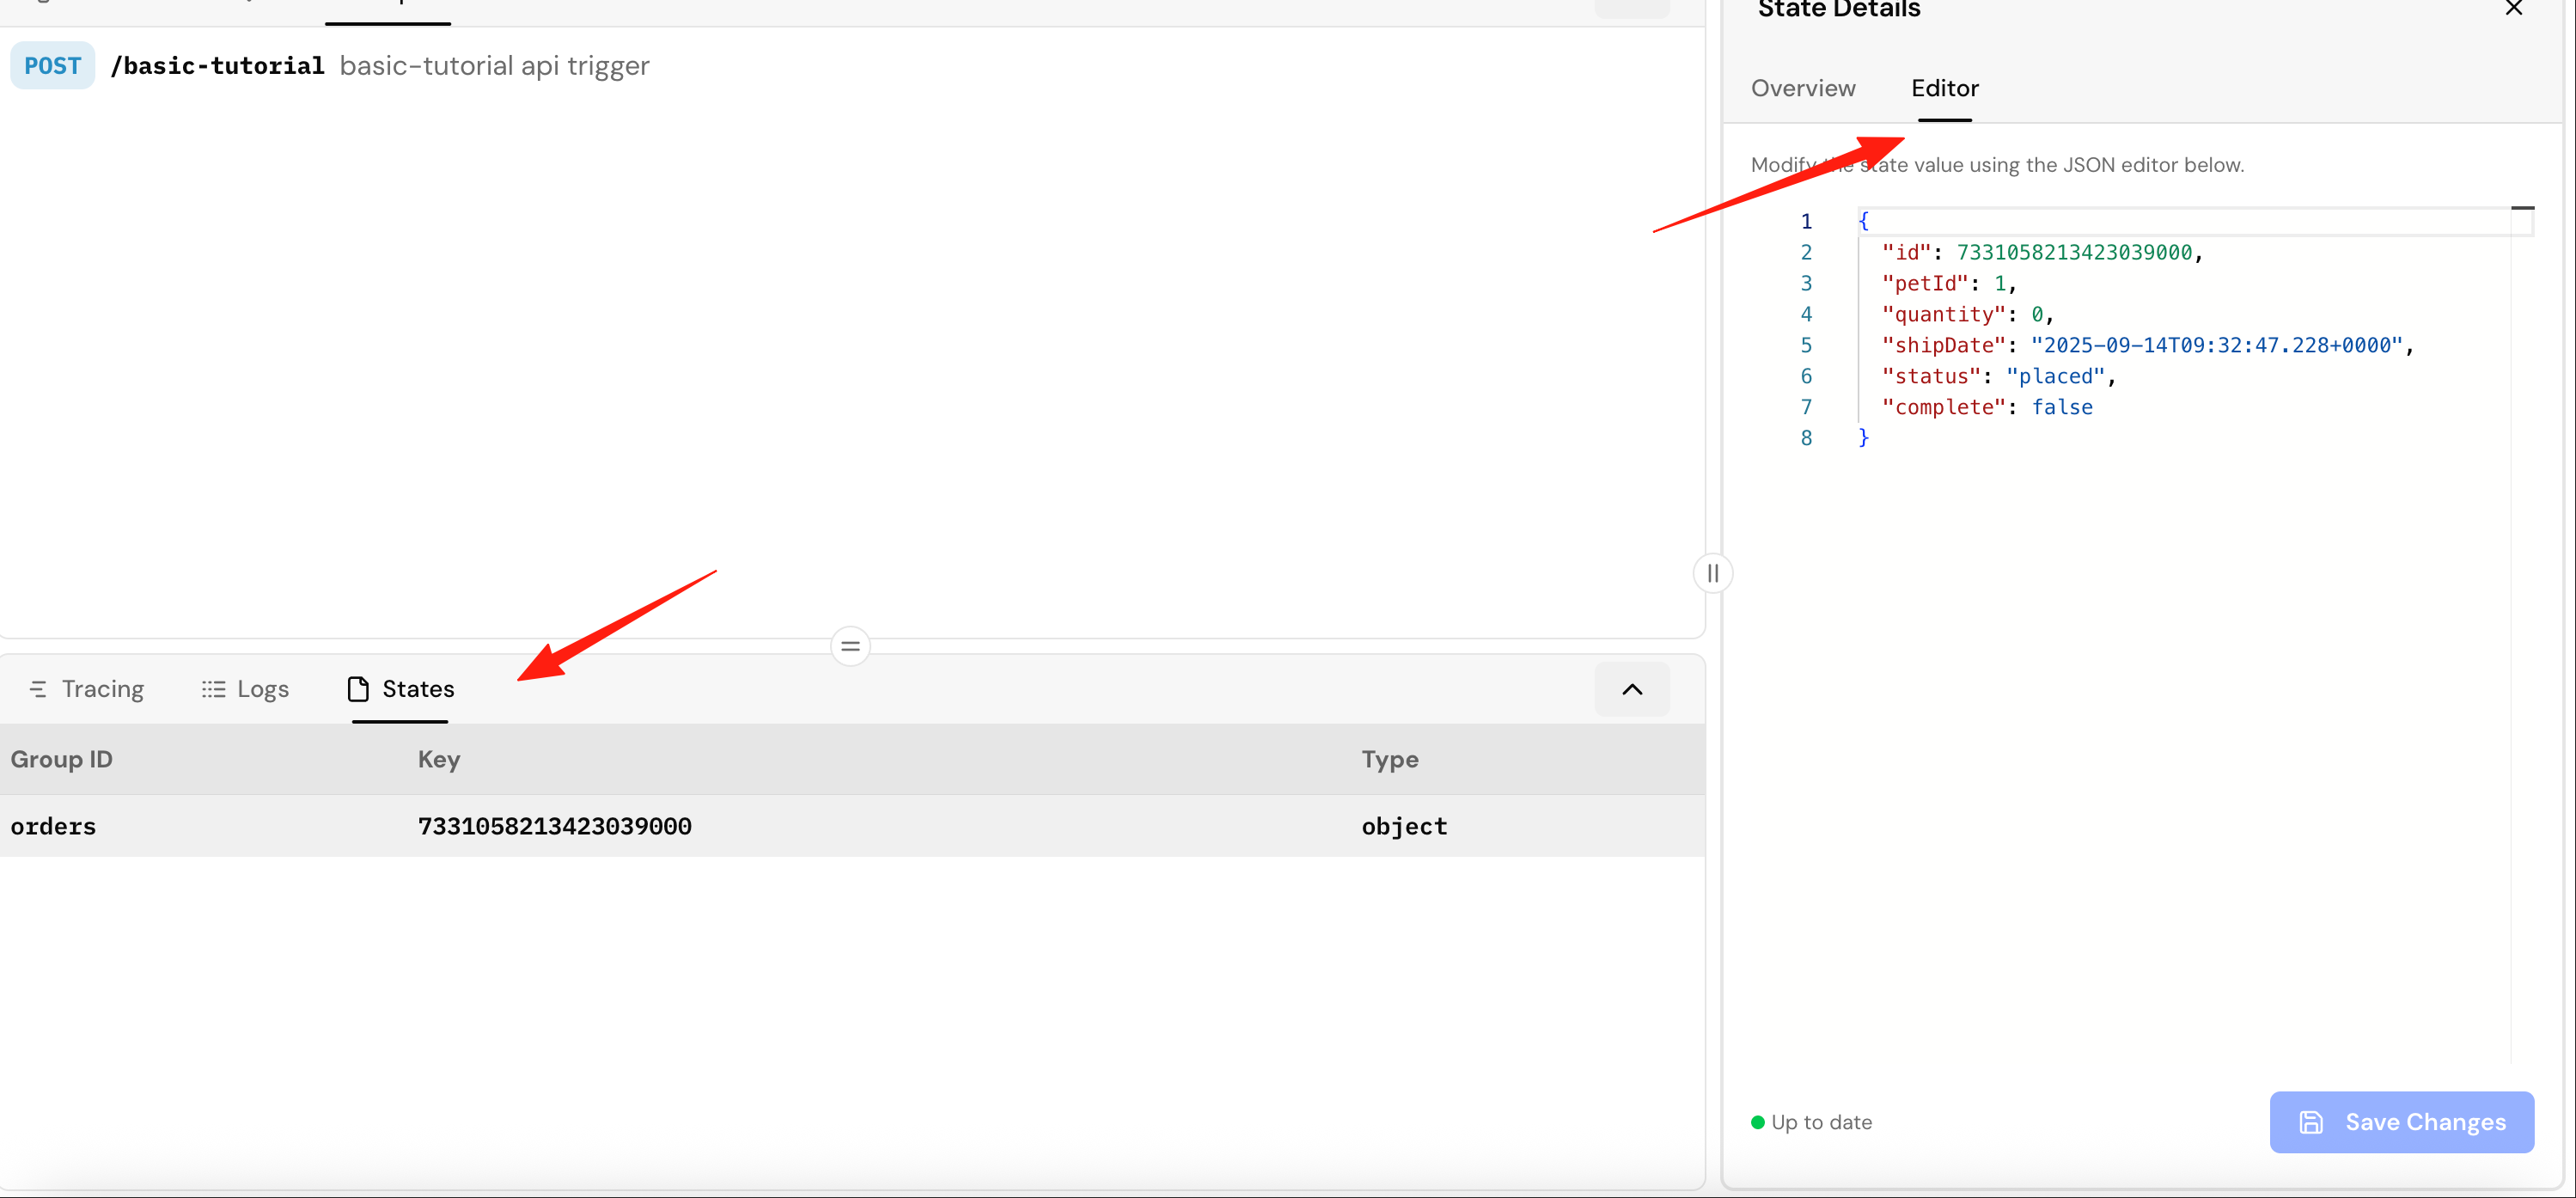
Through this visual interface, backend development is no longer a black box, but a completely transparent, observable, and debuggable system.
The above example demonstrates the basic usage of workflows. If you want to customize your own API interface, you can do it like this:
- Open Application Data -> motia-app-steps
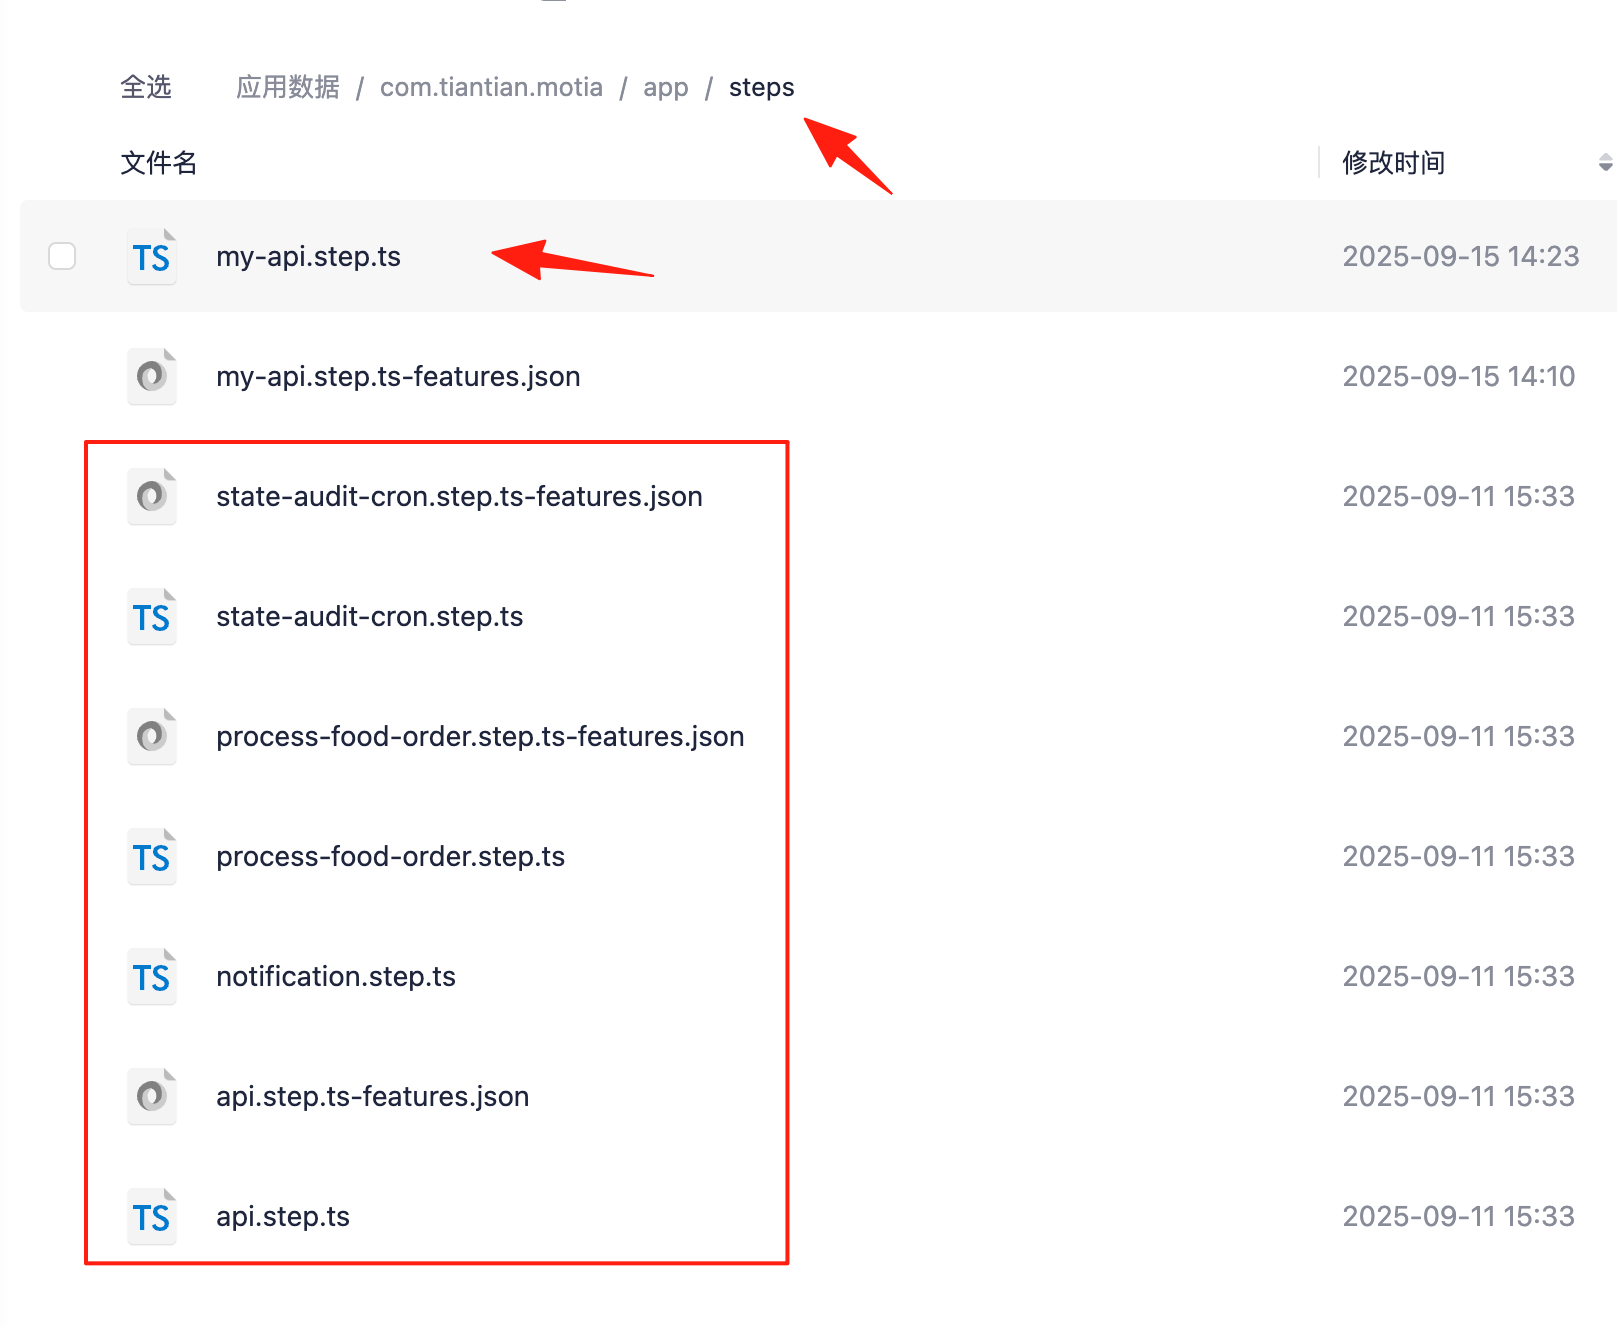
You can see that the 4 workflow files currently in the console are stored here.
Among them, **.step.ts is the workflow node file.
**.step.ts-fetures.json tells the editor which lines contain what content (for syntax highlighting), for example:
Lines 6-30 are configuration
Lines 32-50 are the handler
I created a new file named my-api.step.ts with the following content:
`import { ApiRouteConfig, Handlers } from 'motia'
import { z } from 'zod'

export const config: ApiRouteConfig = {
  type: 'api',
  name: 'MyCustomAPI',
  description: '我的自定义API接口',
  flows: ['basic-tutorial'],     // ⚠️ Important! Must be associated with a workflow

  method: 'GET',
  path: '/api/custom/hello',

  responseSchema: {
    200: z.object({
      message: z.string(),
      timestamp: z.string(),
      author: z.string()
    })
  },

  // If you need to emit events
  emits: ['my-custom-event']     // Optional
}

export const handler: Handlers['MyCustomAPI'] = async (req, { logger, emit }) => {
  logger.info('自定义API被调用')

  // Emit event (optional)
  await emit({
    topic: 'my-custom-event',
    data: { message: 'Hello from custom API' }
  })

  return {
    status: 200,
    body: {
      message: '你好,这是我的自定义API!',
      timestamp: new Date().toISOString(),
      author: '天天'
    }
  }
}
`
After creating the file above, you need to add this configuration to the app/motia-workbench.json file.
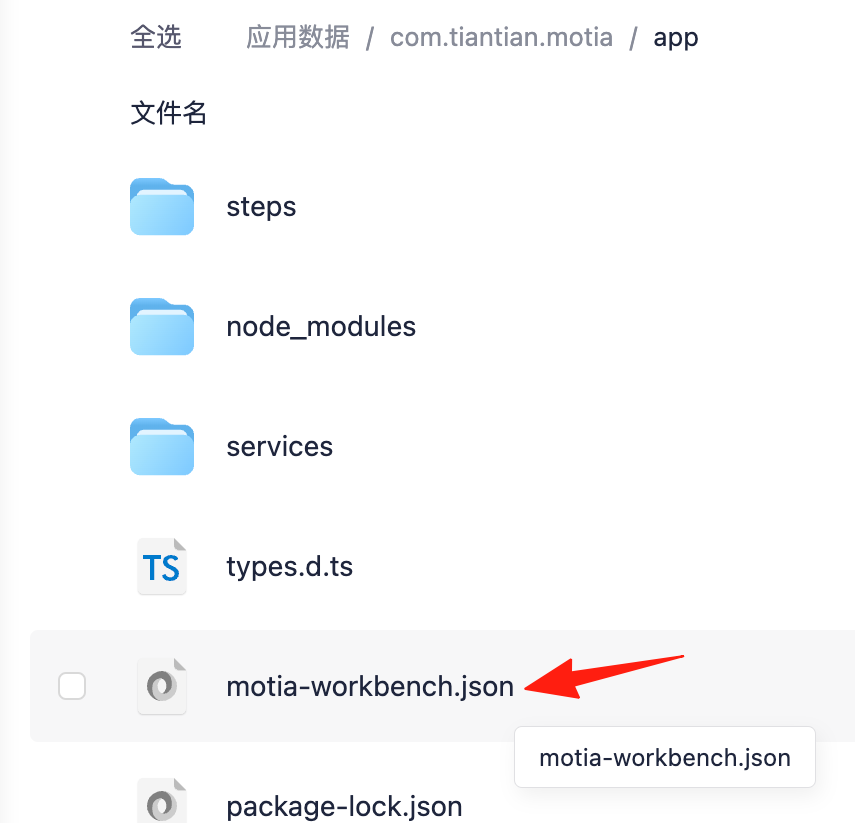
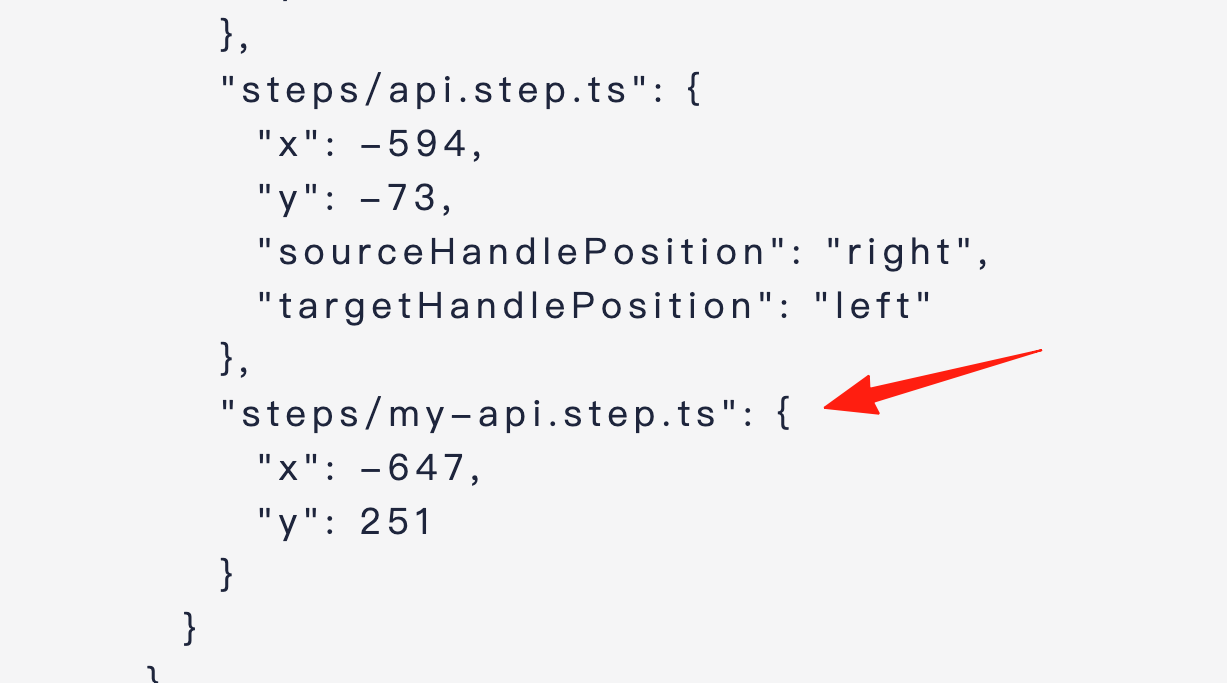
At this point, you can see the node I created in the console.
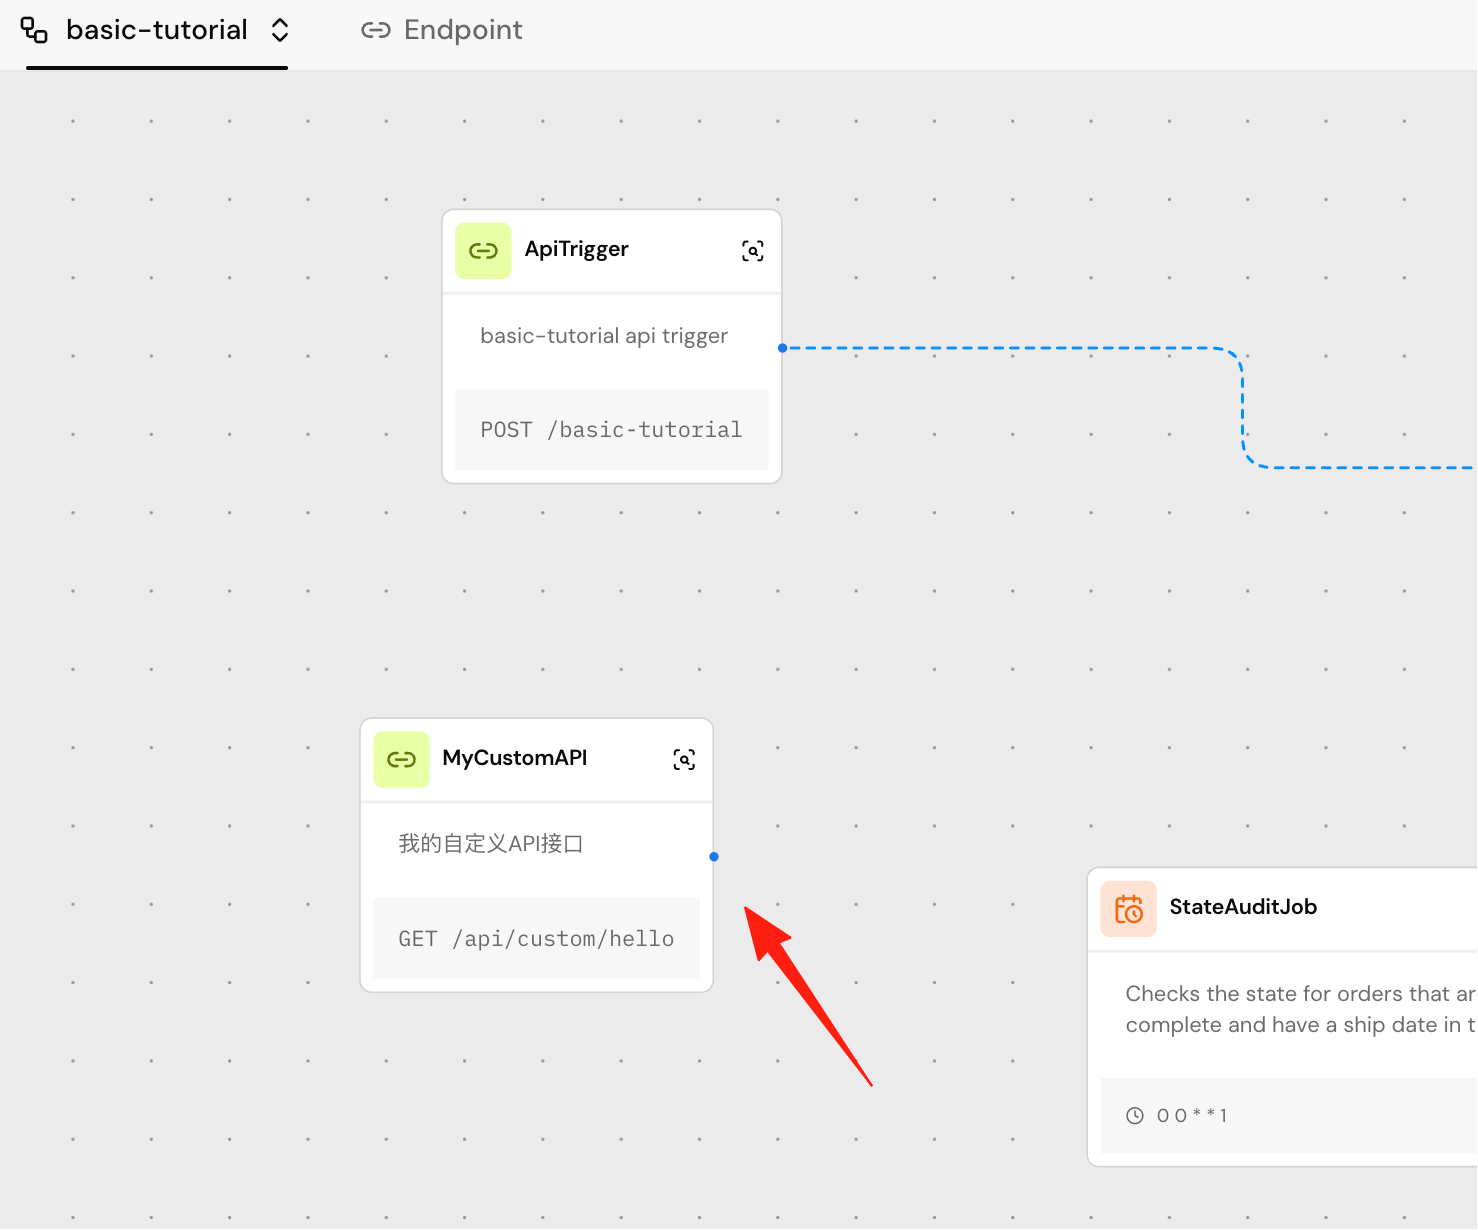
Other types of nodes can be added in the same way.
Scenarios Motia is Particularly Suited For:
- Projects requiring APIs + background jobs + scheduled tasks
- AI-related applications (can mix Python and JS)
- Event-driven systems (order processing, notification systems, etc.)
- Applications requiring real-time push (chat, collaboration tools, etc.)
- Microservices refactoring (using Motia to unify multiple services)
Scenarios Where It Might Be Less Suitable:
- Pure static websites
- Extremely simple CRUD applications (might be overkill)
- Legacy projects with strong dependencies on specific frameworks
Summary
Motia solves many pain points in backend development. No more jumping between various frameworks, no more writing a bunch of glue code just to make Python and Node.js communicate. Everything is in one place, easy to debug and simple to deploy.
If the project you're working on needs to handle APIs, background tasks, scheduled tasks, or if you want to work with AI but don't want to use Python exclusively, you can give Motia a try.