
n8n Hands-On Guide 5: How to Configure Notion Node
Many people use Notion for note-taking, project management, and blogging, but manually syncing data between different applications can be a hassle.
n8n is here to solve this problem. It enables Notion to automatically interact with other apps, saving you both time and effort. Today, let's talk about how to configure the Notion node in n8n to supercharge your workflows!
https://appstore.lazycat.cloud/#/shop/detail/cloud.lazycat.app.n8n
Step 1: Create an Integration in Notion
Many people get stuck here, but it's actually super simple:
1. Create a Notion Integration
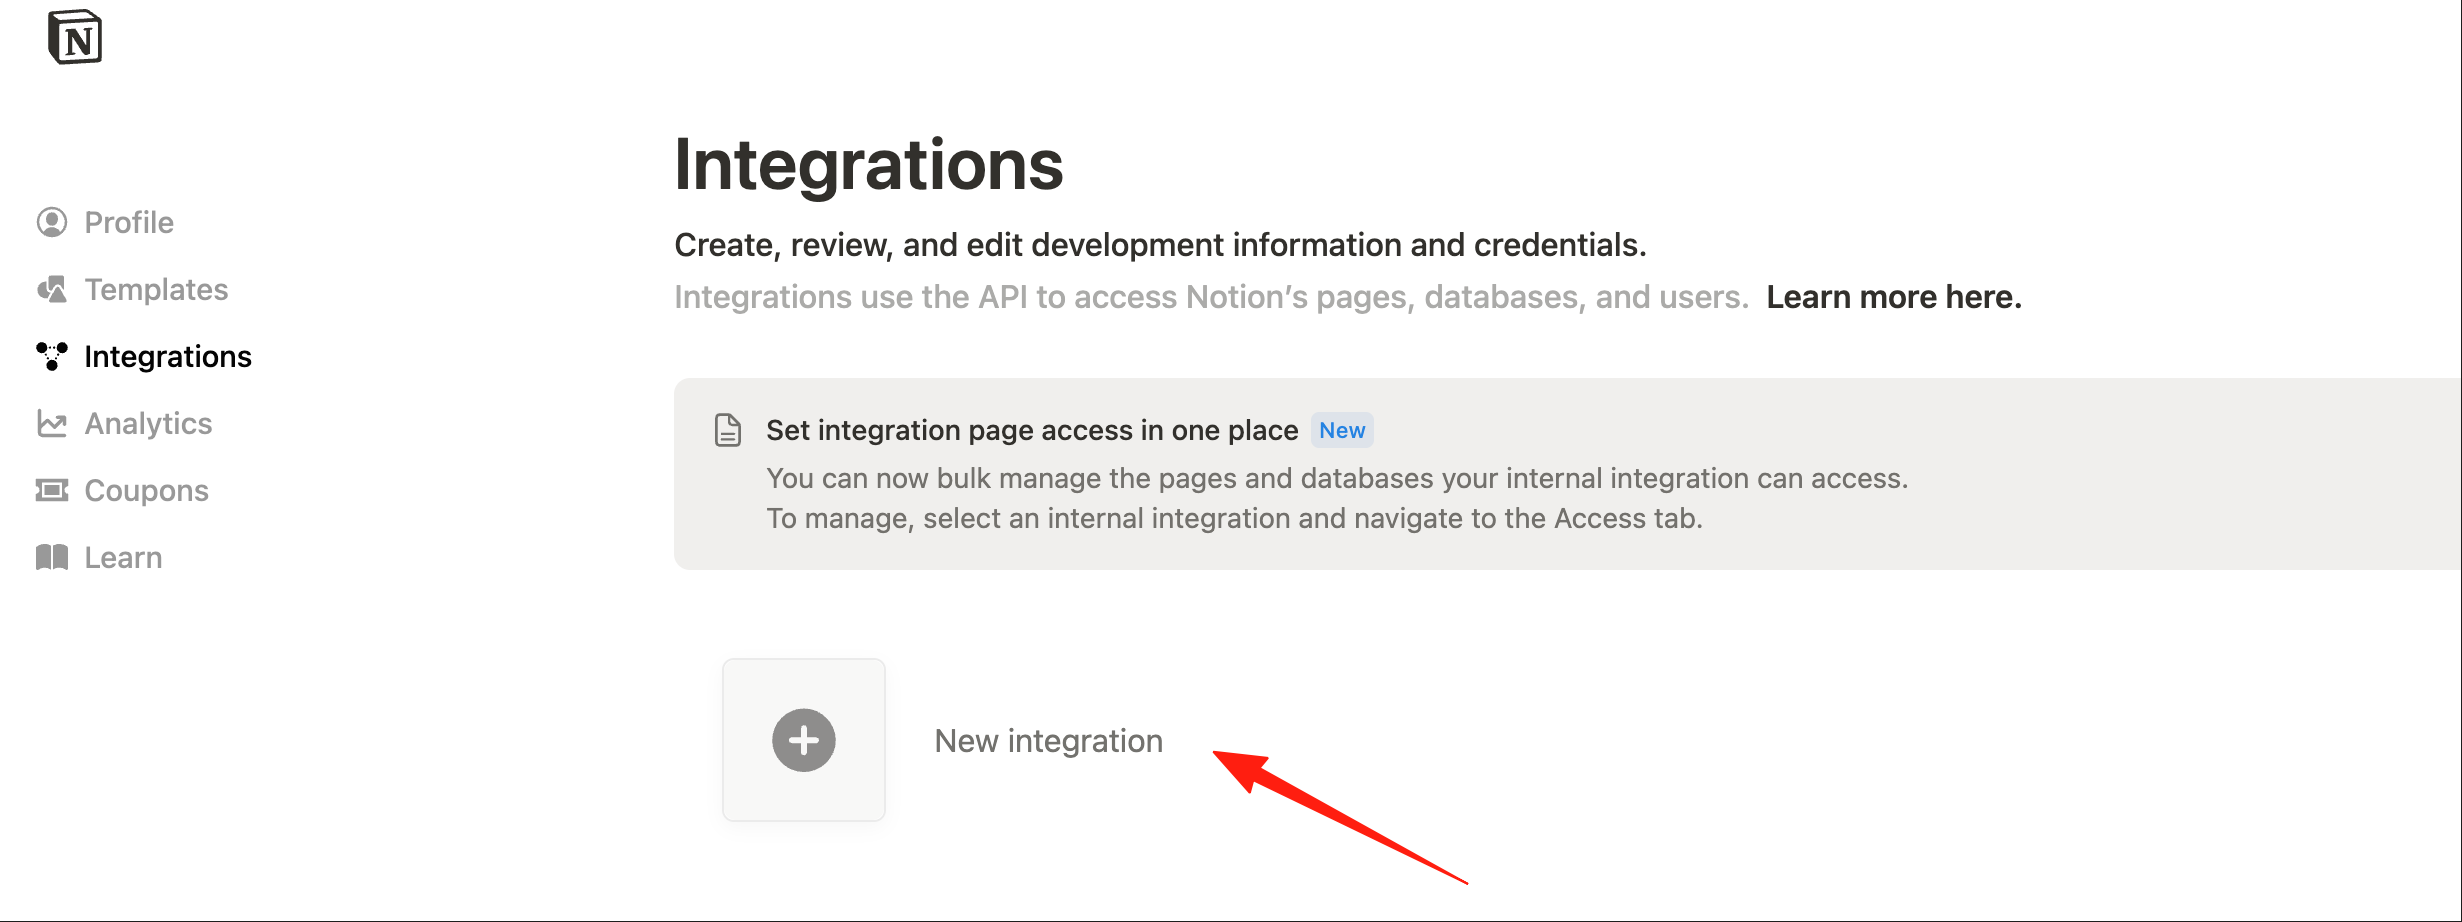
Go to the Notion Integration page Click the "+ New integration" button
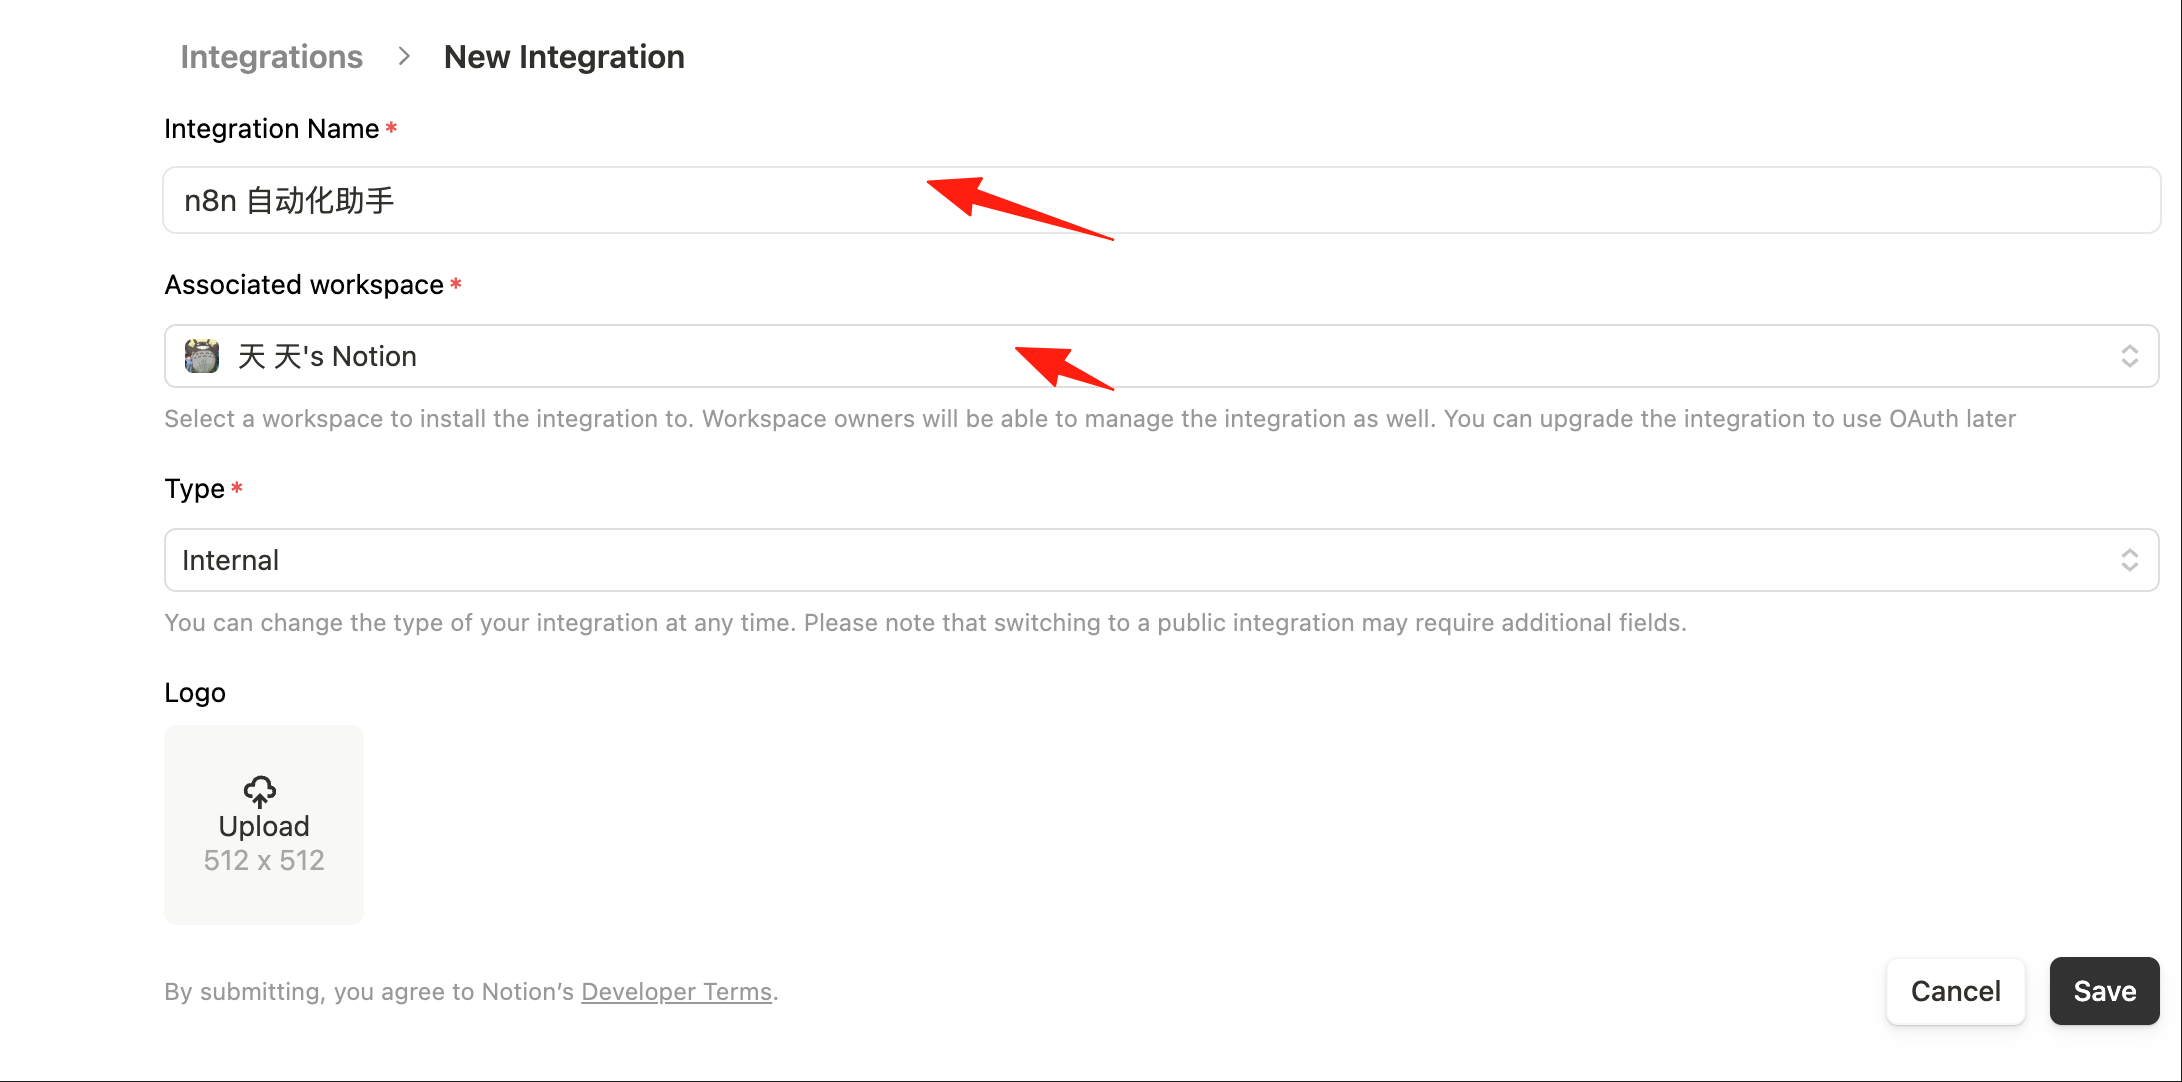
 Give your integration a name, e.g., "n8n Automation Assistant"
Select the workspace you want to associate
Click Save to create it
Give your integration a name, e.g., "n8n Automation Assistant"
Select the workspace you want to associate
Click Save to create it
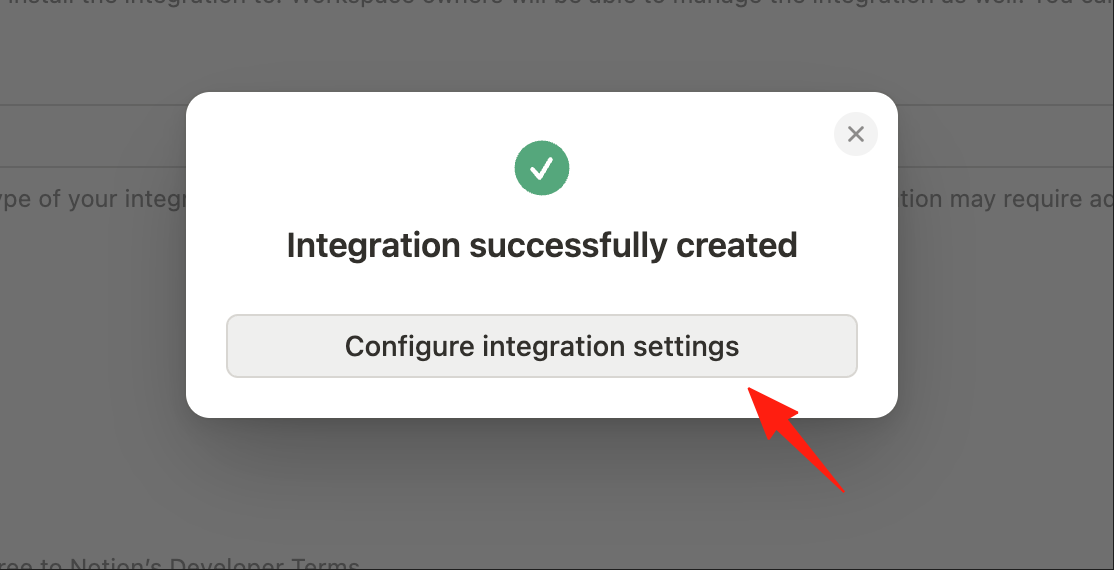
2. Configure Permissions (Don't Skip This!)
After creation, go to the Capabilities tab and check all these permissions:
- Read content
- Update content
- Insert content
- Read comments
- If you need to handle user information, also check Read user information
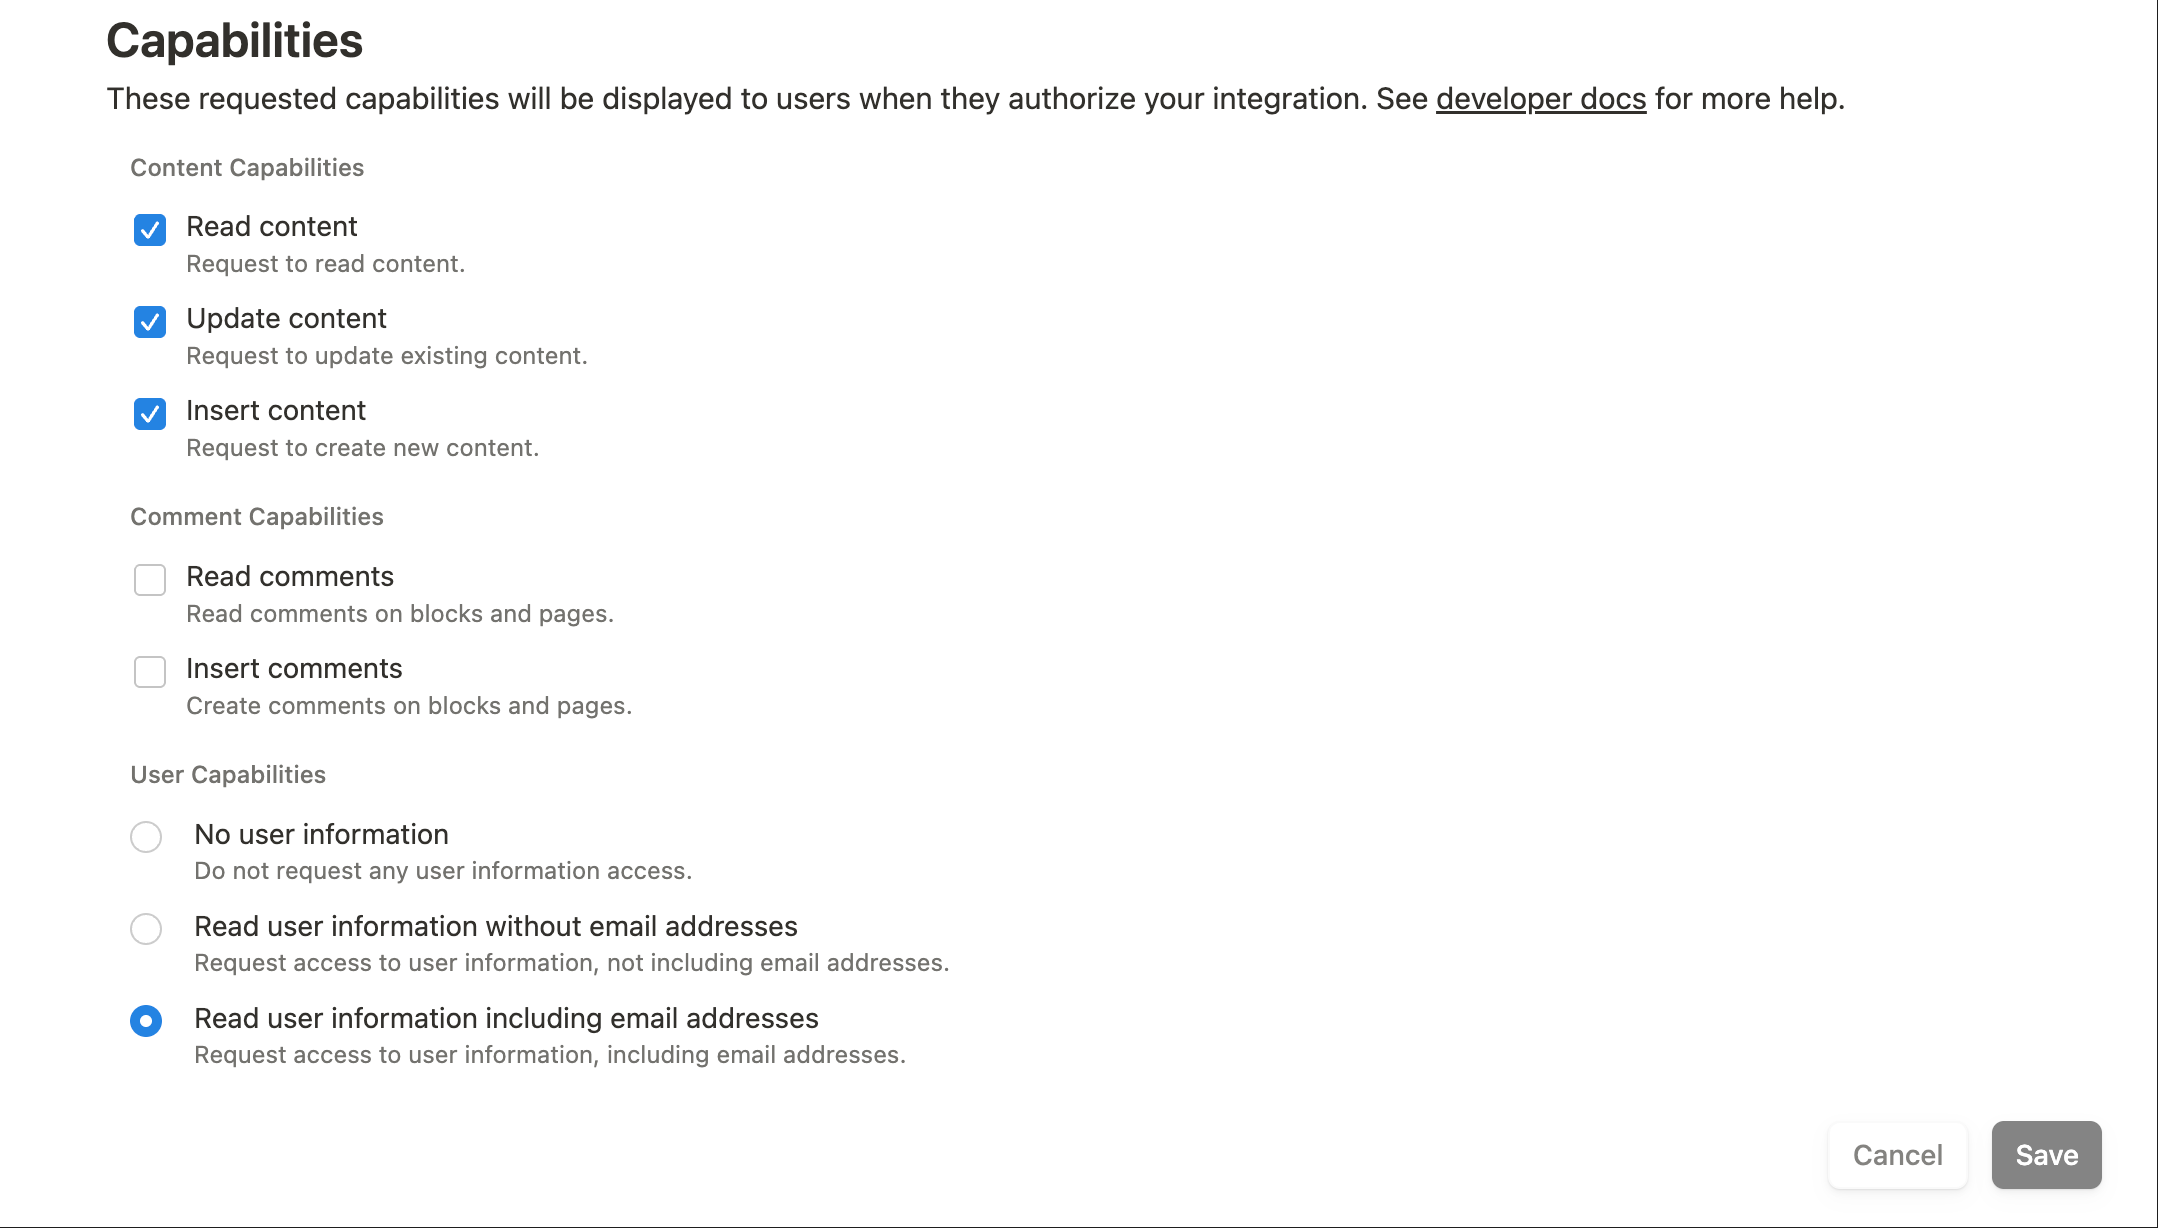 Remember to click Save!
3. Copy Your Secret
You will see an Internal Integration Token – this is your key. Copy it, as you'll need it later.
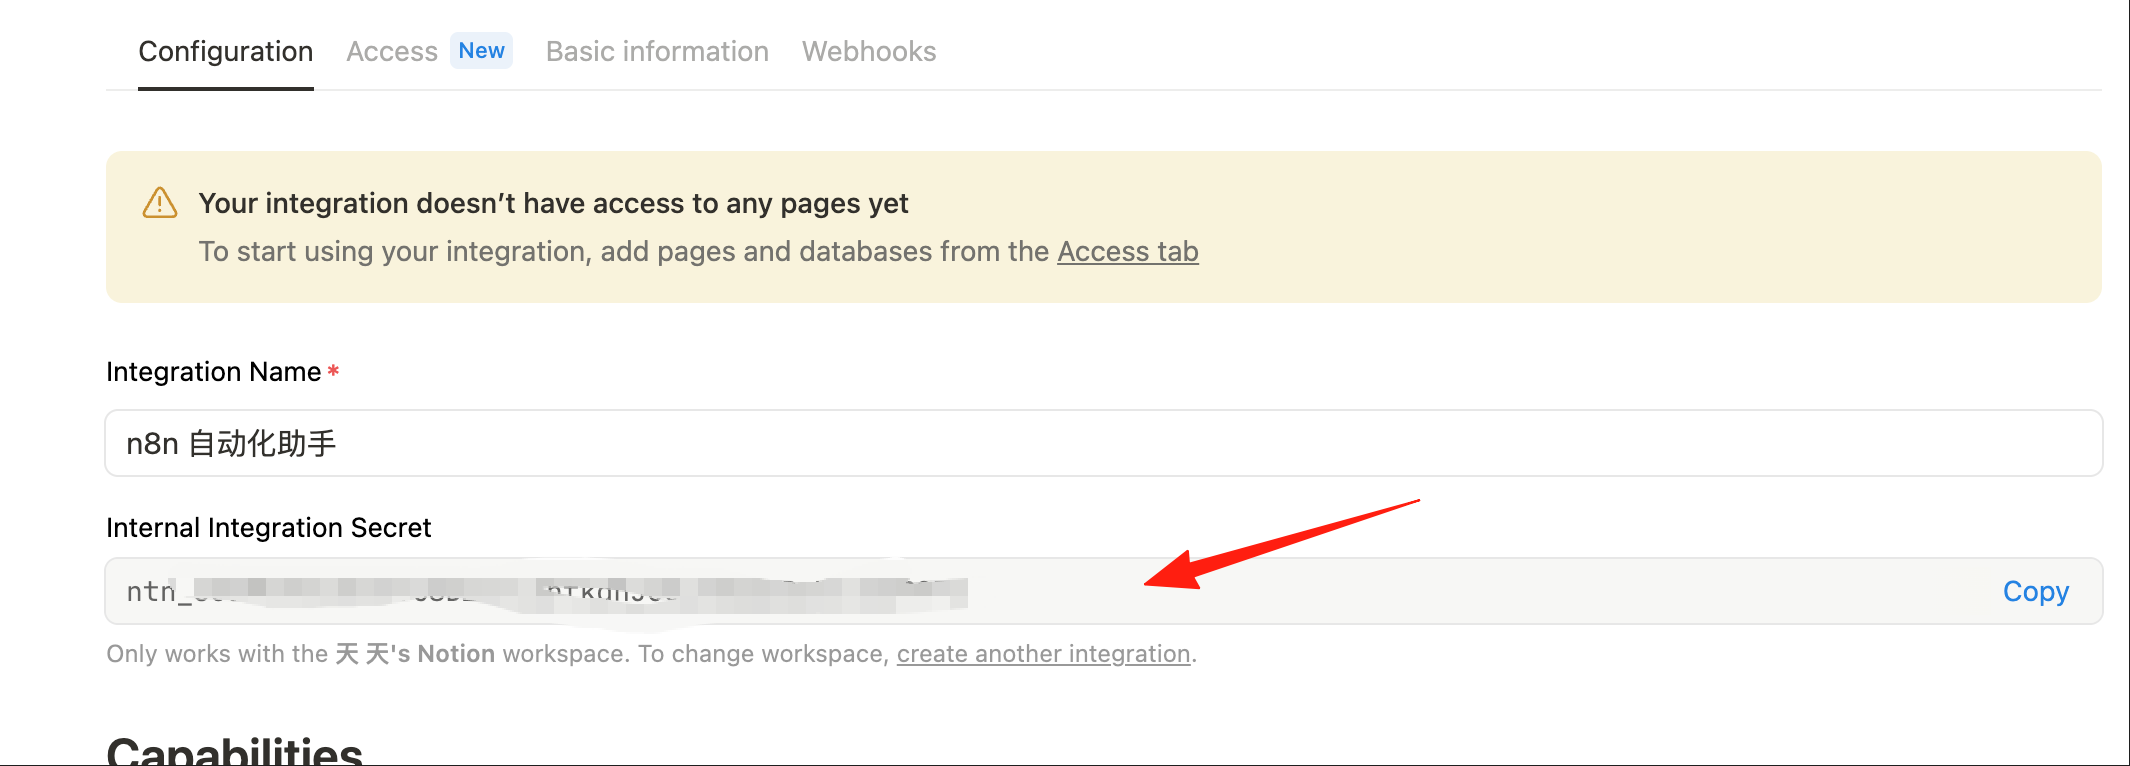
Step 2: Connect the Integration to Your Notion Page
This step is often forgotten, leading to persistent permission errors!
Create a new database in Notion
 Click the "..." menu in the top right corner
Find the Connections section
Click "Connect to" or "添加连接"
Search for and select the Integration you just created
Confirm the authorization
Click the "..." menu in the top right corner
Find the Connections section
Click "Connect to" or "添加连接"
Search for and select the Integration you just created
Confirm the authorization
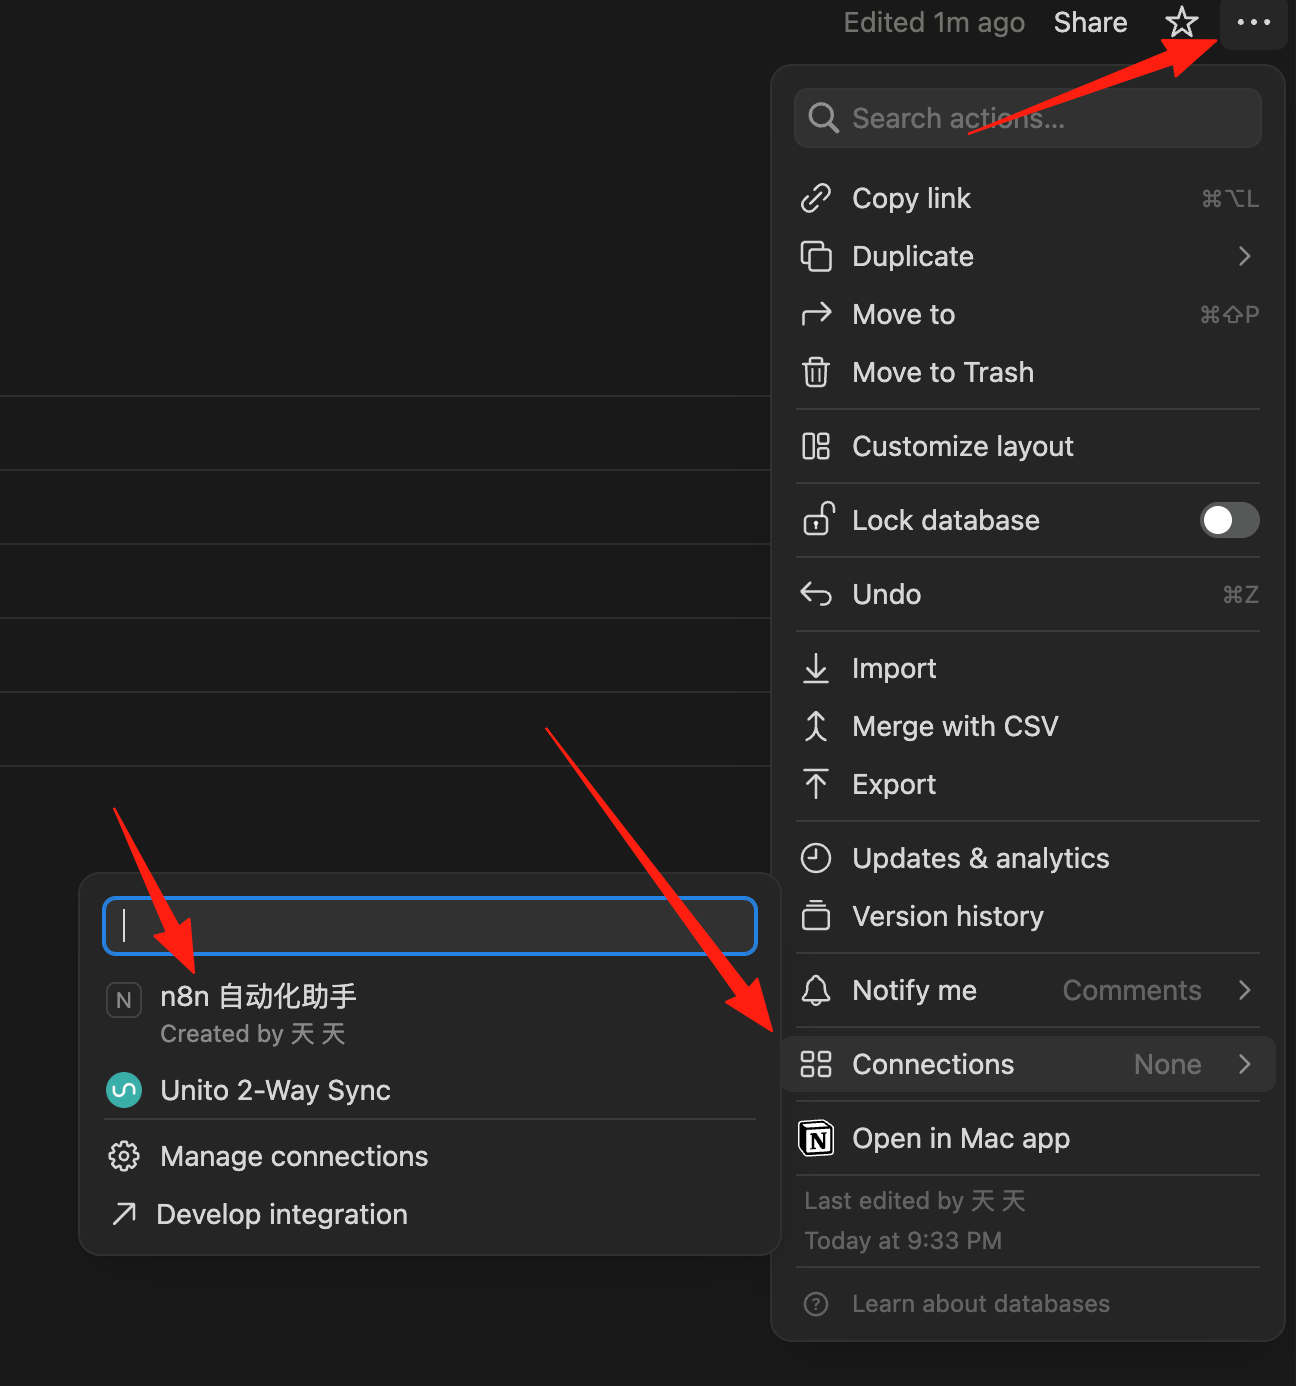
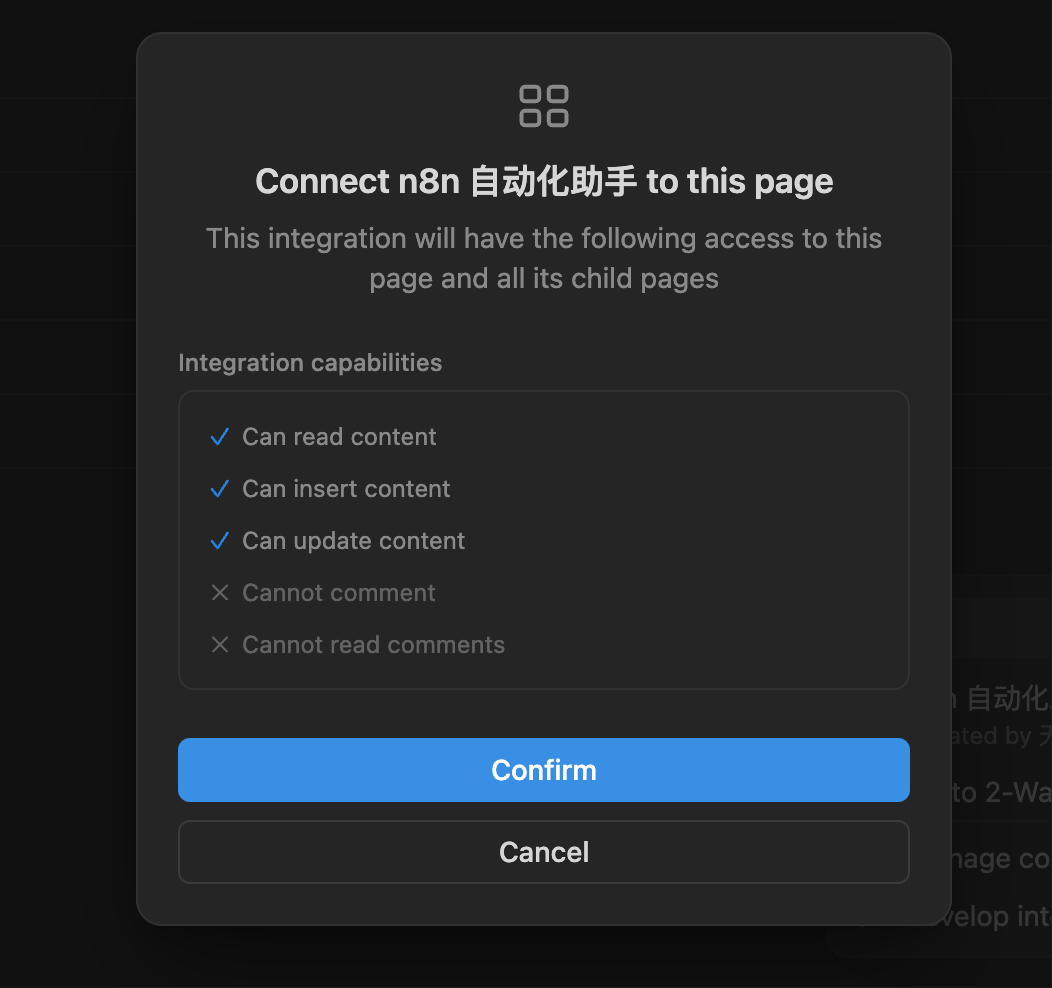 If you need to operate on multiple databases, repeat this step for each one!
Step 3: Configure the Notion Node in n8n
Alright, now let's move to n8n:
1. Add a Notion Node
Click the "+" in your workflow and search for "Notion". You will see two types of nodes:
- Notion Trigger: Triggers when something changes in Notion (e.g., a new page is added)
- Notion: Actively performs operations on Notion (create, update, query, etc.)
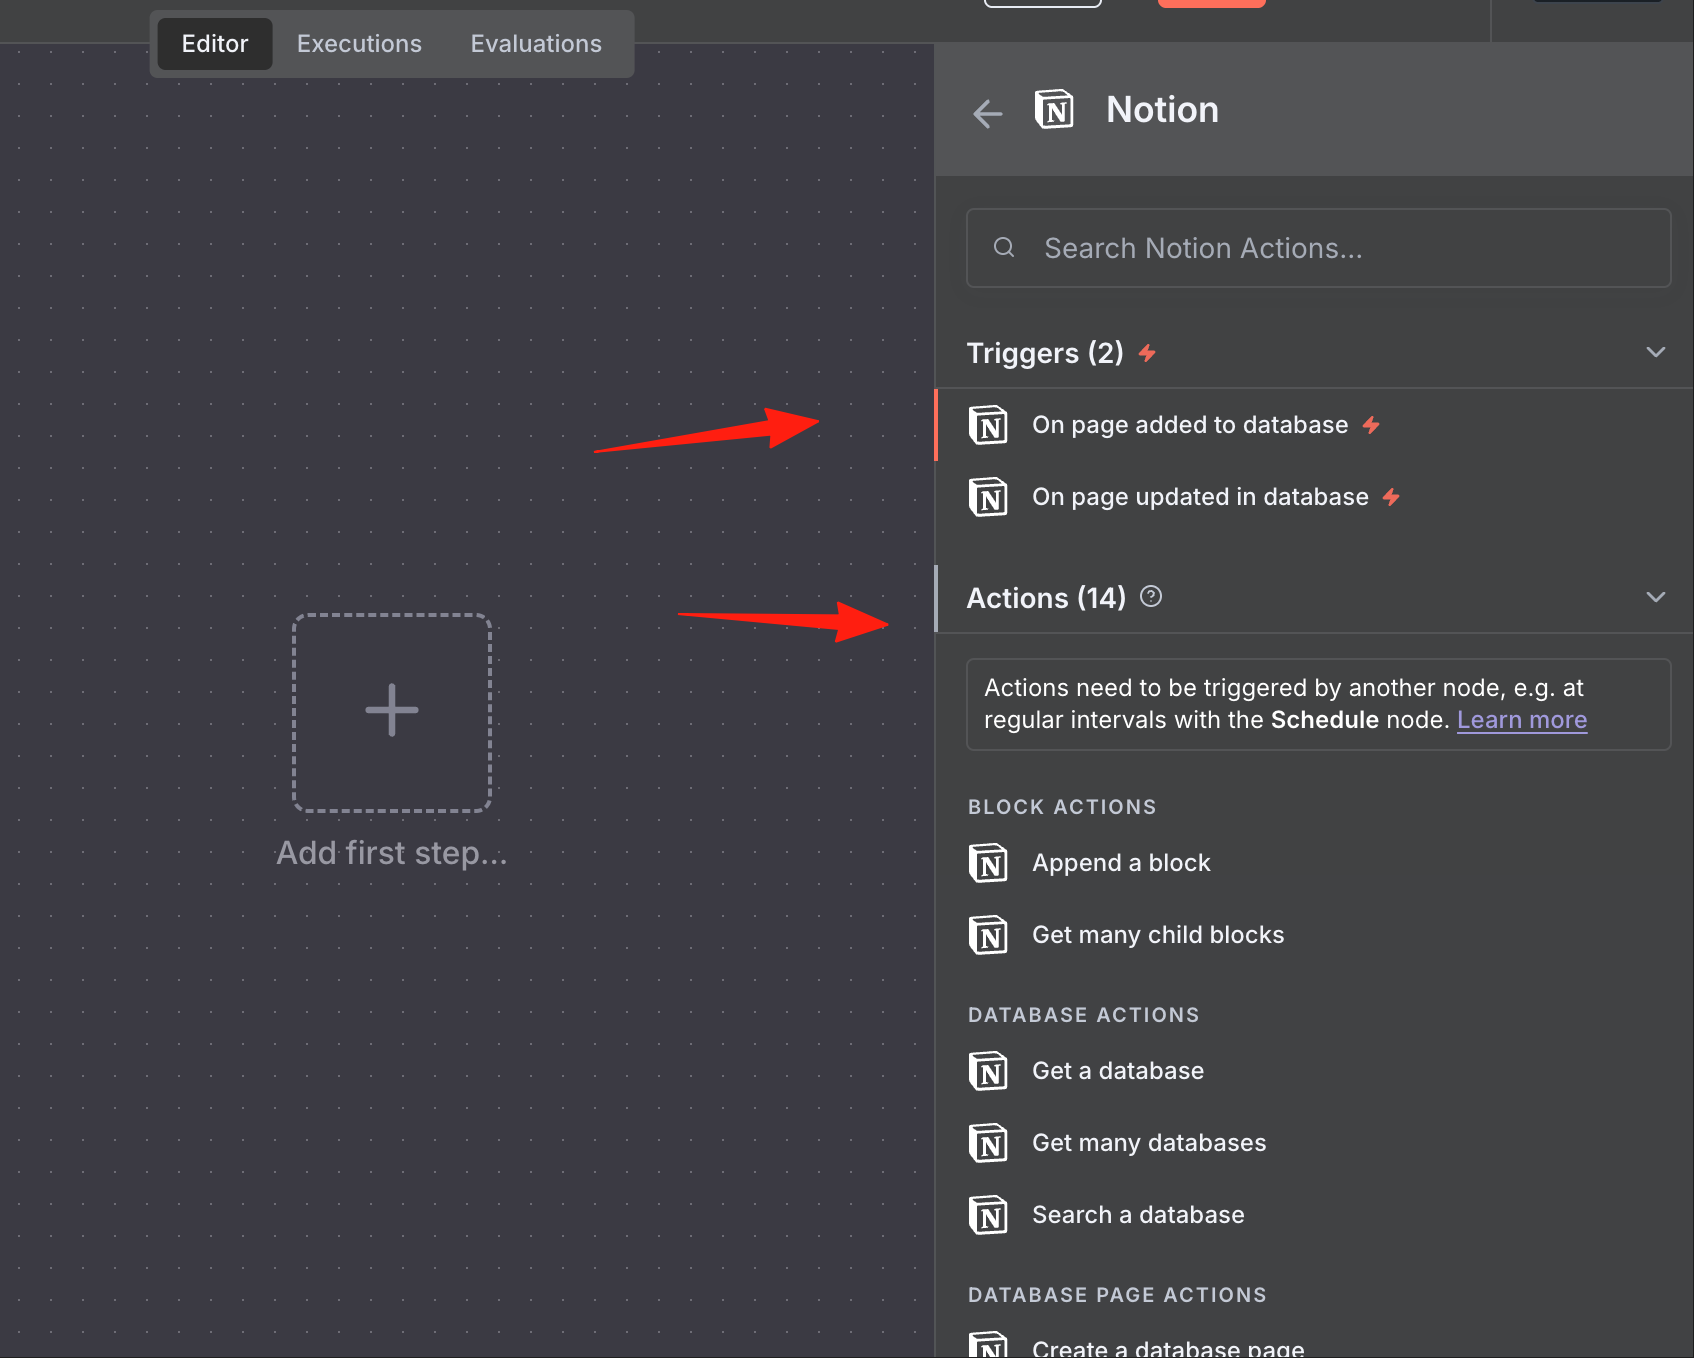
2. Configure Authentication
After clicking the node, go to the Credential section: Click "Create New Credential"
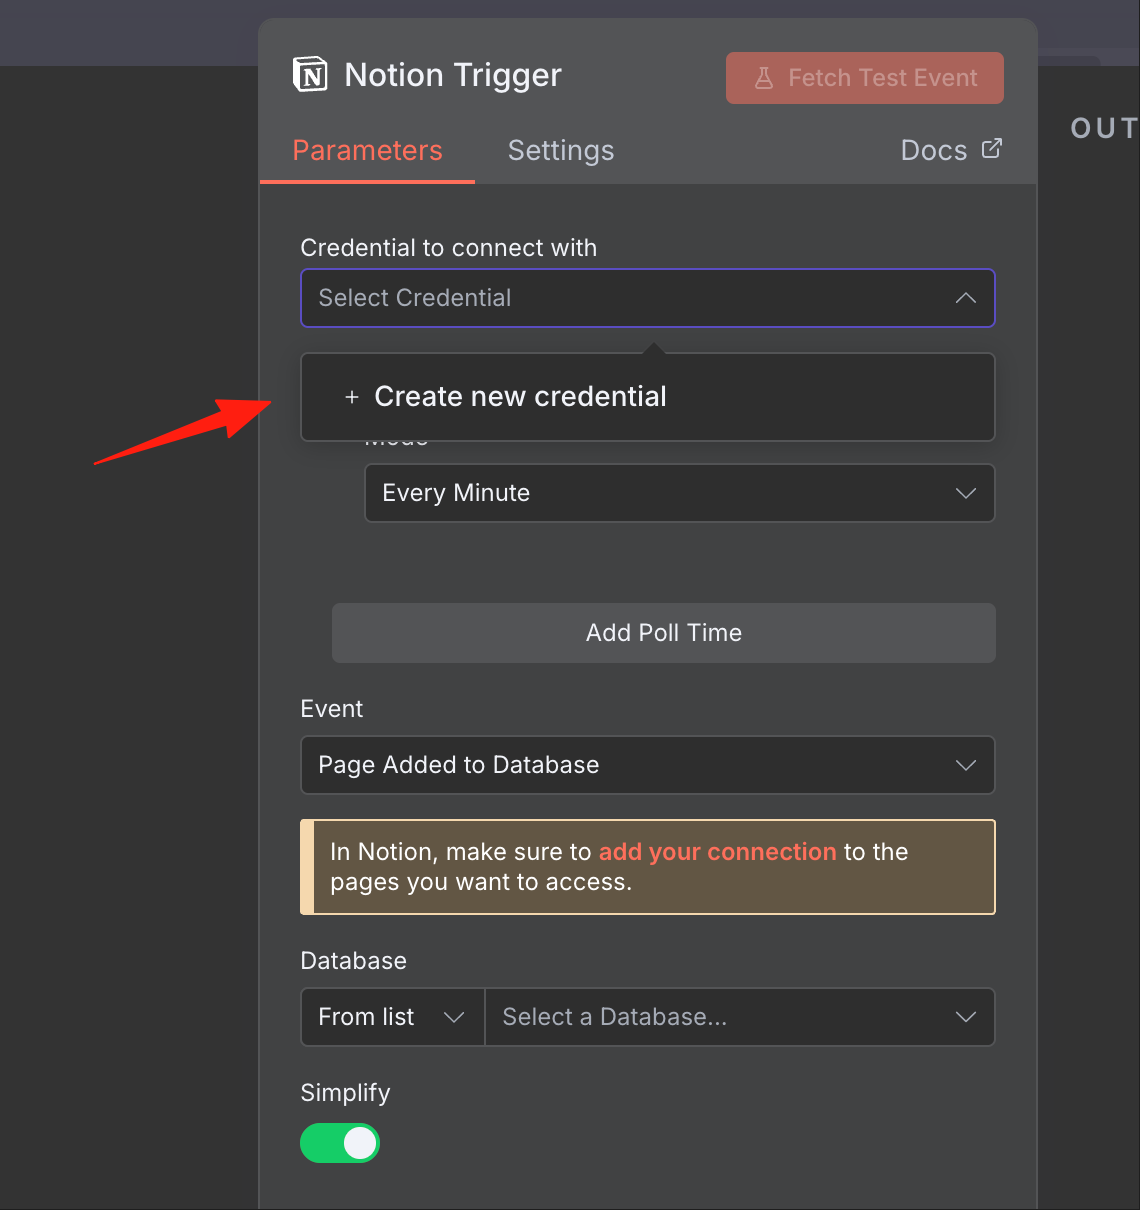 Select the API Token authentication method
Paste the Internal Integration Token you copied earlier
Select the API Token authentication method
Paste the Internal Integration Token you copied earlier
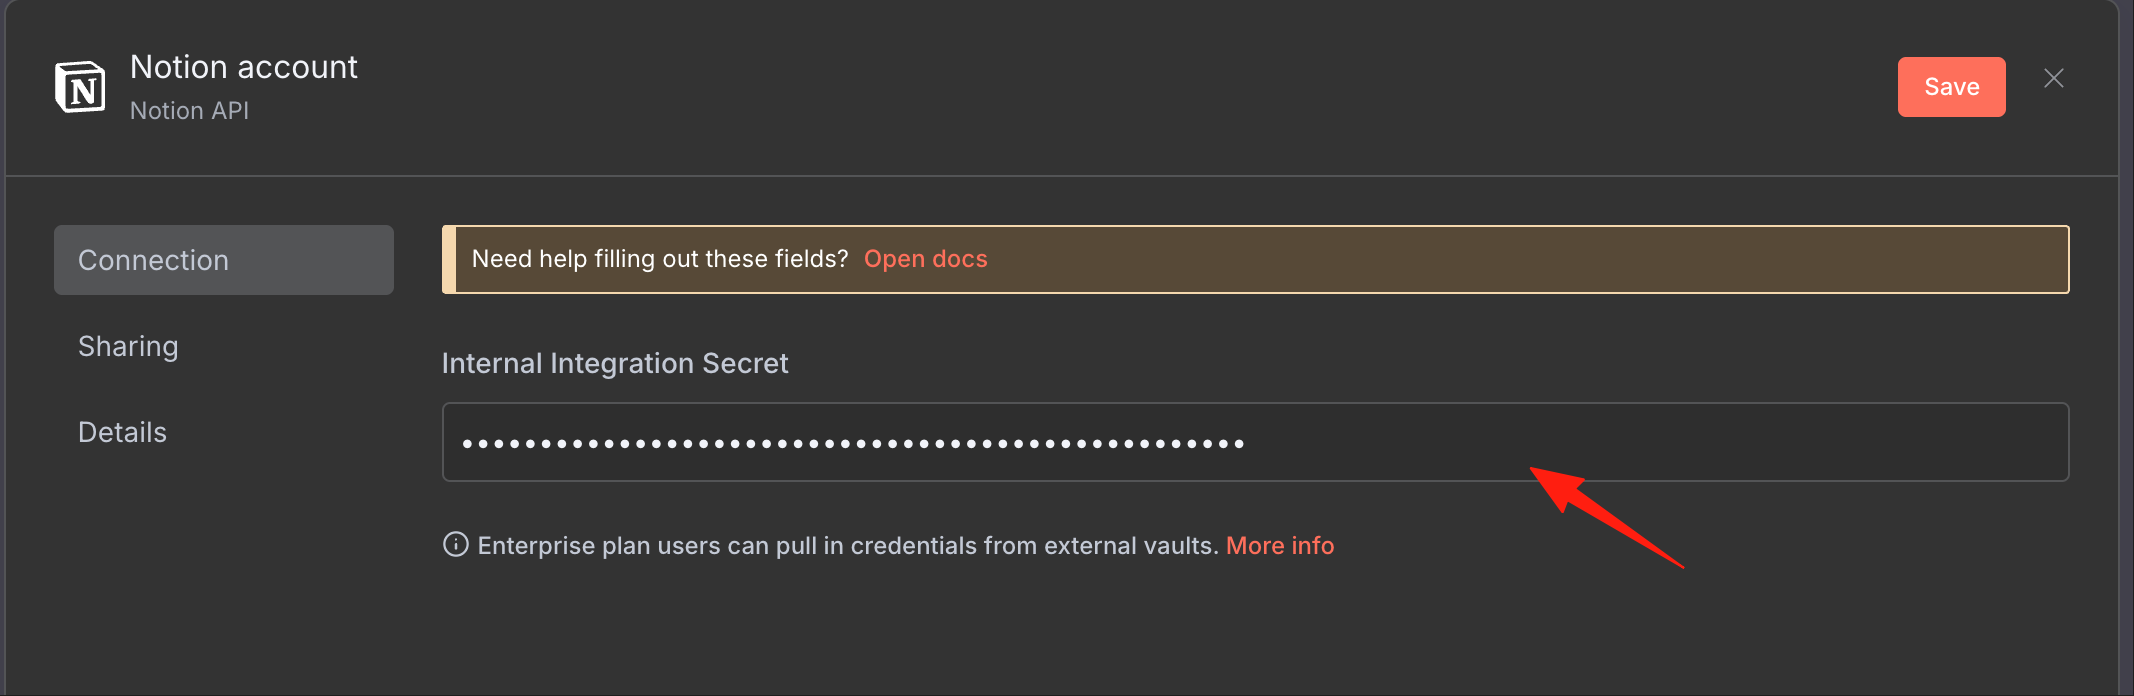
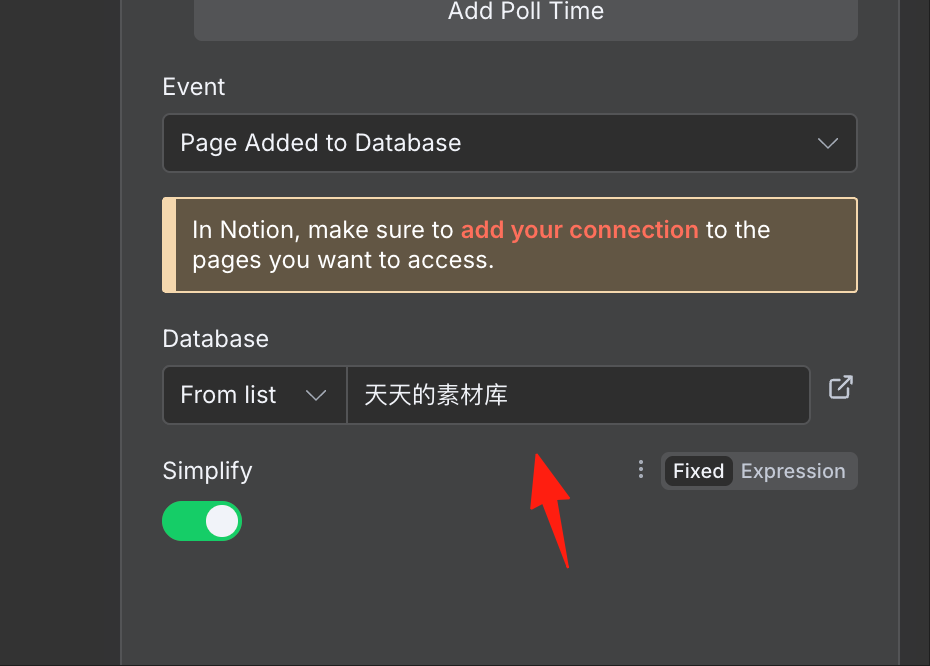 Click Save
3. Select Your Desired Operation
The Notion node supports many operations. Here are some of the most common ones:
Create a Database Page (Most Common!)
- Resource: Database Page
- Operation: Create
- Database: Select your database (if you can't see it, check the authorization in Step 2)
- Properties: Configure the values for each field
Query a Database
- Resource: Database
- Operation: Search
- You can set filter conditions and sorting rules
Add Content Blocks
- Resource: Block
- Operation: Append After
- Supports adding paragraphs, headings, to-do items, lists, etc.
Final Words
Configuring the Notion node isn't really difficult. The key is understanding these three steps: Create Integration → Grant access to the page → Configure in n8n.
You might run into minor issues at first, but trust me, once you get it working, you'll find automation absolutely fantastic!
Related Resources: