
Audacity Practical Guide: A Lifesaver for Audio Beginners
Before We Begin
To be honest, recording and editing audio can feel like leveling up in a game for many people—it looks difficult, but becomes much easier once you find the right tools. Audacity, the tool we're discussing today, is precisely such a "magic weapon."
Don't be intimidated by its English interface; it's actually much more user-friendly than you might think.
What you can actually do with it:
- Record Podcasts: With podcasts being so popular right now, Audacity's recording quality is perfectly adequate.
- Create Ringtones: Trim your favorite song into a ringtone in just a few minutes.
- Process Recordings: Background noise in your voice memos? Apply noise reduction for instant clarity.
- Convert Audio Formats: Convert MP3 to WAV, WAV to FLAC, and more with ease.
- Edit Music: Need background music for a video? Just trim a segment to the perfect length.
https://appstore.lazycat.cloud/#/shop/detail/chestnut.app.audacity
Getting Started Guide
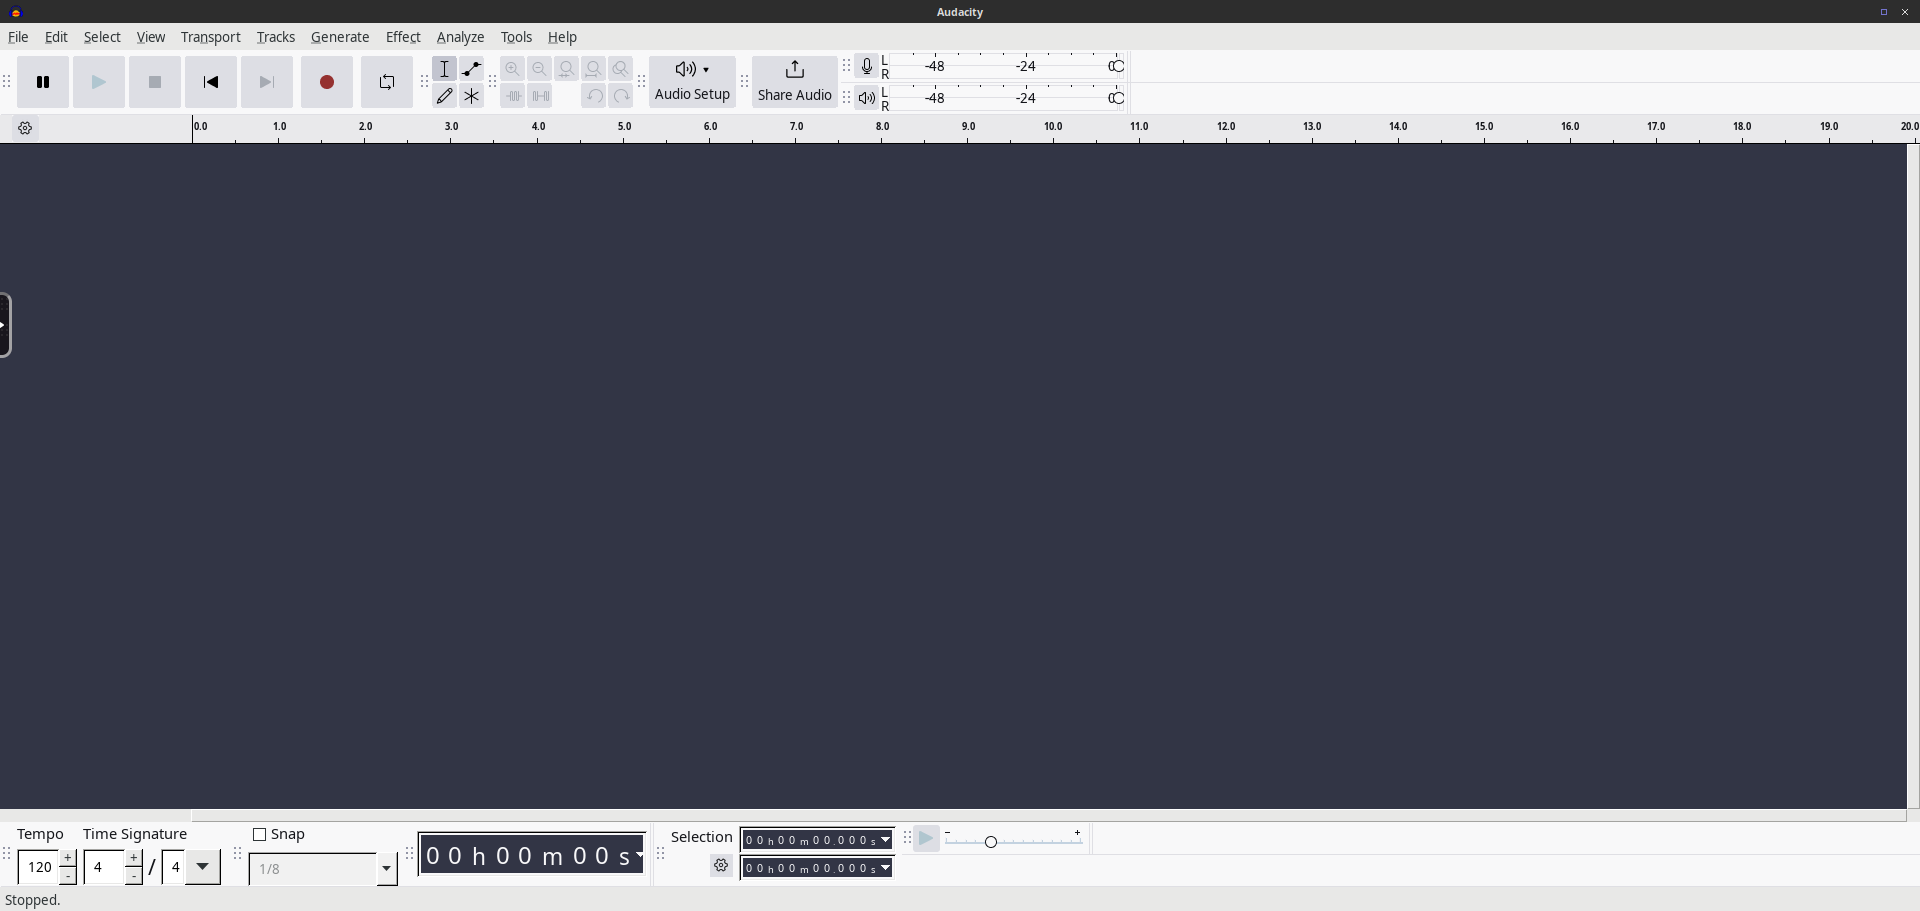
After installing the application, open it to see the home screen.
Understanding the Interface
When you first open the software, the interface might look a bit complex, but you'll mainly use just a few areas:
- Toolbar: Buttons for Record, Play, Pause, Stop (you know, the red circle, green triangle, etc.)
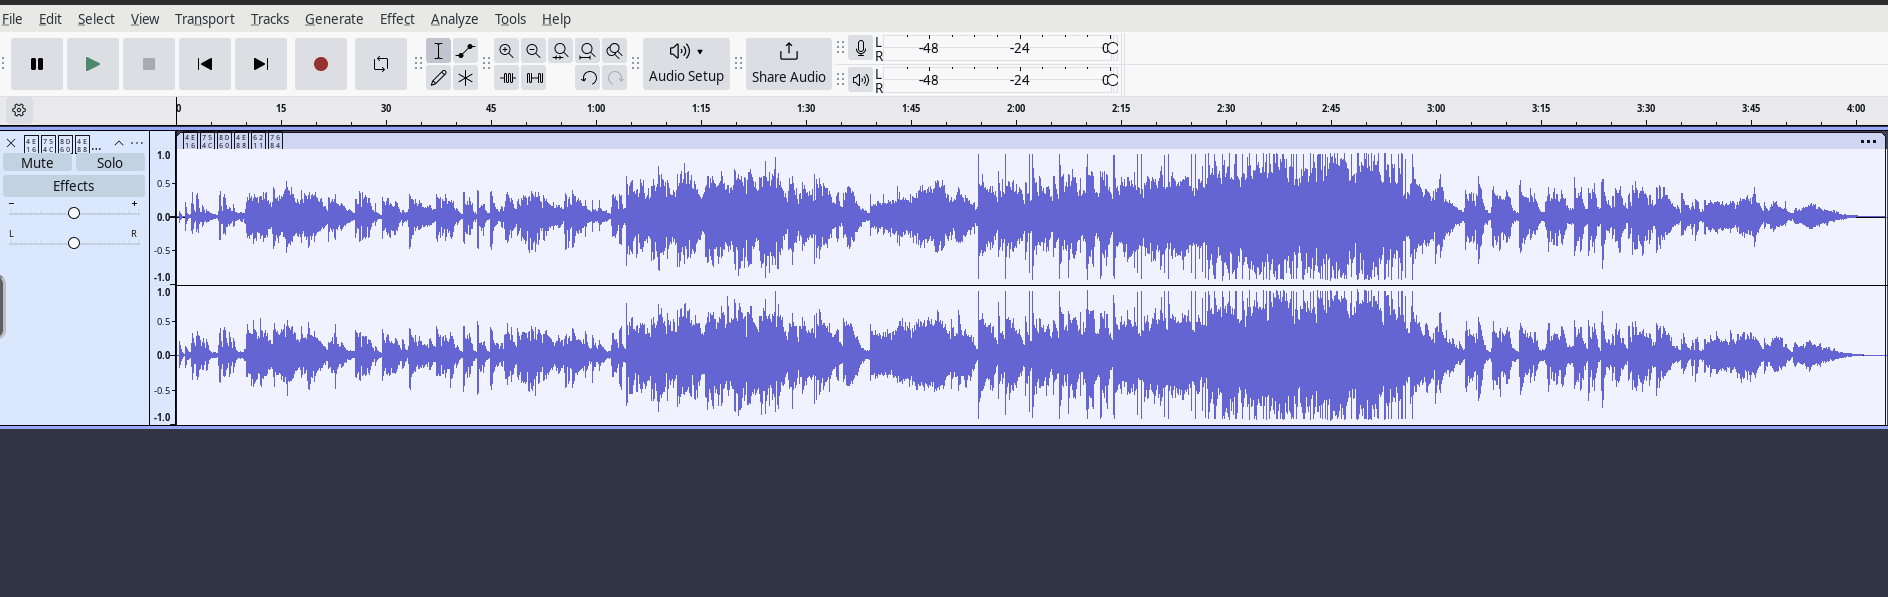
- Waveform Display: See a visual representation of your audio—what it looks like is clear here.
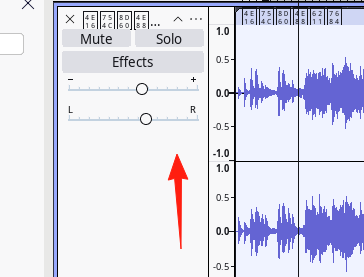
- Track Panel: The control panel for each audio track, where you adjust volume, channels, etc.
Basic Operations
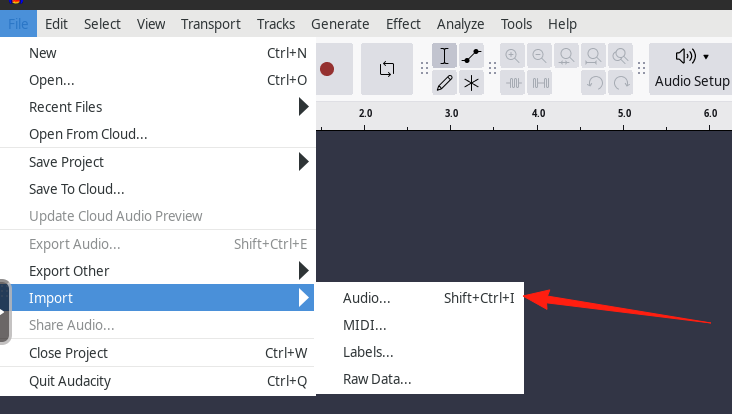
Importing Audio Files: File → Import → Audio, then select the file you want to edit.
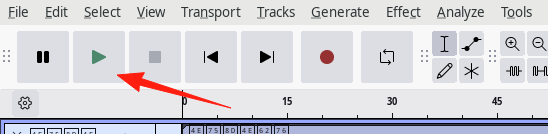
Recording: Click the red Record button to start, and click it again to stop. It really is that simple.
Trimming Audio:
- Select the part you want to trim (click and drag with your mouse)
- Press Ctrl+X to cut, or just Delete to remove it
- Keep the parts you want, delete the parts you don't
Adjusting Volume: Select an audio segment, then go to Effect → Amplify to make the sound louder or quieter.
The Magic of Noise Reduction
This is absolutely one of the most practical features. What to do if your recording has background noise?
Step-by-step:
- First, select a segment that contains only the background noise (e.g., the first few seconds before you start speaking).
- Go to Effect → Noise Reduction → Get Noise Profile.
- Then press Ctrl+A to select the entire audio track.
- Go back to Effect → Noise Reduction, and this time click "OK".
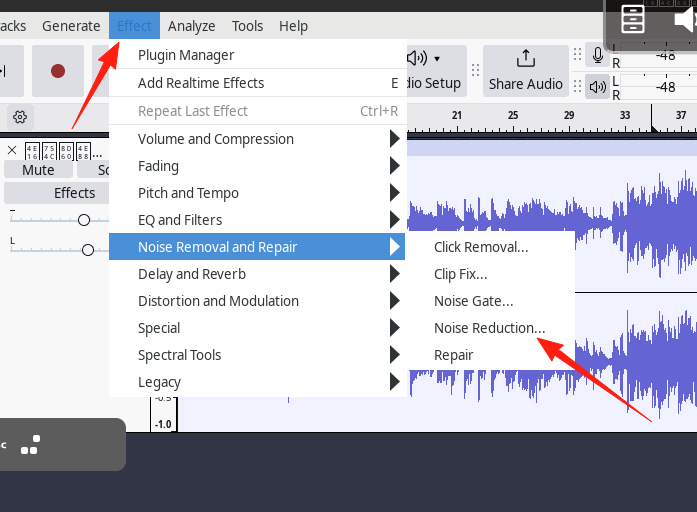
Audacity's noise reduction works by first identifying a noise sample, then finding and reducing similar sounds throughout the track. Simply put, you "tell the software what noise is, and let it find the rest."
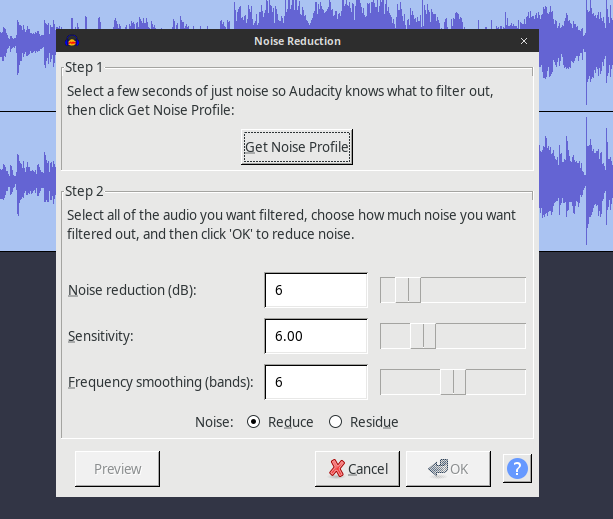
Parameter Suggestions:
- Noise Reduction: 20-30 dB is usually sufficient. Setting it too high can make the audio sound unnatural.
- Sensitivity: Between 5-10. A lower number is more conservative.
Format Conversion
Sometimes you need to convert audio to another format, and Audacity can handle that too:
- Import the original file
- Make no edits
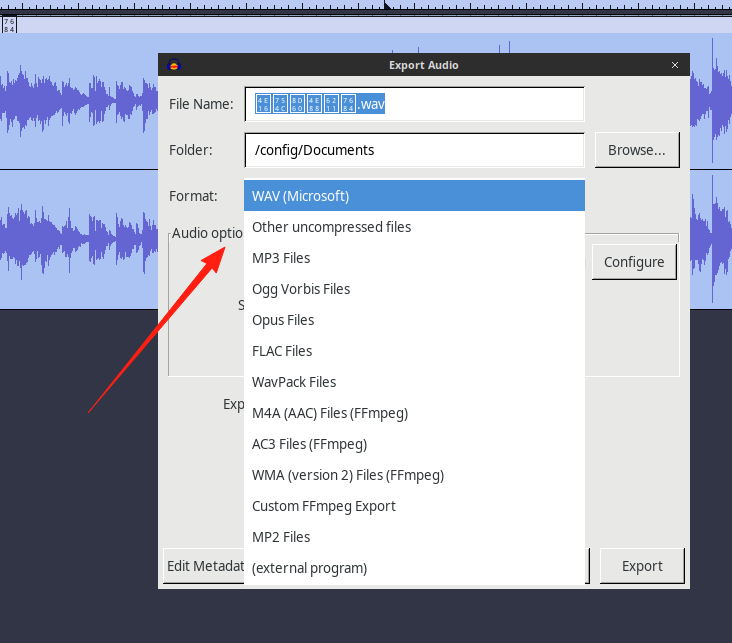
- Directly "Export" it to your desired format
It supports many formats: MP3, WAV, FLAC, OGG, and more.
Audacity only handles audio; it does not support subtitles. For subtitles, it's recommended to use video editing software.
Final Thoughts
For most audio processing needs, Audacity is more than capable. And because it's open-source software, you don't have to worry about licensing issues or sudden charges.
After reading this guide and trying it out a few times, you'll basically be able to handle your everyday audio editing tasks.